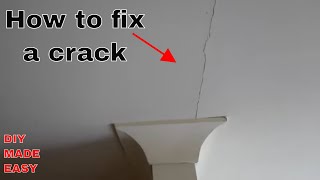
How to Fix a Plaster Wall Crack

HTML-код
- Опубликовано: 27 авг 2024
- Fix cracks in your wall with confidence! Here I'm repairing a 3-foot diagonal crack on a plaster wall. In this video we discuss tools and materials needed, various techniques, and the whole multi-step process to properly repair the crack and keep your walls looking good for another few decades.
----
This video is part of my Master Bedroom Renovation series. Check out all of the videos in the playlist with their links below.
Bedroom Renovations Part 1: The Plan - • Bedroom Renovations Pa...
How to Remove Wallpaper with DIF - • Use DIF to Remove Wall...
How to Fix a Plaster Wall Crack - • How to Fix a Plaster W...
Bedroom Renovations Part 2: Fresh White Closets - • Bedroom Renovations Pa...
How to Remove Paint from Hardwood Floors - • How to Remove Paint fr...
How to Polish Hardware Using CitriStrip - • Use CitriStrip to Poli...
Bedroom Renovations Part 3: Painted Trim, Doors, & Walls - • Bedroom Renovations Pa...
Bedroom Renovations Part 4: All Finished Painting Walls - • Bedroom Renovations Pa...
How to Make a Castle Joint / Shiro Joint / 3-Way Joint - • How to Make a Castle J...
I Built a THUMA Inspired Bed Frame - It Is Awesome! - • I Built a THUMA Inspir...
Building a Modern Walnut Headboard for a King Size Bed - • Building a Modern Waln...
----
Contact me: midwestmanmountain@gmail.com
Instagram: / midwest_workshop_and_g...


My house was built in 1930. This video has helped me immensely for lays ahead for me. For now I am still sanding and protecting all of the hardwood floors in the house.
As a professional I never use mesh tape. It's much better to use paper tape so you can get mud behind and over top of it. It's much less likely to crack move or bubble
Do you prefer hot mud for plaster repair? I find it to be better, especially for filling the actual gap in the plaster... always easier to finish with all-purpose joint compound.
I just apply a thin layer of elastopatch with a putty knife, then paint it. No sanding or tape required. It has held up fine for years, because it is elastic the cracks do not come back.
Wow, thank you for this video. I’m doing my bedroom in a home that was built in 1908. I’m 61 and try to do most of my own home improvement projects. I followed your directions and my walls are turning out pretty well. Did my closet too. Thanks again.
You are welcome! Glad to hear a success story. Keep up the good work.
It was great to see a repair of this type in the same geographical area as I am in, I learned that temp and humidity can affect the long term durability of plaster. (Also, a shoutout to the Luther shirt!)
Doc! I’m doing some Reno in my 1906 house in MPLS- very happy to see you and have you walk me thru your process. Love the Nordic Choir sweater. ❤️👏🏻👏🏻
HA! Love it. Hope this helps with your home improvement projects, Paul. Take care.
This video helped me a ton. I just bought a home built in 1899 and have very similar cracks in my rear stairwell. Thanks for making me confident that I can fix this myself.
You can do it! Thanks for commenting :)
Turned out nicely. I just use plaster to fill in the worst cracks but I do not paint my wallls I put a textured paper wallpaper over them, that hides lots of imperfections. However wallpaper is no good in damp rooms.
You're right, wallpaper is no good in damp rooms indeed! Thanks for watching.
Quick set with mesh, and joint compound with paper.
is quick set not joint compound?
@@EJ313 fast setting joint compound is refferred to as quick set or hot mud. It doesnt shrink like pre mixed joint compound would so the mesh doesnt get exposed.
@@jayhilton5429 got it. Thanks Jay ❤️
If you use a wet sponge to smooth it out , it will make less mess, so you won't be sanding as much or at all
That's a terrific point
I wish I watched this video before I attempted to fix the cracks in my old horse hair plaster walls. I used spackle because I didn't even know what join compound was. I also used too small of a knife so wasn't able to get the surface as smooth as I should. Lesson learned... but shame on me for not watching a video first. Then again, I went into it with the intent of patching small holes and had the stuff in my hand so just went ahead with the cracks... Just spackle, no tape and a small blade. lol you live and learn. Thanks for the video.
You live and you learn. Amen Clyde.
Thanks, such an easy video to follow, thanks for the detailed explanation
This is really helpful, thank you! We just bought our first house (built in 1890) and there's plaster under the layers of paint and paper. You mentioned putting a bit of grit on the primer. Are up able to speak to the difference between doing that over wall paper liner? I'm a total newbie and recently read that paper liner is also really great at covering up imperfections.
Glad the video is helpful for your project! Congratulations on buying your first house, also. I personally have always taken my walls down to bare plaster before fixing cracks. With a house as old as yours, I would suggest doing the same. That plaster is going to be dry as a bone and it's going to want to suck up a lot of paint. In the long run that will be better for your walls and reduce more cracking. Good luck with your home improvements.
Wonderful instruction!
Thank you for sharing honey!
How do you repair corner crack
This was really helpful. Thank you.
Glad to hear it. You're welcome!
So these curved cracks are normal in old houses? My 100 year old home has a diagonal/curbed crack in the 2nd floor laundry room.. I was stressing about it.
Thank you for sharing! This is great
Thanks so much !
You are welcome
Thanks!
You're welcome! Thanks for the super. Good luck on your project.
Thanks for the great video
That’s only for cement walls right?
Thanks for this video! I've seen others that first widen the crack to fill with joint compound, but you don't do that here - is there a reasoning to either filling the crack beforehand or not?
I do widen it, in fact! 1:55. Perhaps it just seems less than other videos you may have seen. Nearly two years in though, this wall still looks fabulous.
Oh whoops! Just missed it. Thanks!!
Can you tell me more about the sand added to the paint?
Very helpful video. What grit sandpaper are you using? Thanks!
Great! Light sandpaper - maybe 120 or so.
I been doing this type of work for like 30 years. Lots of overkill is what I see. Just get a roll of regular mesh drywall tape and cover the holes AS IS. Use as big of a finishing knife as possible. You can do 4 runs of about 4 foot long in a few minutes.
I also install flooring and I can't believe they don't have something like Red Guard by now. Just paint it on the wall. It's made out of rubber so that the material doesn't move the Red Guard does.
Hey Robert! What’s your recommendation for walls that are constantly moving? We have cracks in the walls where the windows are. Idiots (not me) kept filling in the joint and just painting over it but they just crack again and again.
Yeah he has the basic idea down, which is to open the cracks, tape, and sand, but his taping technique is…. it’s not good.
Guy making the video, try watching Vancouver carpenter of that kilted dude. They can’t give you the feel snd dexterity, but watching them hit joints will give you an idea of what the process should look like.
@@gregkosinski2303 the Vancouver carpenter is a drywall guy.
What kind of primer do you recommend? Water based, oil based, shellac?
You can’t go wrong with Zinsser Bin (which he did very briefly mention along with Kilz) and it’s a shellac based product. Oil based Kilz original is great too but it’s oil so you’ve got the rough solvents and fumes that BIN doesn’t come with. Lastly, If you have lots of chipped paint or drywall paper residue, Roman Pro-999 Rx-35 is an absolutely awesome sealer to lock everything down before priming/painting or even skim coating. All of these can be found at Home Depot.
What about lead paint on plaster walls
@ganadai it turned out great! See the thumbnail, this clip at 4:29, or literally this entire next video: ruclips.net/video/mihl0DadEIU/видео.html.
Nice video! Is it possible to do it without the tape?
Yes but it’ll be very soon crack again the future without the tape.
Thank you for sharing this video..
What is that tape call and where can I buy that..?
Drywall Joint Tape - is the type of tape.
Is their an asbestos risk?
Tape every time even sml crack come bk no matter what you use
Did Elon musk just paint ur wall lol
You think I look like Elon Musk? What an honor, thanks!
Using joint compound might be ok to fix a Crack that is old plaster in very old houses that didn't have drywall for walls...idk. I thought this was to actually repair plaster cracks, not joint compound drywall cracks 🤔 I am looking for plaster repair as I'm renovating a 100 year old home and am trying to keep it as original as possible.
I cut out a chunk of plaster to replace a shower head (I needed to add a 2x4 block behind the wall to fasten the shower head "drop ear" to). I made new wood lath by ripping a piece of 2x4 into 3/8" thin slices and affixed that to the existing lath, then I used Durabond 90 "setting type" compound, which doesn't shrink much and sets hard as plaster, plus is water resistant since it chemically sets, not "dries". I mixed wood glue with the Durabond when mixing it. I sprayed 50/50 water/wood glue onto the new and old lath as well as the edges of the existing plaster. Then I shoved the Durabond into the lathe to key it into the wall and built up a thick scratch coat. Then when it set, I added another "brown coat" layer of Durabond. This was almost level with the wall. Then when it set, I finished with some all purpose joint compound to feather out the transition. I used so little joint compound that it was such a waste buying even the smallest container. Anyway.... feathered that out, let it dry. A touch of sanding. Priming. Painting. Done.