I used to hate post-processing on a computer compared to film photography. And then I realized that is the equivalent to the dark room in film photography so at the end you still have to do post-processing either way or have a lab do it for you. The nice thing with digital photography is you can do it all yourself, without chemicals.
If I had to learn with film I never would have become a photographer... I can't imagine the cost in learning with film... So much respect for those pioneers
A very succinct and clear explanation/demonstration of ETTR: one of the best I’ve run into, and very useful. I’m embarrassed to admit that I had purposely ignored ETTR until just recently because I viewed it as a “fad.” Even worse, I have tended to purposely underexpose. My three (LUMIX) cameras all have the same sensor and only now do I realize that this is the better way to minimize noise. Thanks.
Been a photographer for the past 20 years and a shame to say almost everything In this is new to me sir. Thanks 🙏 May the lord Bless you ( too bad my poor M6 Mark II does not have zebra warnings. But learned some other tips from the video )
Super useful for me to learn! I did not even know my gx85 can do the zebra .. Until now! I am amazed how many features I continue to discover buried in a menu somewhere, Panasonic gives you more than I thought I even need ...
50 mm is my favourite. Very versatile for portraits, landscape and photos to pull lines and objects out of their context and thus create a new image. Nice video.
Well this lesson is a life changer for me. I always would dampen down the exposer when I saw the zebra show up anywhere in the picture. In this lesson when you said "find the brightest area in which you want to still see detail and go by that area with zebra" ................. It all clicked for me when you said that. DA! In that past I set my zebra to 90 percent for JPEG but now I'll do 95. It makes sense to do so. I use now the GH5. Thanks again. Tom in NYC
Good advice, thanks - for those without zebra-pattern highlight warings (all of us with DSLRs), I use either 'Highlight weighted metering' if available, or Spot metering for the brightest part of the image - frequently a bright patch of sky. I over expose this by 2-3 stops and am ready to go. No completely non-recoverable blown highlights, but on very bright days you can get some fairly deep shadows. I shoot a Nikon D810, so this is not a big issue, with around 14 stops of dynamic range; Your settings may vary.
Excellent video. I have been ETTR for some time now and it makes a heck of a difference regarding shadows. The shadows can always be darkened down in post-processing with no nasty artefacts, but if don't ETTR, you get noise when brightening the shadows in post-processing. This to me is THE most important result of ETTR. Until next time, happy ETTR.
Just bought LUMIX G9 and I have been following your video. It’s been a great help to learn this LUMIX. I have been using Leica M10 and Sony A7RIII. So Your video has been very useful to understand micro4/3 camera. Thank you very much.
I did find this useful, picked up some great tips. Because I am watching from Australia I was surprised to find that people in Finland took photo's, I thought they all drove rally cars. LOL. Thank's for your time a great video.
Hi, I've been working hard to try and get my exposures right, in camera. I have been trying auto bracketing, but I don't like the results as I still end up with too much noise in my images. I've started to think about manual bracketing so I have more control and not leave it up to the automatics to decide where my exposures are going to me. I really like your video and I'm going start practising to see how far I can push the histogram to the right before I start losing data. I have a Lumix but it's only a bridge camera, but I feel it has potential for good images if I just learn to be a better photographer. Many thanks.
Just discovered this, thanks. I guess it depends if one is tweaking only Aperture and Shutter-time values or if one incorporates ISO into the equation. I would argue that using the latter is "dangerous" because it introduces a possible quality-degrade into the equation. But I do not think you meant us to rely on ISO. In a sense, this then is half "normal" photography - i.e. expose to avoid blowing the whites (ignoring the blacks which, with high-exposure, will not be lost anyway). One thing, however, I think for still subjects - eg: not your singer - the traditional HDR three or five images (one at zero exposure compensation; others over and under in a balanced way) works very well, giving maximum flexibility in post. Interesting and well-explained. Thank you.
Wow. This was brilliant, I purchased a G9 recently, upgrading from a G7, a different world. I'm new to photography and getting constant acceptable exposure is always an issue, thanks for this video! it has helped immensely, as has your other video's... glad I found this!
helpful information thanks, ETTR is a good baseline and independent of LCD or viewfinder brightness which can trick the mind to provoking under/over exposure.
I find exposing for the highlights good when there are any. If you have a picture that does not have real highlights at all (like a total midtone/low key photo), I've found no real benefit in overexposing the grays in the camera and adjusting darker later. In theory it should have a bit more information though but I've not noticed any real difference when I tested it a while back. However, if you expose too little and need to lift shadows, you'll get a lot of noise that is usually unwanted. The damage is often huge even if not total like blown highlights.
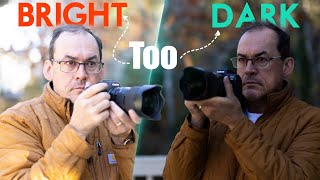
great video thanks. also dont trust the back of your LCD screen or viewfinder as you may have them set way too dark or bright especially if its a sunny/cloudy day so use the live histogram. in this day and age of mirrorless cameras there is no excuses to not get a good exposure when : WHAT YOU SEE IS WHAT YOU GET. good tip about using the Zebra feature which is normally only for video but helpful for stills as well. keep it up
Well, for some types of photography, you don't have that luxury, for example sports, photojournalism and some types of nature photography, but much of the time, you're correct.
There is a popular channel of film makers on RUclips where it has been advised that when you shoot flat profile for video always underexpose slightly so that it helps to get details in post-production. It is, I guess, another way of saying what you explained about slightly over-exposing the brightest part of the image enough to get details. Is that right or is it more complicated than that. Thanks for the upload.
Thanks for your comment. In this video I'm talking about exposing a RAW photo and maybe I was not clear, because I'm not suggesting you over expose anything. You choose which area in the photo should be the brightest, but still have detail, and place the zebra there. It's not always the brightest area in the photo, it's the brightest area where you want to have detail.
Wow, all of these years I have been exposing to the right and didn't know it. This is with a manual exposure film camera (Olympus OM-1), I don't yet have a digital camera.
Wow, I wish my Canon 5d mkIII had the zebra in my view finder! I’ve been relying on spot meeting and placing the important highlights around 1.7 - 2.0 stops over middle grey. But often that detail is far smaller than the “spot” in the meter. That requires getting closer. Knowing where grass, pavement and other things should lie helps. But having instant feedback in the viewfinder with the zebra is awesome.
I enjoyed the video. New to photography and just got a Lumix Gx9. I still have some doubts about the process of getting good exposure. What is the best procedure? When shooting a static scene, is it best to first adjust the ISO, then Sutter speed, and lastly aperture?
Thanks! I would start from the value that is most important in that situation. You want to stop action, set the shutter speed first. You want certain depth of field, set the aperture first.
This depends a lot on how your RAWs are structured and what is considered a shadow, a midtone or a highlight. Canon RAWS are usually pretty bad with shadows and you're better off to go to the right because you can always pull down later. With a Sony the highlights are more of a problem and I don't ETTR with a Sony, knowing I can always bring up the shadows with ease. Zebras are nice for complicated scenes but you have to know at which level the camera alerts you. If you are using picture profiles to later match stills and video footage - each picture profile requires a different threshold for the zebras. So as a general rule ETTR is a good thing to try - if it works well with your camera, stick to it. If you find yourself editing each and every image and run into problems with the upper midtones and the lower highlights - don't.
You are absolutely right, that not all cameras are the same. In the video I'm trying to explain, that you have to find out what is the correct "right" for your camera. I don't know about you, but so many people just watch part of the video and then comment.
Thank you for this video. I am wondering if another option is to set the zebra level such that the zebra pattern identifies the first point of overexposure/blown-out highlights. In this case, the picture taking process would be the same except the photographer would find the point just before the zebra pattern appears (i.e., for the brightest point in the frame in which the photographer wants to maintain detail). Any reason why this approach would be not recommended? The setup process to set the zebra point would also be the same, with the exception of the Zebra set point which would be set such that the zebra pattern indicates blown-out highlights. Guessing this point would be something north of 100 (assuming that is even possible to select). Thank you for considering.
Thanks for your comment. Sure, you can use any method you like and can get constant results with. I recommend you test it with your own camera and see where the actual values drop in your RAW developer.
This advice is based on a useful theory. However, the practical application is more complex than you make it seem. There are more important factors to consider. If a photographer doesn't understand the theory behind all this and how it applies to their specific photographic process, then they could actually get lost rather than find a better way. I am also wondering about the accuracy of cameras' ability to correctly indicate overexposure while shooting and it's relation to highlight recovery post-shooting. There is also shadow noise vs highlight noise etc... As I said, it's a useful theory, but not that simple in practice.
Would you like to elaborate a bit, because I think this is a very practical and not just theory. I'm not sure if you watched the whole video, but we are not looking for overexposure, but white area with detail. That can be any part of the image, where ever you want the "last" detail before blowing out. The accuracy is probably the same as with the light meter and good enough certainly. In the video I also suggest you find out your camera behaves and find out how you should expose.
@@mattisulanto It's too complex of an issue to spend much time on in RUclips comments. I just wanted to leave it here for any passers by as kind of a "warning". The issue is practicality of different photographic approaches and the way they are applied to your shooting needs. Even if a person is a fine art photographer or a working pro with good quality equipment, it's not a problem to trust your camera's metering and only do minor ex. comp. adjustments. In addition to that you can set your camera's exposure bracketing in case you absolutely must have every photo exposed as to the right as possible. For many people it would be much more beneficial to have a clear viewfinder or LCD screen, pay attention to the world and composition, be in the moment. With time you learn how your camera responds to particular lighting conditions and if you need to over or under expose a bit. It's questionable if you need that 1/3-1/5 of a stop of precision of the highlights area pushed to the very edge. Furthermore, contrasty scenes usually have more dynamic range than you can capture anyway, so you just have to make relatively big compromises. You can simply meter for whatever you want to capture (shadow, mids, highlights) and then pull the rest in your RAW editor as much as your camera's sensor allows. There are many factors to consider, but for most users practical and simple approach might be better then one heavily based on pure theory. It would be a different story if contemporary DSLR/MILC cameras had dodgy metering. However, I am not aware of such problems. Current cameras are absolutely amazing. So far I haven't even mentioned the issues of the ETTR approach like the danger of blowing out the highlights, color shifts, post-processing demands.. I just wouldn't recommend this approach as the GO TO technique without explaining all the caveats.
@@PeterKoperdan Thanks for your reply, I think you didn't quite understand, or maybe I was not clear with my explanation, what I was trying to get across in the video. It's not about exposing as far right as possible, but as far as needed for what you want. I'm speaking based on my own about 8 year experience using this method, but of course I admit, that there could be some issues that I haven't yet discovered. I also accept, that everyone doesn't want use this method😀
Nothing could be simpler manual exposure, spot meter read bright white add 3 stops, white with detail add 2 stops, light gray add 1 stop. Midtone no compensation dark gray minus one stop, black with detail minus two stops, black minus three stops. Your light meter turns all tone to a gray midtone and you cameras meter adds or subtracts light in these amounts although not always perfect first try. But check your cameras histogram a couple of tries and your perfect exposure is found.
If you have not looked at DXO-Photolab 2 Elite recently you should really download a free 30 day trial. The lens corrections are far better than LR which uses the same quick&dirty in camera jpg correction. DXO analyse the lenses in their optical labs (it's their day job) and can therefore provide superior corrections. At the wide end of many zooms they can actually give you increased fov as the actual lens focal length is wider than the quoted figure. The jog/LR correction involves a crop for speed whereas DXO-PL 2 can use the power of your computer and relatively infinite time compared to the real time in camera situation. DXO-PL 2 can also markedly improve the other weakness of mft which is noise. PRIME noise reduction is slow but class leading. Try a 25,600 file and prepare to be amazed.
Please put to Panasonic's wishlist an automatic ETTR mode. Set highlight threshold to e.g 250 and percentage of pixels above threshold to e.g. 1% and that is it - the camera should do the rest.
@@mattisulanto Thanks, I tried ETTR when shooting in low light with high ISO. Files looked surprisingly clean on the computer. You'd have to look REALLY close to notice the noise, but who does that.
I would say from experience that exposing to the right is not necessarily a perfect exposure. Generally you want to expose for either realism or creativity, i.e. you want to have the image look exactly as bright as it does in the real world, or expose darker to make the scene look darker and accentuate highlights. But exposing to the right doesn't necessarily make a scene the same brightness it was in real life, because camera's see light differently than we do. Our eyes for example, "stop down" in bright situations, but the exposure time doesn't change. Exposing to the right in camera, requires an even longer shutter speed as you stop down. So by default, the brightness we see the world is dependent upon the aperture of our iris, while the way camera's see the world is dependent upon aperture and shutter speed. You could for example expose a night time scene to the right, and it would look much brighter than you see it with your eyes, and the same applies to day time photography as well. One might think "Well I'll just lower the exposure value in post", but that's not really how it works. You will end up with a washed out dim image that needs to have its highlights, shadows, and mid tones all specifically adjusted in order to come close to matching. The reason why it doesn't work like that, is because depending on how you expose, decides what end of the dynamic range spectrum your exposure favors. For example, if you over expose, you lose dynamic range in the highlights but gain detail in the shadows, and if you underexpose you lose detail in the shadows and gain detail in the highlights. This changes the whole relationship between light and dark parts of an image and the distance between their values is crunched and compressed. But the point I'm making is, for the absolute best representation of a scene (regardless of noise), it's best to expose for how it looks to the eye (unless you want it to be brighter or darker), because that's exactly why the scene caught your eye in the first place. Exposing to the right can have its benefits, but it is not necessarily the best way to convey the ambiance/mood of a scene. You can test this by taking an ETR image and dropping down the exposure level to another more accurate brightness image exposed to the middle or left. It just won't look the same. Maybe if it's just a stop or less it might not make a huge visual difference, but the histogram covers the full dynamic range spectrum, which is more than one stop.
@@mattisulanto To add, another reason why this is true, is because not all scenes necessarily have a full white point, in fact most don't. Even a white object isn't necessarily true white. There are not really many true pure white things in the world. So if you expose to the right, you would effectively be putting that color that reflects the most light, in the upper registers of what the camera considers white, which would effectively overexpose. That's kind of the thing with camera's, they don't actually see color, they see only brightness and darkness, with pixels filtered to represent a color. But no matter the color, if the exposure reaches a certain brightness threshold, it will become white. And in scenes without full white points, or really any white points, or dim white points (such as light reflecting off a leaf) exposing to the right would over expose the rest of the scene. But it all depends on the scene. Since camera's have something like 14 stops to work with, and you only need about 9 or 10 or them, as long as the histogram is primarily spiking in the middle, it should be fine. On top of that, dark scenes that you want to keep the ambiance of, by keeping them as dark as they appear, will generally be exposed to the left with maybe some in the middle of the histogram too.
I am a G9 user and I am having trouble using zebras. After several attepmts to rewatch your video about it. I dont understand where, how and why should I use it. What percentage should I use and how to abjust it, I tried also watching youtube still, why should I use zebra if I have histogram for photos and videos please explain.
I'm fairly sure my Nikon D300 doesn't have a zebra function. The only way I can see an image on my LCD screen is to make a test exposure evaluate it then expose again. The way to get well exposed images in unusual lighting (snow scenes, dark holes) is to use a hand held incident light meter. If you don't have or can't afford one, buy a Kodak grey card and use the camera to take a reflected light reading off it. You can also use the card to accurately set white balance.
The camera always meter 18% gray regardless of what you photograph. In order to see white snow you need to increment +1 or +2 lighter to show actual white and not gray. Be careful not over exposing the highlights. When you photograph a black object let's place as example a black cat then use -1 or -2. under expose.
There is a shortcut for ETTR. If your camera has an extended low ISO sensitivity, you can use it for ETTR. What the camer will do when extended low ISO is in use - it will overexposed the image (by adding the shutter time) and then will composed the shadows for you with builded algorithms. It works grat, but you have to use it wisles, as it is easier to lose information in higlights.
@@Raidenorius Extended ISO is still after the sensor, It is not even a debate - makes zero difference on whether it works in Aperture-Priority Auto settings in a camera - It is not exposure. It is the result based brightness that is a electronic based signal related. You should read up on the basic physics of a camera before commenting back. The only reason to expose to the right is that the gamut of the sensor is more accurate when it is give sufficient light to the sensor. If ISO is after the sensor, then it can not be physically part of that equation. It is possible to raise the ISO and underexpose the sensor . And if that is possible then, it can't be called exposure. All ISO changes move the middle grey up or down the same set of stops - Raising the ISO takes stops from below middle grey and adds them to above middle grey - and reducing ISO will do the opposite. This means that ISO should be used to either enhance detail in shadows or in highlights by changing the stops in the dynamic range. Illuminance light and anything in front of a sensor is exposure - ISO is not.
So far I have not opened a public e-mail for questions, but I may do so in the future. Some send questions to my newsletter e-mail. Regarding the FZ1000, I'm not sure if I understand your question.
Do you think this would allow shooting at below Base ISO (100) on the new G9 for better shadow recovery? Wouldn't this allow higher dynamic range of the sensor? Been experimenting and not sure. Usually using ND grad for landscape so blown highlights aren't a concern usually with this kind of setup.
This will help you to get the most dynamic range from your sensor, if used correctly, but this will not and can't increase the dynamic range beyond what the sensor is capable of. Better stick to ISO 200 and nail the exposure.
@@mattisulanto thanks for your response! So it would be safer to use ISO200 with a marginal sacrifice of Dynamic Range. The ISO 100 would allow pushing shadows a bit more I guess but leaving no play with overexposed highlights.
@@mattisulanto I'll use the 95% Zebra and see how it turns out for landscape. Not sure how I even exposed back when I had Canon FF :) Mirrorless is really amazing, better results, less weight and faster workflow.
Justo Alejandro Gonzalez ,,, Thank you so much for the correction. I apologize for the mistake. I intended to write , “over 38.5 K subscribers”. Thank you again.
Whenever I exposed the right I just blow out my highlights. Therefore I will never expose to the right. I will always just expose in the middle of the histogram or I will expose the left and raise the exposure and post if in any doubt about exposure. I am not a professional photographer so therefore a little noisier image is still acceptable to me.
That's a common mistake. First, if they're just highlights, that may be acceptable. But, if it's not, you should expose as far as you can to the right, before you start to see a spike on the right hand side start to develop. The moment that starts to grow, you're blowing highlights. If you're shooting raw images, check when you get back as to whether those highlights really were blown as the histogram typically is based on the JPG which is only 8bits per channel whereas raw is pretty much always at least 10bits per channel up to 14bits on higher end cameras. Meaning, that it might look blown, but with raw, there may be a bit beyond that which is recorded and not visible in the histogram. That's not to say that this is bad advice, it's just probably a bit more conservative than you really need to be with the highlights. If it's a legit highlight, then blowing it is usually not an issue. With a modern camera, the amount of extra noise from a bit of under-exposure is probably not significant.
hello, nice tuto where i discover zebra for the first time. But can you do a similar tuto for camera not having zebra in picture mode. My D750 has no zebra for pictures. would you use manual metering, spot metering on something neutral, is there any indicator somewhere (histogram,...) acting like zebra. do we need liveview to see clippings ?
Thanks! This method only works with zebra and if your camera does not have it, you just have to use your camera's light meter and evaluate your exposures that way. Live view is necessary to see histogram or highlight and shadow clipping.
camera wants to make everything 18% grey. so you look up your camera's dynamic range (it's about 3 stops above 0) and you spot meter for the brightest part that you want to keep without blowing out and it should show you +3 EV in the finder scale. I always go for 2+2/3 on my x-t2, but your d750 should have a bit more wiggle room. Later if you are more comfortable with it you can guess with center weighted matrix metering and you will become quicker.
That is a good question. I think you just have to practice, because night photography is so different from "normal" photography. There can be huge contrast (street lights for example) or almost no contrast (landscape for example). But, for example, if you shoot available light portraits in the night, you can use the zebra. It really depends on the situation. If your camera has the zebra feature, I suggest you make some tests and see how it works in low light.
Man I wish I had 30 minutes to watch footage setting up what you want to show us I just don't... good luck, can't sit still long enough to learn something as simple as how to set exposure.... should be a 1-2 minute video... :-) thank you.
Informative video! Are you using the evaluative or spot meter? If the spot meter, are you metering off the most important highlight where you want to preserve detail, and then adjusting your exposure until you just start to see the 95% zebra in that most important highlight?
It doesn't matter if you use spot or evaluative, because the zebra and light meter are not connected. Just watch where the zebra shows up and you are good. Thanks for you comment.
Thanks for sharing and very well explained. That G9 is indeed a feature rich camera. I hope your daughter bought you another snow shovel or pair of gloves for Xmas lol.
This is something I wish Olympus would implement in their cameras. They only have the highlight/shadows warning, and having blinking solid orange and/or blue all over the image is WAY too obtrusive - I'd rather just use the histogram.
Great explanation of using this technique for achieving the desired exposure. But your hands moving constantly is quite distracting. Thanks for the video!
thanks for this. I didn't have a proper understanding of the % setting. The downside for me is that my wife hates the stripes and she is reluctant to switch cameras with me if I want to use apsc. Can you help me with that?
@@mattisulanto saving my photos and my marriage. There are things that my apsc does better. I use it for wildlife. The pixel density is greater and I can get a little more relative depth of field. I use it for wildlife and macro. FYI Sony A7iii and a6400. They are great together. Same number of pixels and same colour. I theorized that I would prefer apsc at times but at half the price it took a while and some testing to believe myself especially because salesman didn't agree.
It is almost a shame that after 15 years of widely used digital technology for photography there’s is a need to remind, and often being received as a revelation, ETTR.... it should be the very first concept learned, expose in camera for the highlights and on the computer for the shadows; there are only 2 ways of taking pictures, WYSIWYG jpegs for snapshots and RAW ETTR for everything else.....
Thanks for your comment. My main message here is that with this method you can be more precise than with any other method. But then again, sensors and cameras are so good these days that a small exposure errors are not serious.
@@frankiefalci8735 That can work. We all use our cameras differently and it's important to find the optimal workflow. So please, experiment and find out😀
I shoot a lot of live music video. A major problem is the spotlight. I've tried many ways to expose for it but get inconsistent results... any recommendations? tia
Live music it tricky, because the lights usually change or move all the time. Based on my experience there is no easy way, you just have to shoot a lot, get experience and know your gear. In high contrast situations you have to sacrifice either highlights or shadows, whichever you think is less important in that situation. I don't think I can give any better advice.
@@mattisulanto I thought about shooting in log for really low contrast but need to experiment with it to find out which one to start with. Appreciate your help, btw, I printed color and snow was always hard to print so thanks for your insights.
@@DavidLarew You can try log, but RAW is a better option, because it contains more information. Log is just a really low contrast jpeg and it has only 8 bits of color info, but a RAW file has 12 or 14 bits, which is a lot more.
Thanks for your comment. This video was filmed by a good friend Peter Forsgård on his Olympus E-M1mk2. He is an Olympus Visionary, check out his channel if you haven't already ruclips.net/channel/UCkctXInfNh0Zf4p93itIVhw
I did not know what you meant by zebra either. I had not heard of this before. It rarely snows where I live, but when it has, I have put the exposure compensation up by about a whole stop or stop and a third and it seems to be good. I have a Canon 80D, would you know if it has the zebra feature or if it has a different name in Canon.
This may be an answer I am looking for! Will exposure bracketing help? What really gets me is when I am photographing birds against a white/brightly lit background (for example and most noticeably a bird backlit by the reflection of the Sun off the "in frame" water behind the bird). If I religiously follow the Zebra patterns, its underexposed despite spot focus and fixating that little plus sign center mass or directly on the eye of the bird. However to be fair, I never experimented with changing the Zebra Patter intensity settings. Also, RAW files seem to be less editable than JPEG for me and I cannot do much with them. Does anything I am saying give you a hint what I am doing wrong? Thank you!!!
You need to learn where/how to edit RAW, it will significantly increase margin of error. Exposure bracketing most likely will not help with birds, because they move and exposure bracketing requires to take series of exact same images but with different exposure.
If you have auto exposure lock button in your camera you can expose camera on something without sun reflection to get proper exposure, lock exposure and take your shot. But this might be tricky technique.
@@JetFightzer True, but I treat my exposure bracketing shots as I would my single shots by making sure I have a stable subject. Sometimes they move but that's the breaks as they say :)
Are all editors equal? I see other photographers' work having used Light Room. I use a free editor called PhotoScape X. Am I being too critical on myself expecting very similar results from my editing? Because I don't see it in the clarity all the time, albeit sometimes my photos cannot be beat with strong saturated color. Could it be these "other guys" may be better photographers, and on top of that with using APS-C and APS-C glass? Thank you!!!
Never used PhotoScape X before, but looking on description on official site and some reviews it's doesn't look like good photo editing software for me. If you need free app it's worth to try darktable. With not trashy photo editor you can do a lot with bad camera/glass (but i don't think that APS-C is actually bad), it's just may require more effort and skill. You definitely don't need top cam to take good fotos. Skill is more important.
You also can check if vendor of your camera have free software for editing RAW, like Canon have Digital Photo Professional or Nikon have Capture NX-D. Capture NX-D also work with JPGs.
@@JetFightzer Great advice. Thank you. I've been told that LightRoom is the way to go, but when I see RUclips videos on how to edit in LightRoom I don't see people using controls any different than PhotoScape X. I guess this is my latest experience in how to sift through RUclips videos and advice and pick out the few great ones like Matti's channel. And, there's certainly nothing trashy about my G9 or Leica lens. Knowing that from my favorite channels keeps me going and the more I learn and the better advice I follow, my photos are improving immensely.
@@insideoutshots4394 It doesn't kick in. ISO invariance means that a camera will produce the exact same image quality by staying at ISO (or whatever the base ISO is on the camera) and dramatically underexposing the photo and then brightening it up again in Lightroom, as if you had shot the camera at the proper ISO in the first place.


I used to hate post-processing on a computer compared to film photography. And then I realized that is the equivalent to the dark room in film photography so at the end you still have to do post-processing either way or have a lab do it for you. The nice thing with digital photography is you can do it all yourself, without chemicals.
If I had to learn with film I never would have become a photographer... I can't imagine the cost in learning with film... So much respect for those pioneers
A very succinct and clear explanation/demonstration of ETTR: one of the best I’ve run into, and very useful. I’m embarrassed to admit that I had purposely ignored ETTR until just recently because I viewed it as a “fad.” Even worse, I have tended to purposely underexpose. My three (LUMIX) cameras all have the same sensor and only now do I realize that this is the better way to minimize noise. Thanks.
Thanks! Well, we all can change our opinions and habits and I think it's important to be open minded and try new things.
For me as a wedding photographer, this will seriously come in handy. Thank you. :)
I really want to know what machine you used to shoot? Because I like this simple color too much. Thank you for your great work.
Been a photographer for the past 20 years and a shame to say almost everything In this is new to me sir. Thanks 🙏 May the lord Bless you ( too bad my poor M6 Mark II does not have zebra warnings. But learned some other tips from the video )
Thank you!
Super useful for me to learn! I did not even know my gx85 can do the zebra .. Until now! I am amazed how many features I continue to discover buried in a menu somewhere, Panasonic gives you more than I thought I even need ...
Happy to help!😀
50 mm is my favourite. Very versatile for portraits, landscape and photos to pull lines and objects out of their context and thus create a new image. Nice video.
Thanks for sharing.
Well this lesson is a life changer for me. I always would dampen down the exposer when I saw the zebra show up anywhere in the picture. In this lesson when you said "find the brightest area in which you want to still see detail and go by that area with zebra" ................. It all clicked for me when you said that. DA! In that past I set my zebra to 90 percent for JPEG but now I'll do 95. It makes sense to do so. I use now the GH5. Thanks again. Tom in NYC
Good advice, thanks - for those without zebra-pattern highlight warings (all of us with DSLRs), I use either 'Highlight weighted metering' if available, or Spot metering for the brightest part of the image - frequently a bright patch of sky. I over expose this by 2-3 stops and am ready to go. No completely non-recoverable blown highlights, but on very bright days you can get some fairly deep shadows.
I shoot a Nikon D810, so this is not a big issue, with around 14 stops of dynamic range; Your settings may vary.
Thank you!
Excellent video. I have been ETTR for some time now and it makes a heck of a difference regarding shadows. The shadows can always be darkened down in post-processing with no nasty artefacts, but if don't ETTR, you get noise when brightening the shadows in post-processing. This to me is THE most important result of ETTR. Until next time, happy ETTR.
That's so true and the reason to use ETTR. Thanks and happy ETTR for you too.
This is an excellent video for an often misunderstood and confusing technique. Well done.
Thanks!
Just bought LUMIX G9 and I have been following your video. It’s been a great help to learn this LUMIX. I have been using Leica M10 and Sony A7RIII. So Your video has been very useful to understand micro4/3 camera. Thank you very much.
Thanks and happy to help, always.
I don't know why, but the dozen or so scene changes in the first two minutes had me rolling with laughter!
Always great to make people laugh😀
thank you very much, Matti! I learned something today from you! Keep up the outstanding work!
Thanks for watching.
I did find this useful, picked up some great tips. Because I am watching from Australia I was surprised to find that people in Finland took photo's, I thought they all drove rally cars. LOL.
Thank's for your time a great video.
Thanks! I live in the city and the city people take photos, but those who live in the country, drive rally cars😀
Very helpful and well explained, thank you! The surroundings are, despite being in a city, beautiful.
Thank you!
Expose for the Zebras...! Great tutorial of the G9. Ps: I recognize the car: It's a Snowmobile...!
Hi, I've been working hard to try and get my exposures right, in camera. I have been trying auto bracketing, but I don't like the results as I still end up with too much noise in my images. I've started to think about manual bracketing so I have more control and not leave it up to the automatics to decide where my exposures are going to me. I really like your video and I'm going start practising to see how far I can push the histogram to the right before I start losing data. I have a Lumix but it's only a bridge camera, but I feel it has potential for good images if I just learn to be a better photographer. Many thanks.
Thank you.
Just discovered this, thanks. I guess it depends if one is tweaking only Aperture and Shutter-time values or if one incorporates ISO into the equation. I would argue that using the latter is "dangerous" because it introduces a possible quality-degrade into the equation. But I do not think you meant us to rely on ISO. In a sense, this then is half "normal" photography - i.e. expose to avoid blowing the whites (ignoring the blacks which, with high-exposure, will not be lost anyway).
One thing, however, I think for still subjects - eg: not your singer - the traditional HDR three or five images (one at zero exposure compensation; others over and under in a balanced way) works very well, giving maximum flexibility in post.
Interesting and well-explained. Thank you.
Thanks for your comment.
@@mattisulanto Cheers :)
Wow. This was brilliant, I purchased a G9 recently, upgrading from a G7, a different world. I'm new to photography and getting constant acceptable exposure is always an issue, thanks for this video! it has helped immensely, as has your other video's... glad I found this!
Thanks, I'm happy I could help.
helpful information thanks, ETTR is a good baseline and independent of LCD or viewfinder brightness which can trick the mind to provoking under/over exposure.
I find exposing for the highlights good when there are any. If you have a picture that does not have real highlights at all (like a total midtone/low key photo), I've found no real benefit in overexposing the grays in the camera and adjusting darker later. In theory it should have a bit more information though but I've not noticed any real difference when I tested it a while back.
However, if you expose too little and need to lift shadows, you'll get a lot of noise that is usually unwanted. The damage is often huge even if not total like blown highlights.
Sure, but most photos, even low key photos, have some highlights in them. Not white, but light areas with detail.
great video thanks. also dont trust the back of your LCD screen or viewfinder as you may have them set way too dark or bright especially if its a sunny/cloudy day so use the live histogram. in this day and age of mirrorless cameras there is no excuses to not get a good exposure when : WHAT YOU SEE IS WHAT YOU GET. good tip about using the Zebra feature which is normally only for video but helpful for stills as well. keep it up
Thank you!
Well, for some types of photography, you don't have that luxury, for example sports, photojournalism and some types of nature photography, but much of the time, you're correct.
Thanks for sharing these contents. Is ETTR useful for low light condition photography?
It's useful for every situation.
There is a popular channel of film makers on RUclips where it has been advised that when you shoot flat profile for video always underexpose slightly so that it helps to get details in post-production. It is, I guess, another way of saying what you explained about slightly over-exposing the brightest part of the image enough to get details. Is that right or is it more complicated than that. Thanks for the upload.
Thanks for your comment. In this video I'm talking about exposing a RAW photo and maybe I was not clear, because I'm not suggesting you over expose anything. You choose which area in the photo should be the brightest, but still have detail, and place the zebra there. It's not always the brightest area in the photo, it's the brightest area where you want to have detail.
Excellent description; in my old film days, I used to meter the highlight and add a full stop (for snow shooting). Similar concept.
Thanks. This works, of course, with any subject, not only snow.
With film I expose for the shadows ETTL , the highlights are almost always recoverable!
Matti has definitely improved his audio since 2019
In this particular video the camera frame rate was 24, but my editing frame rate was 25. That's why the audio sounds funny. Stupid mistake.
Wow, all of these years I have been exposing to the right and didn't know it. This is with a manual exposure film camera (Olympus OM-1), I don't yet have a digital camera.
Wow, I wish my Canon 5d mkIII had the zebra in my view finder! I’ve been relying on spot meeting and placing the important highlights around 1.7 - 2.0 stops over middle grey. But often that detail is far smaller than the “spot” in the meter. That requires getting closer. Knowing where grass, pavement and other things should lie helps. But having instant feedback in the viewfinder with the zebra is awesome.
Yes, it's a great feature. Thanks for your comment.
Magic lantern could give you zebras
Great video! Thank you so much. Keep up the awesome work
Thanks for watching!
I enjoyed the video. New to photography and just got a Lumix Gx9. I still have some doubts about the process of getting good exposure. What is the best procedure? When shooting a static scene, is it best to first adjust the ISO, then Sutter speed, and lastly aperture?
Thanks! I would start from the value that is most important in that situation. You want to stop action, set the shutter speed first. You want certain depth of field, set the aperture first.
Your colors are awesome man. Keep going and thank you for the content!
Thanks!
Hi, i have a GH5, normally i set zebra to 105%. In base of your experience, what is the best % vale to shoot raw with ettr technique?
I explain it all in the video. Please watch.
This depends a lot on how your RAWs are structured and what is considered a shadow, a midtone or a highlight. Canon RAWS are usually pretty bad with shadows and you're better off to go to the right because you can always pull down later. With a Sony the highlights are more of a problem and I don't ETTR with a Sony, knowing I can always bring up the shadows with ease. Zebras are nice for complicated scenes but you have to know at which level the camera alerts you. If you are using picture profiles to later match stills and video footage - each picture profile requires a different threshold for the zebras. So as a general rule ETTR is a good thing to try - if it works well with your camera, stick to it. If you find yourself editing each and every image and run into problems with the upper midtones and the lower highlights - don't.
You are absolutely right, that not all cameras are the same. In the video I'm trying to explain, that you have to find out what is the correct "right" for your camera. I don't know about you, but so many people just watch part of the video and then comment.
Thank you for this video. I am wondering if another option is to set the zebra level such that the zebra pattern identifies the first point of overexposure/blown-out highlights. In this case, the picture taking process would be the same except the photographer would find the point just before the zebra pattern appears (i.e., for the brightest point in the frame in which the photographer wants to maintain detail). Any reason why this approach would be not recommended? The setup process to set the zebra point would also be the same, with the exception of the Zebra set point which would be set such that the zebra pattern indicates blown-out highlights. Guessing this point would be something north of 100 (assuming that is even possible to select). Thank you for considering.
Thanks for your comment. Sure, you can use any method you like and can get constant results with. I recommend you test it with your own camera and see where the actual values drop in your RAW developer.
How do you get those window shades top and sides on your computer monitor? Did you buy them or did you make them
They come with the BenQ SW271 monitor.
This advice is based on a useful theory. However, the practical application is more complex than you make it seem. There are more important factors to consider. If a photographer doesn't understand the theory behind all this and how it applies to their specific photographic process, then they could actually get lost rather than find a better way.
I am also wondering about the accuracy of cameras' ability to correctly indicate overexposure while shooting and it's relation to highlight recovery post-shooting. There is also shadow noise vs highlight noise etc...
As I said, it's a useful theory, but not that simple in practice.
Would you like to elaborate a bit, because I think this is a very practical and not just theory. I'm not sure if you watched the whole video, but we are not looking for overexposure, but white area with detail. That can be any part of the image, where ever you want the "last" detail before blowing out. The accuracy is probably the same as with the light meter and good enough certainly. In the video I also suggest you find out your camera behaves and find out how you should expose.
@@mattisulanto It's too complex of an issue to spend much time on in RUclips comments. I just wanted to leave it here for any passers by as kind of a "warning".
The issue is practicality of different photographic approaches and the way they are applied to your shooting needs. Even if a person is a fine art photographer or a working pro with good quality equipment, it's not a problem to trust your camera's metering and only do minor ex. comp. adjustments. In addition to that you can set your camera's exposure bracketing in case you absolutely must have every photo exposed as to the right as possible.
For many people it would be much more beneficial to have a clear viewfinder or LCD screen, pay attention to the world and composition, be in the moment. With time you learn how your camera responds to particular lighting conditions and if you need to over or under expose a bit.
It's questionable if you need that 1/3-1/5 of a stop of precision of the highlights area pushed to the very edge. Furthermore, contrasty scenes usually have more dynamic range than you can capture anyway, so you just have to make relatively big compromises. You can simply meter for whatever you want to capture (shadow, mids, highlights) and then pull the rest in your RAW editor as much as your camera's sensor allows.
There are many factors to consider, but for most users practical and simple approach might be better then one heavily based on pure theory.
It would be a different story if contemporary DSLR/MILC cameras had dodgy metering. However, I am not aware of such problems. Current cameras are absolutely amazing.
So far I haven't even mentioned the issues of the ETTR approach like the danger of blowing out the highlights, color shifts, post-processing demands.. I just wouldn't recommend this approach as the GO TO technique without explaining all the caveats.
@@PeterKoperdan Thanks for your reply, I think you didn't quite understand, or maybe I was not clear with my explanation, what I was trying to get across in the video. It's not about exposing as far right as possible, but as far as needed for what you want.
I'm speaking based on my own about 8 year experience using this method, but of course I admit, that there could be some issues that I haven't yet discovered. I also accept, that everyone doesn't want use this method😀
Very helpful! Thanks for making this!
Thanks!
Nothing could be simpler manual exposure, spot meter read bright white add 3 stops, white with detail add 2 stops, light gray add 1 stop. Midtone no compensation dark gray minus one stop, black with detail minus two stops, black minus three stops.
Your light meter turns all tone to a gray midtone and you cameras meter adds or subtracts light in these amounts although not always perfect first try. But check your cameras histogram a couple of tries and your perfect exposure is found.
Thanks. That works also, of course.
is this your voice on my automobile navigation system too ? very informative, thanks
I have done some voice overs in the past. Which navigation system do you have?😀
If you have not looked at DXO-Photolab 2 Elite recently you should really download a free 30 day trial. The lens corrections are far better than LR which uses the same quick&dirty in camera jpg correction. DXO analyse the lenses in their optical labs (it's their day job) and can therefore provide superior corrections. At the wide end of many zooms they can actually give you increased fov as the actual lens focal length is wider than the quoted figure. The jog/LR correction involves a crop for speed whereas DXO-PL 2 can use the power of your computer and relatively infinite time compared to the real time in camera situation. DXO-PL 2 can also markedly improve the other weakness of mft which is noise. PRIME noise reduction is slow but class leading. Try a 25,600 file and prepare to be amazed.
I'm quite happy with LR, but maybe I''ll have a look at that DxO. Thanks.
Please put to Panasonic's wishlist an automatic ETTR mode. Set highlight threshold to e.g 250 and percentage of pixels above threshold to e.g. 1% and that is it - the camera should do the rest.
That would work, but the camera still doesn't know where you want the last detail before blow out. It's not always the brightest area in the picture.
Fairly specific to your camera, I have a Nikon d750 so will have to investigate, I know it has blinkies, cheers from Poland!
Unfortunately DSLRs don't usually have zebra, but at least many Sony models have it too.
Canon 70D owner here, don't have zebra pattern. Can I ETTR using the histogram, pushing the exposure without clipping the highlights?
Sure thing. Histogram works almost as well. Make some tests and a see what works for you.
@@mattisulanto Thanks, I tried ETTR when shooting in low light with high ISO. Files looked surprisingly clean on the computer. You'd have to look REALLY close to notice the noise, but who does that.
Excellent advice for nailing consistent exposures and very well explained! Cheers
Thank you!
I would say from experience that exposing to the right is not necessarily a perfect exposure. Generally you want to expose for either realism or creativity, i.e. you want to have the image look exactly as bright as it does in the real world, or expose darker to make the scene look darker and accentuate highlights. But exposing to the right doesn't necessarily make a scene the same brightness it was in real life, because camera's see light differently than we do. Our eyes for example, "stop down" in bright situations, but the exposure time doesn't change. Exposing to the right in camera, requires an even longer shutter speed as you stop down.
So by default, the brightness we see the world is dependent upon the aperture of our iris, while the way camera's see the world is dependent upon aperture and shutter speed. You could for example expose a night time scene to the right, and it would look much brighter than you see it with your eyes, and the same applies to day time photography as well. One might think "Well I'll just lower the exposure value in post", but that's not really how it works. You will end up with a washed out dim image that needs to have its highlights, shadows, and mid tones all specifically adjusted in order to come close to matching.
The reason why it doesn't work like that, is because depending on how you expose, decides what end of the dynamic range spectrum your exposure favors. For example, if you over expose, you lose dynamic range in the highlights but gain detail in the shadows, and if you underexpose you lose detail in the shadows and gain detail in the highlights. This changes the whole relationship between light and dark parts of an image and the distance between their values is crunched and compressed.
But the point I'm making is, for the absolute best representation of a scene (regardless of noise), it's best to expose for how it looks to the eye (unless you want it to be brighter or darker), because that's exactly why the scene caught your eye in the first place. Exposing to the right can have its benefits, but it is not necessarily the best way to convey the ambiance/mood of a scene.
You can test this by taking an ETR image and dropping down the exposure level to another more accurate brightness image exposed to the middle or left. It just won't look the same. Maybe if it's just a stop or less it might not make a huge visual difference, but the histogram covers the full dynamic range spectrum, which is more than one stop.
Thanks for your input.
@@mattisulanto To add, another reason why this is true, is because not all scenes necessarily have a full white point, in fact most don't. Even a white object isn't necessarily true white. There are not really many true pure white things in the world. So if you expose to the right, you would effectively be putting that color that reflects the most light, in the upper registers of what the camera considers white, which would effectively overexpose. That's kind of the thing with camera's, they don't actually see color, they see only brightness and darkness, with pixels filtered to represent a color. But no matter the color, if the exposure reaches a certain brightness threshold, it will become white.
And in scenes without full white points, or really any white points, or dim white points (such as light reflecting off a leaf) exposing to the right would over expose the rest of the scene. But it all depends on the scene.
Since camera's have something like 14 stops to work with, and you only need about 9 or 10 or them, as long as the histogram is primarily spiking in the middle, it should be fine. On top of that, dark scenes that you want to keep the ambiance of, by keeping them as dark as they appear, will generally be exposed to the left with maybe some in the middle of the histogram too.
I am a G9 user and I am having trouble using zebras. After several attepmts to rewatch your video about it. I dont understand where, how and why should I use it. What percentage should I use and how to abjust it, I tried also watching youtube still, why should I use zebra if I have histogram for photos and videos please explain.
It’s all in the video. However, if you like the histogram better, use that.
Thanks so much for this, hadn't thought of using zebras for stills
Thanks!
I'm fairly sure my Nikon D300 doesn't have a zebra function. The only way I can see an image on my LCD screen is to make a test exposure evaluate it then expose again. The way to get well exposed images in unusual lighting (snow scenes, dark holes) is to use a hand held incident light meter. If you don't have or can't afford one, buy a Kodak grey card and use the camera to take a reflected light reading off it. You can also use the card to accurately set white balance.
No zebra on DSLR, but like you said, there are other ways to get it right.
That looks coooooold! Hello from Florida.
It looks what it is😀
Here you go! Beach video =) ruclips.net/video/EgDx8XwmbAw/видео.html
Looks like it should to my mind. Winter is snow and ice. But not when you love in Florida of course.
Florida can go down t0 17° F (-8° C) and they don't have good heaters, just electric.
The camera always meter 18% gray regardless of what you photograph. In order to see white snow you need to increment +1 or +2 lighter to show actual white and not gray. Be careful not over exposing the highlights. When you photograph a black object let's place as example a black cat then use -1 or -2. under expose.
That's the traditional old fashioned way of estimating the exposure and it's good if you work with a DSLR of shoot film.
There is a shortcut for ETTR. If your camera has an extended low ISO sensitivity, you can use it for ETTR. What the camer will do when extended low ISO is in use - it will overexposed the image (by adding the shutter time) and then will composed the shadows for you with builded algorithms. It works grat, but you have to use it wisles, as it is easier to lose information in higlights.
ISO is not exposure. ISO is after the sensor, so raising the ISO to try to get as much light to the sensor is not beneficial in any way.
@@JimRobinson-colors You should read about extenden ISOs (like L100 in fuji X-T) *Extended ISOs work only in Aperture-Priority mods.
@@Raidenorius Extended ISO is still after the sensor, It is not even a debate - makes zero difference on whether it works in Aperture-Priority Auto settings in a camera - It is not exposure. It is the result based brightness that is a electronic based signal related. You should read up on the basic physics of a camera before commenting back. The only reason to expose to the right is that the gamut of the sensor is more accurate when it is give sufficient light to the sensor. If ISO is after the sensor, then it can not be physically part of that equation.
It is possible to raise the ISO and underexpose the sensor . And if that is possible then, it can't be called exposure.
All ISO changes move the middle grey up or down the same set of stops - Raising the ISO takes stops from below middle grey and adds them to above middle grey - and reducing ISO will do the opposite. This means that ISO should be used to either enhance detail in shadows or in highlights by changing the stops in the dynamic range.
Illuminance light and anything in front of a sensor is exposure - ISO is not.
Is there a way to achieve one point colour with panasonic camera dc fz 1000m2? Is there another way to ask you questions?
So far I have not opened a public e-mail for questions, but I may do so in the future. Some send questions to my newsletter e-mail. Regarding the FZ1000, I'm not sure if I understand your question.
Do you think this would allow shooting at below Base ISO (100) on the new G9 for better shadow recovery? Wouldn't this allow higher dynamic range of the sensor? Been experimenting and not sure. Usually using ND grad for landscape so blown highlights aren't a concern usually with this kind of setup.
This will help you to get the most dynamic range from your sensor, if used correctly, but this will not and can't increase the dynamic range beyond what the sensor is capable of. Better stick to ISO 200 and nail the exposure.
@@mattisulanto thanks for your response! So it would be safer to use ISO200 with a marginal sacrifice of Dynamic Range. The ISO 100 would allow pushing shadows a bit more I guess but leaving no play with overexposed highlights.
@@RestlessRoamers You'll get the best dynamic range at ISO 200, because the ISO 100 is kind of like a fake sensitivity.
@@mattisulanto I'll use the 95% Zebra and see how it turns out for landscape. Not sure how I even exposed back when I had Canon FF :) Mirrorless is really amazing, better results, less weight and faster workflow.
Thanks for your video, very instructive !
Thank you.
I really like your teaching style, direct and to the point. It is easy to understand why you have over 8.5K subscribers. ;-)
Thank you for those kind words.
38k already
Justo Alejandro Gonzalez ,,, Thank you so much for the correction. I apologize for the mistake. I intended to write , “over 38.5 K subscribers”. Thank you again.
Thank you for tutorial! There is no zebra mode in my D5100 unfortunately
It's mostly a mirrorless camera feature.
Whenever I exposed the right I just blow out my highlights. Therefore I will never expose to the right. I will always just expose in the middle of the histogram or I will expose the left and raise the exposure and post if in any doubt about exposure. I am not a professional photographer so therefore a little noisier image is still acceptable to me.
You have to do whatever feels right and gets you the results you want.
That's a common mistake. First, if they're just highlights, that may be acceptable. But, if it's not, you should expose as far as you can to the right, before you start to see a spike on the right hand side start to develop. The moment that starts to grow, you're blowing highlights.
If you're shooting raw images, check when you get back as to whether those highlights really were blown as the histogram typically is based on the JPG which is only 8bits per channel whereas raw is pretty much always at least 10bits per channel up to 14bits on higher end cameras. Meaning, that it might look blown, but with raw, there may be a bit beyond that which is recorded and not visible in the histogram.
That's not to say that this is bad advice, it's just probably a bit more conservative than you really need to be with the highlights. If it's a legit highlight, then blowing it is usually not an issue. With a modern camera, the amount of extra noise from a bit of under-exposure is probably not significant.
hello, nice tuto where i discover zebra for the first time. But can you do a similar tuto for camera not having zebra in picture mode. My D750 has no zebra for pictures. would you use manual metering, spot metering on something neutral, is there any indicator somewhere (histogram,...) acting like zebra. do we need liveview to see clippings ?
Thanks! This method only works with zebra and if your camera does not have it, you just have to use your camera's light meter and evaluate your exposures that way. Live view is necessary to see histogram or highlight and shadow clipping.
camera wants to make everything 18% grey. so you look up your camera's dynamic range (it's about 3 stops above 0) and you spot meter for the brightest part that you want to keep without blowing out and it should show you +3 EV in the finder scale. I always go for 2+2/3 on my x-t2, but your d750 should have a bit more wiggle room.
Later if you are more comfortable with it you can guess with center weighted matrix metering and you will become quicker.
Great information...Are you calling my expensive, valuable camera DUMB? HAHAHA
Thanks. Did I really say that?
How do you nail it in low light, night photography? 😬
That is a good question. I think you just have to practice, because night photography is so different from "normal" photography. There can be huge contrast (street lights for example) or almost no contrast (landscape for example). But, for example, if you shoot available light portraits in the night, you can use the zebra. It really depends on the situation. If your camera has the zebra feature, I suggest you make some tests and see how it works in low light.
Man I wish I had 30 minutes to watch footage setting up what you want to show us I just don't... good luck, can't sit still long enough to learn something as simple as how to set exposure.... should be a 1-2 minute video... :-) thank you.
I wish I was into fishing so I could watch some of your adventures, which often seem to last much longer than this video😀
Informative video! Are you using the evaluative or spot meter? If the spot meter, are you metering off the most important highlight where you want to preserve detail, and then adjusting your exposure until you just start to see the 95% zebra in that most important highlight?
It doesn't matter if you use spot or evaluative, because the zebra and light meter are not connected. Just watch where the zebra shows up and you are good. Thanks for you comment.
Yes, it was very useful. Thank you
Thanks!
Thanks for sharing and very well explained. That G9 is indeed a feature rich camera. I hope your daughter bought you another snow shovel or pair of gloves for Xmas lol.
Thanks. Now that I live in the city I don't need a shovel, but a good pair of gloves is always welcome.
This is something I wish Olympus would implement in their cameras. They only have the highlight/shadows warning, and having blinking solid orange and/or blue all over the image is WAY too obtrusive - I'd rather just use the histogram.
It's surprising that so few manufacturers use this, but Sony at least does have zebra on most cameras.
Great explanation of using this technique for achieving the desired exposure. But your hands moving constantly is quite distracting. Thanks for the video!
Thanks! No one is perfect and you just have to bear with my hands on this channel😀
Hey you have to stay warm.
Keep the hands moving!
Remings me of an Italian priest I once knew. Chris
thanks for this. I didn't have a proper understanding of the % setting. The downside for me is that my wife hates the stripes and she is reluctant to switch cameras with me if I want to use apsc. Can you help me with that?
Thanks! Ditch the APS-C altogether😀 Ok, that was a joke. Put the zebra on one of the Fn buttons, so it's easy to switch on and off.
@@mattisulanto saving my photos and my marriage. There are things that my apsc does better. I use it for wildlife. The pixel density is greater and I can get a little more relative depth of field. I use it for wildlife and macro. FYI Sony A7iii and a6400. They are great together. Same number of pixels and same colour. I theorized that I would prefer apsc at times but at half the price it took a while and some testing to believe myself especially because salesman didn't agree.
It is almost a shame that after 15 years of widely used digital technology for photography there’s is a need to remind, and often being received as a revelation, ETTR.... it should be the very first concept learned, expose in camera for the highlights and on the computer for the shadows; there are only 2 ways of taking pictures, WYSIWYG jpegs for snapshots and RAW ETTR for everything else.....
Thanks for your comment. My main message here is that with this method you can be more precise than with any other method. But then again, sensors and cameras are so good these days that a small exposure errors are not serious.
Great tips. Thanks
if I shoot only JPEG at what value do you recommend setting the zebra?
I recommend you take a few test photos at different settings and see what works best for you.
@@mattisulanto it's ok if I set it to 100 then I correct the exposure until the zebras disappear
@@frankiefalci8735 That can work. We all use our cameras differently and it's important to find the optimal workflow. So please, experiment and find out😀
Is there a difference between jpeg cliping and video zebras ?
I'm sorry, but I don't understand what you mean.
So helpful. Thank you for the great tips! Subscribed :)
Thank you.
Also, I liked that you were switching up the shots while you were talking! I was engaged the whole time!
I shoot a lot of live music video. A major problem is the spotlight. I've tried many ways to expose for it but get inconsistent results... any recommendations? tia
Live music it tricky, because the lights usually change or move all the time. Based on my experience there is no easy way, you just have to shoot a lot, get experience and know your gear. In high contrast situations you have to sacrifice either highlights or shadows, whichever you think is less important in that situation. I don't think I can give any better advice.
@@mattisulanto I thought about shooting in log for really low contrast but need to experiment with it to find out which one to start with. Appreciate your help, btw, I printed color and snow was always hard to print so thanks for your insights.
@@DavidLarew You can try log, but RAW is a better option, because it contains more information. Log is just a really low contrast jpeg and it has only 8 bits of color info, but a RAW file has 12 or 14 bits, which is a lot more.
@@mattisulanto thanks I'll look into that!
It does not make sense to me to expose to the right. Why go brighter? It seems to me that ETTR is for the blacks and not the highlights.
ETTR is for capturing the most amount of tonal information in the RAW file. In post processing you then determine the final look for your photo.
Thanks. Clearly, your camera has a Zebra "preset" - neither my X-Pro2 or GRII do. So harder work for me to experiment.
Mercedes station wagon?
Yes, there is a "preset" and not every camera has that. Fortunately almost every Panasonic has it, but also some Sonys at least.
well, thats an interesting t-shirt (slogan)
Nice video! What camera was used for the video?
Thanks for your comment. This video was filmed by a good friend Peter Forsgård on his Olympus E-M1mk2. He is an Olympus Visionary, check out his channel if you haven't already ruclips.net/channel/UCkctXInfNh0Zf4p93itIVhw
I am having trouble fining you newsletter to view. Please direct.
Please, look at video description under my latest video, it's there, if you scroll down.
If you shoot in available or continues light only. So maybe not EVERY time ;)
Sorry i dony know what you are talking about ,what is zebra is this only for your camera
It's not only for Panasonic, many other cameras have the same feature.
I did not know what you meant by zebra either. I had not heard of this before. It rarely snows where I live, but when it has, I have put the exposure compensation up by about a whole stop or stop and a third and it seems to be good. I have a Canon 80D, would you know if it has the zebra feature or if it has a different name in Canon.
@@MrBooojangles No zebra on the 80D. This works in every situation, it just happened to winter when I made this video.
@@mattisulanto ah ok thanks, no problem. I understand histograms, so I will carry on with them.
@@MrBooojangles Histogram works too, just a bit different.
I was wondering what my silver 15mm would look like in a G9 body.
BMW. 5 series touring?
Very good thanks
Thank you too!
This may be an answer I am looking for! Will exposure bracketing help? What really gets me is when I am photographing birds against a white/brightly lit background (for example and most noticeably a bird backlit by the reflection of the Sun off the "in frame" water behind the bird). If I religiously follow the Zebra patterns, its underexposed despite spot focus and fixating that little plus sign center mass or directly on the eye of the bird. However to be fair, I never experimented with changing the Zebra Patter intensity settings. Also, RAW files seem to be less editable than JPEG for me and I cannot do much with them. Does anything I am saying give you a hint what I am doing wrong? Thank you!!!
You need to learn where/how to edit RAW, it will significantly increase margin of error. Exposure bracketing most likely will not help with birds, because they move and exposure bracketing requires to take series of exact same images but with different exposure.
If you have auto exposure lock button in your camera you can expose camera on something without sun reflection to get proper exposure, lock exposure and take your shot. But this might be tricky technique.
@@JetFightzer True, but I treat my exposure bracketing shots as I would my single shots by making sure I have a stable subject. Sometimes they move but that's the breaks as they say :)
That car - VOLVO
BMW😀
My camera, 6D doesn't have this zebra thingy. how do you do?
You need a camera with zebra to use this. I think no DSLR has zebra, because it only works with an EVF or live view.
Thank you.
Thanks! Also, it is taking pictures, not making - one of the strange expressions in English :)
Thanks for your comment.
That's the norm, but even in English a lot of photographers will say they "make" photographs to emphasize their conscious involvement in the process.
I dont have any zebra in my cameras, I have nikon d600and canon 5d.
It's mostly a mirrorless feature.
Brilliant! Thank you
Thanks!
Excellent
Thanks!
Why is it called ETTR?
Expose To The Right.
@@mattisulanto I understand that, but why is it called Expose To The Right?
@@housinit Because you'll want to make sure the histogram reaches the right side of the scale.
@@mattisulanto Ah-ha! That was the explanation I was looking for. Thank you, that actually helps to make sense of the whole ETTR thing. Thank you!
Thank you!
Thanks!
Thanks!
I have never heard or seen the "Zebra lines" when composing with my cameras
Not all cameras have the zebra.
My Sony A6000 has zebra lines, very useful.
"I can do it, and so can you" ... dude... obviously you are speaking 2 languages.. that already means you are smarter than I lol.
Well, I kind of did not have learn the first language. It was given to me😀
Are all editors equal? I see other photographers' work having used Light Room. I use a free editor called PhotoScape X. Am I being too critical on myself expecting very similar results from my editing? Because I don't see it in the clarity all the time, albeit sometimes my photos cannot be beat with strong saturated color. Could it be these "other guys" may be better photographers, and on top of that with using APS-C and APS-C glass? Thank you!!!
Never used PhotoScape X before, but looking on description on official site and some reviews it's doesn't look like good photo editing software for me. If you need free app it's worth to try darktable. With not trashy photo editor you can do a lot with bad camera/glass (but i don't think that APS-C is actually bad), it's just may require more effort and skill. You definitely don't need top cam to take good fotos. Skill is more important.
You also can check if vendor of your camera have free software for editing RAW, like Canon have Digital Photo Professional or Nikon have Capture NX-D. Capture NX-D also work with JPGs.
@@JetFightzer Great advice. Thank you. I've been told that LightRoom is the way to go, but when I see RUclips videos on how to edit in LightRoom I don't see people using controls any different than PhotoScape X. I guess this is my latest experience in how to sift through RUclips videos and advice and pick out the few great ones like Matti's channel. And, there's certainly nothing trashy about my G9 or Leica lens. Knowing that from my favorite channels keeps me going and the more I learn and the better advice I follow, my photos are improving immensely.
is the s1 iso inverent?
It's ISO invariant up to about 5 stops.
@@mattisulanto ok and when does that start happing when should i be counting the stops?
@@insideoutshots4394 Are we talking about the same thing?
@@mattisulanto yes we are i am just wonder when it kicks in
@@insideoutshots4394 It doesn't kick in. ISO invariance means that a camera will produce the exact same image quality by staying at ISO (or whatever the base ISO is on the camera) and dramatically underexposing the photo and then brightening it up again in Lightroom, as if you had shot the camera at the proper ISO in the first place.