Getting Started With Raspberry Pi Pico

HTML-код
- Опубликовано: 2 июл 2024
- PCBway: only $5 for 10 pcbs from www.pcbway.com/?from=CZcouple
Couple of months ago, I bought a "Raspberry Pi Pico" to get some hands-on experience of it and to create some amazing projects using it. But since then, it has just been sitting on my desk, collecting dust. Today after a very long wait, I finally have decided to create a short video tutorial to show you guys how to get started with the Raspberry Pi Pico.
Items Required:
Raspberry Pi Pico: amzn.to/3nauOPQ
Blog Posts: diyfactory007.blogspot.com/20...
Video: • Getting Started With R...
Other Resources:
RP2040 Datasheet : datasheets.raspberrypi.com/rp...
Hardware design with RP2040 : datasheets.raspberrypi.com/rp...
Raspberry Pi Pico Datasheet : datasheets.raspberrypi.com/pi...
Getting started with Raspberry Pi Pico : datasheets.raspberrypi.com/pi...
MicroPython UF2 : micropython.org/download/rp2-...
Thonny website : thonny.org/
Piper Make: make.playpiper.com/
CircuitPython 7.1.0: circuitpython.org/board/raspb...
Support My Work:
BTC: 1M1PdxVxSTPLoMK91XnvEPksVuAa4J4dDp
LTC: MQFkVkWimYngMwp5SMuSbMP4ADStjysstm
DOGE: DDe7Fws24zf7acZevoT8uERnmisiHwR5st
ETH: 0x939aa4e13ecb4b46663c8017986abc0d204cde60
BAT: 0x939aa4e13ecb4b46663c8017986abc0d204cde60
LBC: bZ8ANEJFsd2MNFfpoxBhtFNPboh7PmD7M2
Thanks, ca again in my next tutorial.
#RaspberryPi #PicoTutorial #RaspberryPiPico  Хобби
Хобби


One statement that may be confusing. The Pico comes with all of its components soldered, just not the header pins. We will have to solder the header pins, but not the surface mount components.
Ha ha, yes that's correct mate
Great video - very informative!
Thanks a lot
Excellent.... Very informative video content.... 👍👍👍
Thanks mate 👍
Perfect tutorial,
I learned a lot.
Thanks a lot again
You are welcome
Very nice tutorial, absolutely to the point
Thanks 👍
Woow bhaiya, nailed it
Another one of your best tutorials :)
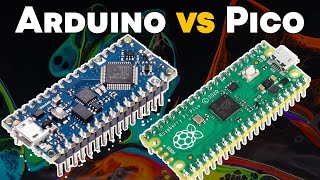
The main problem with the Pico is that it only has 3 analog inputs. An Arduino Nano has 8 and is cheaper than a Pico. An Arduino Uno has 6 analog inputs and also cheaper.Most of the projects I have completed in the last year required 6 to 8 analog inputs. Also the Arduino IDE is must easier to use an has thousands and thousands of sketches/codes available for free!! The library support for Arduino is vast and simply incredible. I like R pis for using as computers. But I will skip their microcontroller. Maybe try in a few years when it is improved.
As a microcontroller there is no up side to using a Pico compared to an Arduino Uno or Nano. I buy them in lots of 10 for $2.40 to $3.25 a piece with free shipping.
Your're right, but some proyects could need a more powerful microcontroller. Here you have two 32 bits cores at 133 Mhz. But Nano is far less powerful than that.
Nice and easy project mate
Thanks mate 👍
nice...
Thanks 👍