Take FULL Control of Affinity Photo Brushes

HTML-код
- Опубликовано: 21 дек 2022
- The best photo editors pay close attention to the Brushes they use. In contrast, the average photographer uses only the basic circular brush. Watch the video to understand how you can take better control of the Brush Tool.
In this video, I'm going to show you how to get the most out of your photo editing by using powerful custom brushes of Affinity Photo. We'll look at the different brush controls that can help you simulate artistic effects, and you'll also get tips on how to make the most of the basic circular brush. With these simple tips, you'll be able to take your photo editing to the next level!
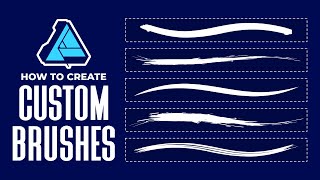
The video explains and demonstrates the different brush settings of Width, Hardness, Flow, and Opacity and how they work together with the Spacing control to create smoother brush strokes. We also explore the Jitter and Accumulation settings and how they interact with the other settings. With this tutorial, you'll gain a better understanding of how these brush settings work together to produce artistic effects in Affinity Photo.
Download your Affinity Photo trial: tinyurl.com/2g9lhadc (affiliate link)
AFFINITY PHOTO BOOKS
Make learning Affinity Photo easy: geni.us/essentialap2book
Extend your Affinity Photo skills: geni.us/aphowtochoice
Produce complex, accurate selections fast: geni.us/AffinityPhotoSelection
PHOTOGRAPHY & PHOTO EDITING BOOKS
Make learning easy with my collection of books: lenscraft.co.uk/books-by-robi...
FREE BOOK
Don't forget to join my free monthly newsletter to get your free copy of my book "6 Steps to Shooting Brilliant Landscape Photography". bit.ly/3GbtmE9
Buy me a coffee: geni.us/buy-robin-a-coffee
#robinwhalley #lenscraft #lenscraftphotography  Хобби
Хобби


wow... thank you veeeery much, that is the first time i grasp those concepts with flow and hardness! you found a great way to explain it! that helped me a lot
That's great to hear. I'm glad I could help.
more brush videos please, how to make them, and what all the settings are also how to make sub brushes please
You make the BEST tutorial!
Thanks a million!
You're very welcome. Thank you.
fantastic tutorial. Many thanks
Thank you. I'm glad that you liked it.
wow i had no idea how the settings worked now i do thank you so much
Glad I could help. Thank you
Thank you!
You're welcome.
Great Tutorial !
Thank you.
Thanks so much, I had absolutely no idea this was available in Affinity.
Glad I could help. Thank you
Thanks again , but honestly I have no idea how people keep up with all their brushes or brushes available, considering my Lr5 has one adjustable round brush and it's amazing how powerful that brush really is . Affinity needs a similar magic brush imo .
So in Affinity I have one (mostly used) go to round brush 50% opacity 35% hard brush plus a few others affinity defaults -- it's easy enough to change basic settings . By adding "_" to My brushes puts that category at the top of the list
Thanks. Don't forget, Affinity Photo is a professional level package that also needs to support designers and artists. It's a replacement for Photoshop rather than Lightroom. That's why they have a large choice of brushes and features, just like Photoshop.
Great video! Your accent is similar to James French, the gent who teaches people to be sensitive to animals!
I'm glad you liked the video.
I wasn't familiar with James French so I found one of his videos. To me he sounds very different. Whilst I can't place his accent (I guess he's lived overseas) I don't think that he is from near to me. It's interesting how where we are from plays a role in how we perceive other accents.
@@RobinWhalley Ah yes, listening again, I realize there are differences. But I think there is similarity in tone and pacing, and that is probably what jogged my memory. Very nice and soothing voices, both of you! 😊I used to work with voice actors...cheers
Where do I find the width slider. I also use the square bracket keys but I would like to know what number my brush is currently using. I don't see any of those indicators you have at the top of your screen Thank you
It's in the toolbar at the top when you have the brush selected. It's the first control on the left.
@@RobinWhalley Thank you I will try that
I confess that I only rarely change brushes. Occasionally i pick a non-circular tip but I've never tried any of the speckled ones or other more artistic type brushes.
You must experiment with some of the other brush controls. It's amazing what you can do with them.
I'm the same as I have used the one and only available round Lightroom 5 brush for years . I find having lots of brushes available is so confusing
Surprisingly the masking brush in the Development persona (with Overlays) doesn't draw a straight line the same way as in Photoshop - though most other short-keys are copies of their Photoshop examples.
The generally accepted standard: Left-click on a position (A), then hold down the Shift-key and left-click on a new position (B) will draw a straight brush-line between A and B.
In Affinity Photo 2.0.3 the procedure seems to be the same, except the line is not drawn until you let go the mouse-button on position B. That feels strange.
Moreover, if I want to draw a new brush-line separated from the preceding line, by choosing a new A' and B' point, the next brush-line will be drawn from former B to B', which is useless.
This is a major show-stopper in my attempt to replace Photoshop with Affinity Photo as I love precise masking using a large number of short straight lines.
Has this been reported - and is it possible to submit a bug-claim to the developer? The forum observed something similar in 2021 and a moderator promised to relay the problem, but apparently nothing has happened within more than one year. Bad strategy?
I haven't noticed that. Have you tried checking the Shortcut Keys in the Preferences? There are lots of options that still aren't set by default. It may be one you can easily add.
@@RobinWhalley I have shortened my first comment above to be more correct according to what is actually going on - which I found out later. I have looked in the Preferences to see if this could have anything to do with settings for e.g. pen pressure, but haven't found such a setting. I have also described the phenomenon to the Product expert, James, from Affinity Photo. He didn't return more than once, after I had described the problem, so maybe he's thinking.
The brush actually works like this: you mark the starting point - with a left-click - as close to where you want to begin (the point A) - then move the cursor slightly towards A (now the point "near A" has been recognized), then hold the Shift-key down while moving the cursor close to B (your chosen endpoint), left-click and further move the brush slightly towards B. The line will probably be draw one pixel from "near A" to a position one pixel from your last mouse-click "near B", which differs from what you want. Actually you will not be able to exactly place the brush-line. Fortunately the brush in the Photo Persona works as in Photoshop regarding straight lines.
Please tell me if you can replicate this behavior. It could be a Win problem.
@@Eigil_Skovgaard Both Photoshop and Affinity Photo 2 seem to work the same way for me. Click once then click on a second point whilst holding down shift. The line is drawn as soon as I click on a second point. I can then add another point and line by clicking elsewhere, unless I release the shift key. If I release the shift key and click on a new point. That starts the process of drawing a new line.
@@RobinWhalley And you did this in Develop Persona? (the problem doesn't exist in Photo Persona) - and are you testing in Mac or Windows? (I have the problem in Windows 11 Home edition).
Still - I have to move the cursor in point B to have the line drawn - otherwise I only get two dots.