I completed the installation myself and it wasn't hard. I went from a 2 handle to a 1. It required adding a wire backing followed by adding mortar between the wire where the new tile would be. Once that was level and in place, I cut the tile to match the black template and stuck tile in place tile mix & spacer between tiles, then grouted. For the dry wall, you can buy some plastic strips & use spackling to stick it along both sides. Then place the cut drywall back, spackle, sand & paint.
When working with pex and copper do the soldering first... pex flexes, so you don't have to leave it loose in the spigot pipe like he did to move it. Soldering 1/2 copper to the inside of the male brass fitting like he did works, but, if he put a female thread with a half inch sweat, replacing the valve in the future means no sweating would be required - making it easier for any homeowner; make sure the access panel allows for a full rotation if done this way.
Always sodder your pipe first before applying Teflon tape or the pex tubing. It gets hot and could cause future leaks. Let it cool down before applying Teflon. Cool down after sodder sets with a cold rag
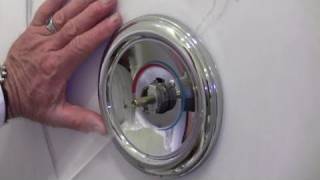
I find it interesting that the final image of the install shows the shower valve handle much closer to the wall/trim ring than the finished result of the install video. The video shows the handle sticking out too far as the valve was not recessed enough and it does look bad. The entire thin wall/thick wall segment and diagram is confusing as well. I understand that the video is more about the Pex connections but it would be nice if it was at least accurate and focused on details such as what I've mentioned.
Hello Kane. The Posi-Temp rough-in valve can be mounted to a bracer/backing board ran between the wall studs or it can have the supply lines mounted/attached to the wall studs as shown in the video.
Its important to note, a good set of star headed bits help easier to tighten the two screws for plumbing , otherwise need Allen wrenches. Good video, we use a better teflon tape, and wrap 3 times around, for new valve installation.
What happens if instead of installing the shower head at the recommended 77"height I do to the full 8 ft? I was trying to do the ceiling rain fall effect.
If the shower head is installed above the suggested height, there may be a delay in the water exiting the shower head. If you need additional installation assistance, please contact 1-800-289-6636.
When I turn the shower handle, the water is coming out from the lower valve and the shower head valve. Can you Please tell me where I went wrong? P.S . I followed your exact procedure, it is a new installation with the same model you installed in your instructional video. Thank you very much
Hello Yikan, you will mount the valve behind your wall between 2 2x4's. The valve should include a plaster gound in the packaging to assist in positioning the valve for the finished wall.
Thanks for the educational video. One thing in a new build with full access... you would put a backing 2x4 at both the shower valve and up at the shower head 90 degree brass fitting to fully secure those items... not just let them float in thin air with PEX. I will say that my existing tub shower which was supposedly done by a "professional" looks like hell. Big gaps between fixtures and walls, little to no caulking or plumbers putty, and the tub overflow leaked like a sieve before I fixed it. That is why I do things myself. Why pay someone to screw it up, when I can screw it up myself?
Also, don't forget to put caulk around 3/4 of the back of shower valve flange. They don't mention it in the video. Leave a small section uncaulked at the base to allow any water that gets back behind the flange to be able to drain back out into the tub and down the shower wall instead of back behind your shower wall.
Has 6 unnecessary connections... just 6 more places for it to leak. Both hot and cold feeds have so many pex couplings I don't know if they could fit any more in there.
Hello Trad Pro. Moen recommends the larger hole so the plaster ground can be installed which will help determine the placement of the rough valve in the wall.
This was a good video . Gave me all the information I needed. If you don't understand it might be better just to hire a plumber. By the way, PEX is very simple. Had plummer do a passable job with copper, I did a better job with PEX.
Yes, I had to, Drawers were installed BEHIND the Access door, and they used heavy duty construction glue to seal the door shut. I will not saw off the Drawer rails to "get in there" either. Perfect video world. I'll see how good I am by FACING the front to do this. Idiot 1940 workers, geeeez.
Hello Nextround I. Moen tub/shower escutcheon plates are only made to install onto Moen Rough-in valves. If you have a Moen Posi-Temp rough-in valve-has a rotate only handle, a Moen Posi-Temp escutcheon plate will fit; if you have a Moen Moentrol rough-in valve-has a push/pull handle, a Moen Moentrol escutcheon plate will fit.
After installing the cartridge, water does not flow from the shower head. We've taken out the cartridge and turned on the water and there is no problem with the flow. What could be causing this problem?
Hello Aisha, it is possible that the valve needed to be flushed prior to installing the replacement cartridge. To fully troubleshoot your faucet and resolve your issue, please contact Moen directly at 800-289-6636. Our business hours are from 8am-7pm Monday through Friday. You can also fill out the form at the address below: www.moen.com/customer-support/contact-us
Hello for further assistance with your Moen product, please contact Moen directly at 800-289-6636. Our business hours are from 8am - 7pm or you can fill out the link below to send an email: www.moen.com/customer-support/contact-us
Hello Sanchez09nt. The issue you are describing is referred to as stacking. Please review the following link for issues that would cause stacking: solutions.moen.com/Article_Library/What_is_a_Stacking_Leak%3F
I bought a Moen shower kit but I am not able to regulate the water flow, all the water come rushing in.Somebody at homedepot told me that all new kits and it doesn't matter the brand come like that , that you can't regulate the amount of water that you get except by getting a new shower head from which you regulate the water flow. is that how it works???
katalina125 Moen makes two main types of shower valves, Posi-Temp and Moentrol. The Posi-Temp valve will turn on and operate at full pressure. The Moentrol Valve will allow you to control both volume and temperature. Should you have additional questions, you may contact us at 1-800-BUY-MOEN (1-800-289-6636). Our business hours are 8:00 a.m. - 7:00 p.m. Monday through Friday EST.
HOME HARDWARE had replacement cartridge and Moen was quick to respond. WORKS SMOOTHLY NOW!! ... Failed after 3 years! The valve will not open to allow water flow. Never had any valve fail so fast. EDIT: Home Hardware, had MOEN replacement cartridge at NO COST!. New one works very smoothly, far better than original.
Hello Glynis. I would like to assist you further. Please send us a direct message with your address, phone number, email address, full view picture of the unit and a copy of the purchase receipt if still available.
@@moenfaucets per Edit. Home Hardware carries replacement cartridges from MOEN. Removal and replacement was explained in package. The new cartridge works very smoothly. Customer Service was not available when I called but fortunately Home Hardware came through. I take it MOEN provides the cartridges to Home Hardware. Thank you for your quick response.
on valve with male threads, the inside of the port is 1/2" tubing size and a pex fitting x swet adapter will work well and no mechanical joints to leak
I hate these types of videos from the manufacturers. It isn't an actual "real world" scenario. Everything here, including the freaking bathroom is made up and picture perfect.
What do you do with the *tub outlet* if you only have a shower and no tub? The tap I just bought requires (one valve of your choice, out of a possible four), all of which have one hot water and one cold water inlet, one shower outlet and one *tub outlet*
Hi leaf16nut, In order to use the 4 port valve for a shower only install, you will need to cap off the tub port. For additional technical support please feel free to contact us directly at 1-800-289-6636. Our office hours are Mon-Fri 8:00am-7:00pm EST.
Hello Celeste. We'd be happy to help! You can call us at 1-800-289-6636 in the US or at 1-800-465-6130 in Canada. If you would prefer to send us an email, visit our website at www.moen.com and click on the “Service” option and then choose the “Contact Us” button.
Wayne Wallace The push to fit couplings cannot be used unless you have permanent access to check the fittings for leaks. The o-rings can deteriorate and leak and little bits of o-ring can flake off and damage plumbing components, ice makers, etc and little particles can show up in your water.
@@ronh9384 You do realize the main cartridge on the MOEN valve is made up of plastic and O rings right ?? So the O rings on the push connection will fail, but the O rings CONSTANTLY moving in and out/rotating inside the cartridge valve are perfectly fine. Just checking :) Also I'm not saying to go ahead and use push connects since there is a whole debate on that one too, but there are a lot of fail points in the plumbing system that expose it to leaks/failure etc.
KRALTAIR47, The Moen Posi-Temp valve shown in the video with PEX connections is Moen model number 2580. For the Moen Posi-Temp valve with CC connections, you will need Moen model number 2520 or 2570.
How come he moved the handle adaptor to 9 o'clock [the tab was at 3 o'clock] , when he adjusted for the temperature over 120 degrees, the handle adaptor was put back on...the tab was at 10 o'clock
Hello Carol. The handle adapter is turned all the way back to 9 o'clock so you can test that your full hot, 120 degrees, is coming out. If the temperature at 9 o'clock is over 120 degrees, then you remove the adapter and adjust the temperature limit stop so the handle will stop before that position. Please send us a direct message if we can assist you further.
Homeowners beware. Instruct your plumbers accordingly. Moen's "plaster guards" in general have been and always will be a joke when used to judge valve/handle depth at rough in. Moen's defacto standard always sets handles further out and off the escutcheon than what 99% of homeowners expect. If you want a tight fit, plan ahead.
How far are they usually off? My tile man told me to allow 3/4” past the framing for cement boards and tile... so how far out should I set the moen plastic insert if I want a right fit?
@@jlynchtx I wish I could give you an exact measurement. I don't recall ours and the thickness of tiles, backerboards and mortar layers are going to vary case by case. We made an 18"x18" mock up as our gauge; Hardie board (skipped the Redguard, since waterproofing was inconsequential for a mock up), mortar with the exact same notched trowel as for the finish job, the actual tile we were using and the proper circumference hole. It was extra work but we could gauge the mounting depth of the valve on an open framed wall exactly and get a tight fit. Most don't care that much, but we were really annoyed by two previous master bath remodels where we went by the instructions and it stuck out too far, awkwardly. This is our last house, I'll die in this one (if it doesn't kill me first, lol) so we made an extra effort.
John Krug Ok, thanks for the feedback. I think I will grab some materials the same thickness and do a mock up of sorts too. I want to know exact,y where to install it and not just guess and regret it later. I think I would be annoyed also if it sticks out way too far.
@@slappy2825 Thanks John. Is it the face of the plaster guard that should be flush with the face of the tile? Or should the plaster guard be recessed a little? If so, then by what amount?
@@cryptocomplete In my experience, Moen has thin-wall and thick-wall recommendations in their instruction manual. But installing three or four of these, the plaster guards always end up locating the valve handle way too far out beyond the face of the escutcheon regardless. I can't say if it is more a question of aesthetics or better for keeping water out from behind the valve handle. We just thought it looked awkward when the handle stuck out so far. Preferring the handle base more flush against the escutcheon (e.g. 1/16" gap) we mounted the valve set further back in the wall. The plaster guard was no help making this measurement precisely, so we mocked it up beforehand on scrap material.
Hello Tin Man. Moen tub/shower products require 1/2" copper piping for the tub drop pipe to ensure that there is no "stacking" or back up in the system. If water starts to "stack" it will come out of both the tub spout and the showerhead when trying to fill the tub.
is your support number designed to frustrate the caller? I call, they put me on hold, then get disconnected, now I can't get through to anyone. ..every single call back time I input is not allowed so I exceed the number of entries. .sick and tired of calling your 1800BUYMOEN number.. ..
Hello Mallomar_gataffy. The handle adapter appears loose in the video as it is not tightened into place until after the temperature limit stop is set for how far into the hot water the handle can rotate.
Hello Travis, when installing this valve with the PEX to PEX installation you can only use PEX on the hot and cold inlets, and the outlet going from the valve to the shower head. The valve going to the tub spout will have to be a 1/2" metal pipe (copper, galvanized, or brass IPS).
The soldering step in this video is confusing. They say: solder it, but first remove the cartridge. Then they never mention soldering again. It should just say, remove cartridge to prepare for soldering, solder, and then flush.
Exactly, don't you need to clean and put in flux before you start attaching the PEX? As well, you probably need to be somewhat timely on the soldering, is it not possible for the tape to melt if the body gets too warm?
What about waterproofing the handle escutcheon? Big hole back there. Otherwise quite clear video. If you're intimidated by this job have someone else do it.
Why do you need a temp limit stop?? The water isnt going to be any more hot than what comes out of the water heater which shouldnt be no more than 120 degrees anyway.
Hello MountaineerApiary, the temperature limit stop allows you to restrict the handle from turning to the hottest point of the valve. This feature is helpful if you do not want the water to reach 120 degrees. Example: A bathroom children will use. Should you have any additional questions, please contact Moen directly at 800-289-6636. Our business hours are 9:00 a.m. - 5:30 p.m. Monday through Friday Eastern Time.
This free floating installation wouldn't hold up very long with the gorillas living in my house. Really, has any professional ever installed one in this manor, and was able to sleep at night. Relying on the pipes, or pex in this case, to hold the valve securely? It would feel like it's coming out of the wall. My original Moens were all installed braced by wood blocking. I will figure some way to support it again. I would have expected more from Moen. Sad state of intellectual craftsmanship.
I'm watching this because a roach crawled into the space between the escutcheon and the handle & I wanna know where it went or else I'm never showering again 😂
NOT 1/2" copper tube. 1/2" copper pipe. This industry has specific names for specific items. There is a reason for using the proper description. Doing an instructional video may be one of those important times.
Hello Captain. I am sorry to hear you are having issues with your faucet. Please send us a private message with your first/last name, address, phone number, email address, full picture of the faucet installed, brief description of the issues and a copy of the receipt.
The guy that did this video doesn't know his ass from a hole in the ground when it comes to telling people how to go about a technical project Lot's of room for a DIY to make serious and damaging errors.
+DubleDeuce True. I followed their instructions (both printed and their video) to a tee and ended up with a 5/8 gap between the escutcheon and the handle. Then I looked at Amazon's reviews (as well as numerous other places on the 'net) and many people had the exact same problem. I started noticing that professionally installed showers with Moen valves also had this problem, both at my parent's house and at the very-high-end country club where I visited once. Their printed instructions are among the worst I've ever encountered.
I just installed one of these so my advice is don't follow Moen's instructions. I don't think anyone there can speak english and for sure can't read a ruler. If you install the plaster ground even with the finished wall the handle will have a large gap (mine was 3/4 inches) . As someone else here pointed out if you notice in this video when he is installing the screw in the handle you can see the gap behind the handle (which is what I had) and in the finished video the gap is missing so the installer altered something which you can't do after it is installed. Luckily I heard this is a problem with Moen valves and I installed the valve on a moveable 2x4 and since the wall was open behind the shower I could adjust the valve so there was no gap. Most people won't be able to do this. My best advice is don't buy a Moen valve until they fix this issue.
Hello jimjenkins03, The Moen Posi-Temp trims are designed to have a gap between the handle and the escutcheon plate to ensure the screws on the plate do not interfere with the operation of the handle. Depending on the installation, it is acceptable for this gap to be between ½” - 1”. Many times this gap is defined by the amount of room behind the shower wall the installer has to position the valve.
@@moenfaucets If you think 3/4 of an inch looks good have at it. I've installed numerous showers/bath rooms in my 50 years as a carpenter/electrician/plumber and I have never had to deal with this (after reading the instructions) until I purchased a Moen. Might as well have it stick out 10 inches and hang a towel on it. There is more than just one RUclips channel that has noted that their instructions are just wrong.
A different model Moen, installed by licensed plumber. Handle has gap, & jingle. His explanation didn't give me peace of mind. Called Moen myself, was told HANDLE shouldn't JINGLE. Another is being sent out with instruction. I don't thi k this will be a resolution. So Very Disappointed,
Hello PJ S. Please allow up to 48 business hours for us to respond to your email. You may also give us the beginning of your email address so we can find your email and respond faster to you.
This video is WORSE than the instructions that come inside the box, I had to space the shower valve several times after the install, thankfully I left the outer wall exposed for wiring etc in the hallway otherwise the shower valve would have been an ugly mess.
So many skipped steps. Helpful, but certainly not complete. Um, installing pex to the shower arm? He's screwing it in here. Screwing into what exactly?
These instructions were very basic and vague. Once you get behind the walls it's very easy to get confused and make mistakes. If you don't know how to properly install one of these let a professional do it because it could result in a leak causing damages to your house.
Yeah and now your house is going to get robbed of all tis copper stupid. That's the only reason they went to synthetic materials, cheaper and worthless on the street.
@@darrenr1194 PEX is a joke, its the next gimmick, ya its great and easy to work with, but cant hook it up to a water heater, joints sag as they are plastic. Plus NOTHING will stick to copper, it was amazing for sewage too but just too costly given the size requirements and welding a 3 -4" pipe couldnt have been fun. For water, copper still remains one of the best options. I mean there is brass and stainless steel, but best cost effective option :)
Hi Roy Bellamy, For technical assistance including installation support feel free to contact us by phone at 1-800-289-6636. Our current office hours are Mon - Fri 8am - 7pm EST.
They did say at the beginning of the video "installation in existing pipe". But yes, one could eliminate some of those extra couplings in a new install.
Moen sets you up for failure if you're a homeowner! They used teflon tape without thread sealant(pipe dope)"Megalok" or "Rectorseal" are good .Those joints will leak for sure .Also soldering after putting on Teflon tape is wrong! Wrong wrong wrong!!!! What a disappointing video from Moen .
First thing should have been pull valve and solder then cool valve and rest of assembly and tub spout be careful if irs a piece of shit plastic one I mean really plastic tub spout what a joke
This free floating installation wouldn't hold up very long with the gorillas living in my house. Really, has any professional ever installed one in this manor, and was able to sleep at night. Relying on the pipes, or pex in this case, to hold the valve securely? It would feel like it's coming out of the wall. My original Moens were all installed braced by wood blocking. I will figure some way to support it again. I would have expected more from Moen. Sad state of intellectual craftsmanship.
Absolutely needs wood blocking. At least that is what I do. I HATE sloppy feeling valves, seems that it is not a great idea due to potential wreckage behind the wall ;->
Actually you can see the pipes are strapped down with j hooks and I'm sure they have a drop ear 90 where the shower head goes. They just dont show it since this is supposed to be a replacement, not a new installation.
With a copper or galvanized pipe connection it’s pretty sturdy but you’re still supposed to mount it to a cross beam. That’s why there are 2 screw holes on the valve

 Хобби
Хобби


I completed the installation myself and it wasn't hard. I went from a 2 handle to a 1. It required adding a wire backing followed by adding mortar between the wire where the new tile would be. Once that was level and in place, I cut the tile to match the black template and stuck tile in place tile mix & spacer between tiles, then grouted. For the dry wall, you can buy some plastic strips & use spackling to stick it along both sides. Then place the cut drywall back, spackle, sand & paint.
good video I held it in place with steel angle iron. BOOM
I liked how they soaked the drywall when flushing.
😂
Thanks! Big help information.
Lmao I knew what kind of video this was going to be when a guy who looks like he just got off a shift at Best Buy walks in to do the job
Very goooooood my friend.
Great and clear instructions... thanks
When working with pex and copper do the soldering first... pex flexes, so you don't have to leave it loose in the spigot pipe like he did to move it. Soldering 1/2 copper to the inside of the male brass fitting like he did works, but, if he put a female thread with a half inch sweat, replacing the valve in the future means no sweating would be required - making it easier for any homeowner; make sure the access panel allows for a full rotation if done this way.
Always sodder your pipe first before applying Teflon tape or the pex tubing. It gets hot and could cause future leaks. Let it cool down before applying Teflon. Cool down after sodder sets with a cold rag
Good tutorial..
Sweet tool box brah
Great help
I find it interesting that the final image of the install shows the shower valve handle much closer to the wall/trim ring than the finished result of the install video. The video shows the handle sticking out too far as the valve was not recessed enough and it does look bad. The entire thin wall/thick wall segment and diagram is confusing as well. I understand that the video is more about the Pex connections but it would be nice if it was at least accurate and focused on details such as what I've mentioned.
Scott Claerhout
Many necessary details were not mentioned in this video. It was a good video as a guide for people who have some plumbing experience.
You should solder the first connection before anything else or don't you know that heat and plastic don't go well ??
Good job
wow if only it was this easy everytime
Should the Posi temp valve be mounted to a wooden brace inside my shower framing or just floating like this held by the Pex connections?
Hello Kane. The Posi-Temp rough-in valve can be mounted to a bracer/backing board ran between the wall studs or it can have the supply lines mounted/attached to the wall studs as shown in the video.
A good plumber always puts blocking in to secure the valve when possible.
Its important to note, a good set of star headed bits help easier to tighten the two screws for plumbing , otherwise need Allen wrenches. Good video, we use a better teflon tape, and wrap 3 times around, for new valve installation.
What happens if instead of installing the shower head at the recommended 77"height I do to the full 8 ft? I was trying to do the ceiling rain fall effect.
If the shower head is installed above the suggested height, there may be a delay in the water exiting the shower head. If you need additional installation assistance, please contact 1-800-289-6636.
Do I have a bad valves
When I turn the shower handle, the water is coming out from the lower valve and the shower head valve. Can you Please tell me where I went wrong?
P.S . I followed your exact procedure, it is a new installation with the same model you installed in your instructional video.
Thank you very much
simon choucroun
Do I have to mount or fix the valve on wall?
Hello Yikan, you will mount the valve behind your wall between 2 2x4's. The valve should include a plaster gound in the packaging to assist in positioning the valve for the finished wall.
Thanks for the educational video. One thing in a new build with full access... you would put a backing 2x4 at both the shower valve and up at the shower head 90 degree brass fitting to fully secure those items... not just let them float in thin air with PEX. I will say that my existing tub shower which was supposedly done by a "professional" looks like hell. Big gaps between fixtures and walls, little to no caulking or plumbers putty, and the tub overflow leaked like a sieve before I fixed it. That is why I do things myself. Why pay someone to screw it up, when I can screw it up myself?
For additional installation assistance, please contact 1-800-289-6636 (US) or 1-800-465-6130 (Canada). Thank you.
Can you tell me what the issue might be on this shower?
Shower plumbing incorrectly installed.
Michael Richards I think it was it was in stall wrong, it puts water out only
Also, don't forget to put caulk around 3/4 of the back of shower valve flange. They don't mention it in the video. Leave a small section uncaulked at the base to allow any water that gets back behind the flange to be able to drain back out into the tub and down the shower wall instead of back behind your shower wall.
O(k
Has 6 unnecessary connections... just 6 more places for it to leak. Both hot and cold feeds have so many pex couplings I don't know if they could fit any more in there.
great
I’d like to know why the big 4 inch hole why not 2 inch so the tile can have a backing ? ?
Hello Trad Pro. Moen recommends the larger hole so the plaster ground can be installed which will help determine the placement of the rough valve in the wall.
Video does no show any bracing on the 3 Port Valve. Does valve need to be braced when using pex?
Hello kenb. Moen leaves the bracing of the valve in the wall up to the installers' discretion.
Yes, you need to brace the valve
This was a good video . Gave me all the information I needed. If you don't understand it might be better just to hire a plumber. By the way, PEX is very simple. Had plummer do a passable job with copper, I did a better job with PEX.
I hired A prostitute
well then what have you learned Dorothy. Is it their no plsce like Moen. foolio
+fading fast nice work... was your new higher worth it..😎😞☻
This video should start out with... In a perfect world... I have no access to my pipes.. do i have to start cutting holes in my wall?
Yes, I had to, Drawers were installed BEHIND the Access door, and they used heavy duty construction glue to seal the door shut. I will not saw off the Drawer rails to "get in there" either. Perfect video world. I'll see how good I am by FACING the front to do this. Idiot 1940 workers, geeeez.
+mike domenge VERY confusing for a DIYer that is looking to complete this project without any outside help. Can you say 1-800 PLUMBER.
Mike Domenge
I KNOW! You're saying to replace a major plumbing aspect of my home I have to open a wall? FUCK YOU MOEN!!!
@@bobdobbs7828 Better get back on your anger meds there Bob.
There was no plumbers putty put around the trim ring to prevent shower water from leaking behind the wall.
My moen plate does not fit over the valve and I was told there all standard size?
Hello Nextround I. Moen tub/shower escutcheon plates are only made to install onto Moen Rough-in valves. If you have a Moen Posi-Temp rough-in valve-has a rotate only handle, a Moen Posi-Temp escutcheon plate will fit; if you have a Moen Moentrol rough-in valve-has a push/pull handle, a Moen Moentrol escutcheon plate will fit.
Anda muy limpiecito para andar haciendo esos trabajos ese playaso
After installing the cartridge, water does not flow from the shower head. We've taken out the cartridge and turned on the water and there is no problem with the flow. What could be causing this problem?
Hello Aisha, it is possible that the valve needed to be flushed prior to installing the replacement cartridge. To fully troubleshoot your faucet and resolve your issue, please contact Moen directly at 800-289-6636. Our business hours are from 8am-7pm Monday through Friday.
You can also fill out the form at the address below:
www.moen.com/customer-support/contact-us
My water is not coming out as hot as it should be. How do I adjust this type of valve?
Hello for further assistance with your Moen product, please contact Moen directly at 800-289-6636. Our business hours are from 8am - 7pm or you can fill out the link below to send an email:
www.moen.com/customer-support/contact-us
What would cause the tub spout and shower head to run at the same time
Hello Sanchez09nt. The issue you are describing is referred to as stacking. Please review the following link for issues that would cause stacking:
solutions.moen.com/Article_Library/What_is_a_Stacking_Leak%3F
I see it flopping around if valve is not mounted
I bought a Moen shower kit but I am not able to regulate the water flow, all the water come rushing in.Somebody at homedepot told me that all new kits and it doesn't matter the brand come like that , that you can't regulate the amount of water that you get except by getting a new shower head from which you regulate the water flow. is that how it works???
katalina125 Moen makes two main types of shower valves, Posi-Temp and Moentrol. The Posi-Temp valve will turn on and operate at full pressure. The Moentrol Valve will allow you to control both volume and temperature. Should you have additional questions, you may contact us at 1-800-BUY-MOEN (1-800-289-6636). Our business hours are 8:00 a.m. - 7:00 p.m. Monday through Friday EST.
Thanks for replying. Is that phone number for Canada as well?
For Moen Canada, please contact 1-800-465-6130.
HOME HARDWARE had replacement cartridge and Moen was quick to respond. WORKS SMOOTHLY NOW!! ... Failed after 3 years! The valve will not open to allow water flow. Never had any valve fail so fast.
EDIT: Home Hardware, had MOEN replacement cartridge at NO COST!. New one works very smoothly, far better than original.
Hello Glynis. I would like to assist you further. Please send us a direct message with your address, phone number, email address, full view picture of the unit and a copy of the purchase receipt if still available.
@@moenfaucets per Edit. Home Hardware carries replacement cartridges from MOEN. Removal and replacement was explained in package. The new cartridge works very smoothly. Customer Service was not available when I called but fortunately Home Hardware came through. I take it MOEN provides the cartridges to Home Hardware. Thank you for your quick response.
Moen covers the cartridge for life you call them with your model number and they mail it to you at no cost.
Why use two short pieces for connections to valve
Hello Keith. The length of the parts attached to the valve is based on the existing plumbing and accommodating the PEX adapters.
on valve with male threads, the inside of the port is 1/2" tubing size and a pex fitting x swet adapter will work well and no mechanical joints to leak
I hate these types of videos from the manufacturers. It isn't an actual "real world" scenario. Everything here, including the freaking bathroom is made up and picture perfect.
What do you do with the *tub outlet* if you only have a shower and no tub?
The tap I just bought requires (one valve of your choice, out of a possible four), all of which have one hot water and one cold water inlet, one shower outlet and one *tub outlet*
Hi leaf16nut, In order to use the 4 port valve for a shower only install, you will need to cap off the tub port. For additional technical support please feel free to contact us directly at 1-800-289-6636. Our office hours are Mon-Fri 8:00am-7:00pm EST.
Perfect, thank you Moen! (:
Should have done the soldering before installing all those heat sensitive connections
I agree
9 www.google.com/flights/?q=plug+power+stock+quote&tbm=flm&source=lnms#flt=/m/0f2v0./m/0n1rj.2020-06-13.MIATPA0AA2624*/m/0n1rj./m/0f2v0.2020-06-17.TPAMIA0AA2213;c:USD;e:1;sd:1;t:f;sp:2.USD.28170*2.USD.29620 www.google.com/flights/?q=plug+power+stock+quote&tbm=flm&source=lnms#flt=/m/0f2v0./m/0n1rj.2020-06-13.MIATPA0AA2624*/m/0n1rj./m/0f2v0.2020-06-17.TPAMIA0AA2213;c:USD;e:1;sd:1;t:f;sp:2.USD.28170*2.USD.29620 www.google.com/flights/?q=plug+power+stock+quote&tbm=flm&source=lnms#flt=/m/0f2v0./m/0n1rj.2020-06-13.MIATPA0AA2624*/m/0n1rj./m/0f2v0.2020-06-17.TPAMIA0AA2213;c:USD;e:1;sd:1;t:f;sp:2.USD.28170*2.USD.29620 www.google.com/flights/?q=plug+power+stock+quote&tbm=flm&source=lnms#flt=/m/0f2v0./m/0n1rj.2020-06-13.MIATPA0AA2624*/m/0n1rj./m/0f2v0.2020-06-17.TPAMIA0AA2213;c:USD;e:1;sd:1;t:f;sp:2.USD.28170*2.USD.29620 www.google.com/flights/?q=plug+power+stock+quote&tbm=flm&source=lnms#flt=/m/0f2v0./m/0n1rj.2020-06-13.MIATPA0AA2624*/m/0n1rj./m/0f2v0.2020-06-17.TPAMIA0AA2213;c:USD;e:1;sd:1;t:f;sp:2.USD.28170*2.USD.29620 www.google.com/flights/?q=plug+power+stock+quote&tbm=flm&source=lnms#flt=/m/0f2v0./m/0n1rj.2020-06-13.MIATPA0AA2624*/m/0n1rj./m/0f2v0.2020-06-17.TPAMIA0AA2213;c:USD;e:1;sd:1;t:f;sp:2.USD.28170*2.USD.29620 www.google.com/flights/?q=plug+power+stock+quote&tbm=flm&source=lnms#flt=/m/0f2v0..2020-06-13*./m/0f2v0.2020-06-17;c:USD;e:1;sd:1;t:e www.google.com/flights/?q=plug+power+stock+quote&tbm=flm&source=lnms#flt=/m/0f2v0..2020-06-13*./m/0f2v0.2020-06-17;c:USD;e:1;sd:1;t:e www.google.com/flights/?q=plug+power+stock+quote&tbm=flm&source=lnms#flt=/m/0f2v0..2020-06-13*./m/0f2v0.2020-06-17;c:USD;e:1;sd:1;t:e www.google.com/flights/?q=plug+power+stock+quote&tbm=flm&source=lnms#flt=/m/0f2v0..2020-06-13*./m/0f2v0.2020-06-17;c:USD;e:1;sd:1;t:e www.google.com/flights/?q=plug+power+stock+quote&tbm=flm&source=lnms#flt=/m/0f2v0..2020-06-13*./m/0f2v0.2020-06-17;c:USD;e:1;sd:1;t:e www.google.com/flights/?q=plug+power+stock+quote&tbm=flm&source=lnms#flt=/m/0f2v0..2020-06-13*./m/0f2v0.2020-06-17;c:USD;e:1;sd:1;t:e
Mine just came off and I’m trying to figure out how to put it back on
Hello Celeste. We'd be happy to help! You can call us at 1-800-289-6636 in the US or at 1-800-465-6130 in Canada. If you would prefer to send us an email, visit our website at www.moen.com and click on the “Service” option and then choose the “Contact Us” button.
Hey, what's wrong with the push and fit coupling? They are much easier than crimp fitting. :-)
Wayne Wallace The push to fit couplings cannot be used unless you have permanent access to check the fittings for leaks. The o-rings can deteriorate and leak and little bits of o-ring can flake off and damage plumbing components, ice makers, etc and little particles can show up in your water.
@@ronh9384 You do realize the main cartridge on the MOEN valve is made up of plastic and O rings right ??
So the O rings on the push connection will fail, but the O rings CONSTANTLY moving in and out/rotating inside the cartridge valve are perfectly fine.
Just checking :)
Also I'm not saying to go ahead and use push connects since there is a whole debate on that one too, but there are a lot of fail points in the plumbing system that expose it to leaks/failure etc.
@@ronh9384 Sharkbites aka the most common push to fit connectors are safe in wall and under ground if installed properly. No access needed.
What part number is this? Can I solder all 4 connections on this?
KRALTAIR47, The Moen Posi-Temp valve shown in the video with PEX connections is Moen model number 2580. For the Moen Posi-Temp valve with CC connections, you will need Moen model number 2520 or 2570.
Moen what comes in the 2520 cc box? Is it a complete kit like the adler box?
KRALTAIR47 The Moen 2520 includes the Posi-Temp rough-in valve only. A Moen Posi-Temp trim kit would have to be purchased separately.
How come he moved the handle adaptor to 9 o'clock [the tab was at 3 o'clock] , when he adjusted for the temperature over 120 degrees, the handle adaptor was put back on...the tab was at 10 o'clock
Hello Carol. The handle adapter is turned all the way back to 9 o'clock so you can test that your full hot, 120 degrees, is coming out. If the temperature at 9 o'clock is over 120 degrees, then you remove the adapter and adjust the temperature limit stop so the handle will stop before that position. Please send us a direct message if we can assist you further.
Homeowners beware. Instruct your plumbers accordingly. Moen's "plaster guards" in general have been and always will be a joke when used to judge valve/handle depth at rough in. Moen's defacto standard always sets handles further out and off the escutcheon than what 99% of homeowners expect. If you want a tight fit, plan ahead.
How far are they usually off? My tile man told me to allow 3/4” past the framing for cement boards and tile... so how far out should I set the moen plastic insert if I want a right fit?
@@jlynchtx I wish I could give you an exact measurement. I don't recall ours and the thickness of tiles, backerboards and mortar layers are going to vary case by case. We made an 18"x18" mock up as our gauge; Hardie board (skipped the Redguard, since waterproofing was inconsequential for a mock up), mortar with the exact same notched trowel as for the finish job, the actual tile we were using and the proper circumference hole. It was extra work but we could gauge the mounting depth of the valve on an open framed wall exactly and get a tight fit. Most don't care that much, but we were really annoyed by two previous master bath remodels where we went by the instructions and it stuck out too far, awkwardly. This is our last house, I'll die in this one (if it doesn't kill me first, lol) so we made an extra effort.
John Krug Ok, thanks for the feedback. I think I will grab some materials the same thickness and do a mock up of sorts too. I want to know exact,y where to install it and not just guess and regret it later. I think I would be annoyed also if it sticks out way too far.
@@slappy2825 Thanks John. Is it the face of the plaster guard that should be flush with the face of the tile? Or should the plaster guard be recessed a little? If so, then by what amount?
@@cryptocomplete In my experience, Moen has thin-wall and thick-wall recommendations in their instruction manual. But installing three or four of these, the plaster guards always end up locating the valve handle way too far out beyond the face of the escutcheon regardless. I can't say if it is more a question of aesthetics or better for keeping water out from behind the valve handle. We just thought it looked awkward when the handle stuck out so far. Preferring the handle base more flush against the escutcheon (e.g. 1/16" gap) we mounted the valve set further back in the wall. The plaster guard was no help making this measurement precisely, so we mocked it up beforehand on scrap material.
good stuff
We're glad this was helpful to you!
Moen
If PEX is okay for supply lines and to shower head why use copper to tub spout?
Hello Tin Man. Moen tub/shower products require 1/2" copper piping for the tub drop pipe to ensure that there is no "stacking" or back up in the system. If water starts to "stack" it will come out of both the tub spout and the showerhead when trying to fill the tub.
pex on a tub spout causes too much back pressure and the shower will work at the same time as tub spout
@@moenfaucets you can get around this by using 3/4" Pex from the valve to the spout.
Hello Andy. We only recommend copper for the tub drop line to prevent the shower and tub from running at the same time.
@@moenfaucets Would galvanized pipe work instead of copper?
7:16 perfect
🤣
Necesito saber como poder solucionar no me esta saliendo agua caliente
Hi John Restrepo, Based on your concern you may need to replace the Moen posi-temp cartridge part # 1222.
Buy a water heater.
is your support number designed to frustrate the caller? I call, they put me on hold, then get disconnected, now I can't get through to anyone. ..every single call back time I input is not allowed so I exceed the number of entries. .sick and tired of calling your 1800BUYMOEN number.. ..
You never soldered the copper pipe going to the down spout in your instructions.
why is there so much slop in the handle adapter...
Hello Mallomar_gataffy. The handle adapter appears loose in the video as it is not tightened into place until after the temperature limit stop is set for how far into the hot water the handle can rotate.
Why did they say 3 pipes but then count all 4?
Hello Travis, when installing this valve with the PEX to PEX installation you can only use PEX on the hot and cold inlets, and the outlet going from the valve to the shower head. The valve going to the tub spout will have to be a 1/2" metal pipe (copper, galvanized, or brass IPS).
The soldering step in this video is confusing. They say: solder it, but first remove the cartridge. Then they never mention soldering again. It should just say, remove cartridge to prepare for soldering, solder, and then flush.
+DukeLaCrosse20 it also does NOT go into the vagaries of soldering like cleaning and fluxing the copper joints.
Exactly, don't you need to clean and put in flux before you start attaching the PEX?
As well, you probably need to be somewhat timely on the soldering, is it not possible for the tape to melt if the body gets too warm?
What about waterproofing the handle escutcheon? Big hole back there.
Otherwise quite clear video. If you're intimidated by this job have someone else do it.
+Carl brill..and you've lerned to spell escutcheon
Deal with the big hole. End of escutcheon!
Hello colleagues. What a multifaceted work we have.
Why do you need a temp limit stop?? The water isnt going to be any more hot than what comes out of the water heater which shouldnt be no more than 120 degrees anyway.
Hello MountaineerApiary, the temperature limit stop allows you to restrict the handle from turning to the hottest point of the valve. This feature is helpful if you do not want the water to reach 120 degrees. Example: A bathroom children will use. Should you have any additional questions, please contact Moen directly at 800-289-6636. Our business hours are 9:00 a.m. - 5:30 p.m. Monday through Friday Eastern Time.
“Advanced project lmao”. Maybe if my parents were brother and sister.
This free floating installation wouldn't hold up very long with the gorillas living in my house. Really, has any professional ever installed one in this manor, and was able to sleep at night. Relying on the pipes, or pex in this case, to hold the valve securely? It would feel like it's coming out of the wall. My original Moens were all installed braced by wood blocking. I will figure some way to support it again. I would have expected more from Moen. Sad state of intellectual craftsmanship.
I'm watching this because a roach crawled into the space between the escutcheon and the handle & I wanna know where it went or else I'm never showering again 😂
LOL
NOT 1/2" copper tube. 1/2" copper pipe. This industry has specific names for specific items. There is a reason for using the proper description. Doing an instructional video may be one of those important times.
It's copper tubing that is commonly referred to as "pipe".
My Moen faucet failed after 6 years.
Hello Captain. I am sorry to hear you are having issues with your faucet. Please send us a private message with your first/last name, address, phone number, email address, full picture of the faucet installed, brief description of the issues and a copy of the receipt.
wow moen I buy over 300,000 a year from you guys and you put out a video like this! I'm going to talk to my moen rep Kurt. very very disappointed.
I hear you there, but life goes on that way. It's with literally anything really. Just find another way to make your business more stable.;)
vitaminwaterlover. But even when people see it they will call the plumber ,why worry,he is going to loose only the handy
The guy that did this video doesn't know his ass from a hole in the ground when it comes to telling people how to go about a technical project Lot's of room for a DIY to make serious and damaging errors.
+DubleDeuce True. I followed their instructions (both printed and their video) to a tee and ended up with a 5/8 gap between the escutcheon and the handle. Then I looked at Amazon's reviews (as well as numerous other places on the 'net) and many people had the exact same problem. I started noticing that professionally installed showers with Moen valves also had this problem, both at my parent's house and at the very-high-end country club where I visited once. Their printed instructions are among the worst I've ever encountered.
+duke la cross...big duke my man. if your on the golf club circuit. hire a plumber.
I just installed one of these so my advice is don't follow Moen's instructions. I don't think anyone there can speak english and for sure can't read a ruler. If you install the plaster ground even with the finished wall the handle will have a large gap (mine was 3/4 inches) . As someone else here pointed out if you notice in this video when he is installing the screw in the handle you can see the gap behind the handle (which is what I had) and in the finished video the gap is missing so the installer altered something which you can't do after it is installed. Luckily I heard this is a problem with Moen valves and I installed the valve on a moveable 2x4 and since the wall was open behind the shower I could adjust the valve so there was no gap. Most people won't be able to do this. My best advice is don't buy a Moen valve until they fix this issue.
Hello jimjenkins03, The Moen Posi-Temp trims are designed to have a gap between the handle and the escutcheon plate to ensure the screws on the plate do not interfere with the operation of the handle. Depending on the installation, it is acceptable for this gap to be between ½” - 1”. Many times this gap is defined by the amount of room behind the shower wall the installer has to position the valve.
@@moenfaucets If you think 3/4 of an inch looks good have at it. I've installed numerous showers/bath rooms in my 50 years as a carpenter/electrician/plumber and I have never had to deal with this (after reading the instructions) until I purchased a Moen. Might as well have it stick out 10 inches and hang a towel on it. There is more than just one RUclips channel that has noted that their instructions are just wrong.
A different model Moen, installed by licensed plumber. Handle has gap, & jingle. His explanation didn't give me peace of mind. Called Moen myself, was told HANDLE shouldn't JINGLE. Another is being sent out with instruction. I don't thi k this will be a resolution. So Very Disappointed,
I've called and emailed and still can't get anyone to respond..your customer service is horrible
Hello PJ S. Please allow up to 48 business hours for us to respond to your email. You may also give us the beginning of your email address so we can find your email and respond faster to you.
They leak cause you dont tighten them enough...lol, how the hell you get a leak on threaded adapters
This video is WORSE than the instructions that come inside the box, I had to space the shower valve several times after the install, thankfully I left the outer wall exposed for wiring etc in the hallway otherwise the shower valve would have been an ugly mess.
So many skipped steps. Helpful, but certainly not complete. Um, installing pex to the shower arm? He's screwing it in here. Screwing into what exactly?
a drop ear
These instructions were very basic and vague. Once you get behind the walls it's very easy to get confused and make mistakes. If you don't know how to properly install one of these let a professional do it because it could result in a leak causing damages to your house.
Darren R
Darren R tell who do I call
If you need assistance, please call 1-800-BUY MOEN (289-6636).
b
One thing I hate about moan shower valve is the nub sticking out the back so you can't secure it to a stud.
But you can, thats what the corner screws are for, granted you can't on the 2 inch part of a 2x4, so I had to add a block to the 2x4 to screw it in.
No
T
pex pipes are too much to deal with! I piped my house with copper just easier!
Yeah and now your house is going to get robbed of all tis copper stupid. That's the only reason they went to synthetic materials, cheaper and worthless on the street.
I can pipe an entire house with pex in just one day. Whereas copper takes a lot longer and is more difficult to work with.
True, but the only thing is I was only taught to pipe with copper; and in my opinion I would rather weld than pay more money for rentals.
@@darrenr1194 PEX is a joke, its the next gimmick, ya its great and easy to work with, but cant hook it up to a water heater, joints sag as they are plastic. Plus NOTHING will stick to copper, it was amazing for sewage too but just too costly given the size requirements and welding a 3 -4" pipe couldnt have been fun.
For water, copper still remains one of the best options. I mean there is brass and stainless steel, but best cost effective option :)
Damn it there’s a freaking sealed in book shelf or shelving behind the shower maybe that’s where the access wall is... fuck it ... IM DONE ...
did you do a shower valve?
Hi Roy Bellamy, For technical assistance including installation support feel free to contact us by phone at 1-800-289-6636. Our current office hours are Mon - Fri 8am - 7pm EST.
Too many crimps ...
Not enough bloods.
They did say at the beginning of the video "installation in existing pipe". But yes, one could eliminate some of those extra couplings in a new install.
in what fucking planet does a plumber do a repair in white pants, please cut the drama out !
Moen sets you up for failure if you're a homeowner! They used teflon tape without thread sealant(pipe dope)"Megalok" or "Rectorseal" are good .Those joints will leak for sure .Also soldering after putting on Teflon tape is wrong! Wrong wrong wrong!!!!
What a disappointing video from Moen .
That bathroom is bigger than the gas chamber at Dachau
If your not a plumber in MA do not do this by yourself. Call a contractor don't be an idiot.
First thing should have been pull valve and solder then cool valve and rest of assembly and tub spout be careful if irs a piece of shit plastic one I mean really plastic tub spout what a joke
This free floating installation wouldn't hold up very long with the gorillas living in my house. Really, has any professional ever installed one in this manor, and was able to sleep at night. Relying on the pipes, or pex in this case, to hold the valve securely? It would feel like it's coming out of the wall. My original Moens were all installed braced by wood blocking. I will figure some way to support it again. I would have expected more from Moen. Sad state of intellectual craftsmanship.
Absolutely needs wood blocking. At least that is what I do. I HATE sloppy feeling valves, seems that it is not a great idea due to potential wreckage behind the wall ;->
Actually you can see the pipes are strapped down with j hooks and I'm sure they have a drop ear 90 where the shower head goes. They just dont show it since this is supposed to be a replacement, not a new installation.
With a copper or galvanized pipe connection it’s pretty sturdy but you’re still supposed to mount it to a cross beam. That’s why there are 2 screw holes on the valve
the hole in surround needs to be only as wide as the faceplate holding screws.