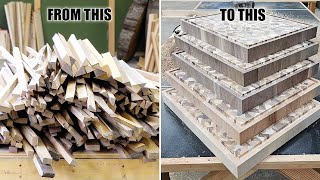
flatten end grain cutting board- planer or no planer

HTML-код
- Опубликовано: 22 мар 2019
- Flatten an end grain cutting board? No planer? No problem. No matter what your cutting board designs are, Andrew shows 3 best ways to level an end grain cutting board. Choose the best method for your shop. Make your cutting board design dead flat so it is as useful as it is beautiful. Follow along to the next 2 videos to learn the fastest food safe finish for your end grain cutting board. and even see an experiment on staining a cutting board.
You can see a portfolio of Andrew Teixeira's work on his website, anamericanartisan.com
Check out these links for more on end grain cutting boards:
Matt Cremona: • Turning Scraps Into En...
Wood by Wright: • How to Make an End Gra...
Amazing Woodworking: • Video
Slovenian Woodworker: • Wish To Learn How To A...
mtmwood: • 3D end grain cutting b...
Products used:
Porter cable 890 series router,
Powermatic - 15" Planer with Helical Cutterhead, Model 15HH
Titebond 3, Titebond III, General Finishes Butcher Block Oil, Mineral Oil, Beeswax, Carnauba Wax,  Хобби
Хобби


Dang. GREAT video. All learning and no BS or filler. I can hear you all the time and can see what you’re doing. Those qualities shouldn’t be rare, but they are. Subscribed.
Thank you SO much!! (Y) Wow, this video just changed a lot for me!
In all the many videos about using a planer I've watched, they always said that a planer could not be used with endgrain boards, and you had to use a drum sander or a router to plane them.
None of them have said it could be done like we've seen here, with a sled and a board in the ends, and it's "only" the ends that will be ripped, and not the whole board.
That's why it's so important to use the huge DIY "library" on specific topics, and watch many videos on each topic, as you never know when you'll get exactly the info that will make your work a lot easier, better looking, and still safe!
This is one of the very good "If you don't know, now you know" moments! :D
Stay safe and creative (y)
My sediments, exactly!
I was able to salvage a walnut end grain cutting board thanks to the sled / planer method. Thanks so much for sharing.
Great job! I appreciate your time and effort.
Great idea!
I'll have to try this technique soon.
Thanks for sharing your talent.
Hi Paul,
Glad you like it. If you use the planer, remember to take small cuts.; like 1/32" or so.
Thanks for watching and commenting.
-Andrew
Great video.
Oh I know this guy, he did the Micro Machines commercials in the 80's!
great info
What do I used to flatten surface irregularities in an already installed butcher block kitchen countertop? Is there a tool for that?
Thank you so much for the video. I'm mentally preparing for my first end grain cutting boards and thought about planing them. So in your professional opinion, it seems feasible but I need to build a sturdy sled? I'll be using a Dewalt 13"/2 speed with three blade head. I can build up a nice sled from scraps of hardwood. Again, thank you and I welcome your suggestion (though you said yes in the video). Best regards! Jr.
No. I hope you didn't use your planer.. If you did, how badly did you fuck the blades on it?
Great video.
I will soon be attempting my 2nd end grain board and was really looking for a better way to make it flat. Ill be making a sled and running through my planer. Thank you
Be careful, take small passes and stay out of the line of fire they can kick back especially if you take off anything more then a 16th
@James Declan wow, i never heard that before, about a planer doing that…
You are one smart cookie! All of your knowledge, experience and patience really reflects in the uber high-quality end result. Well done!
Do you make custom boards? I had one made recently but it got botched. I can see that you really know your stuff so I would love to work with you if I can afford you!
Great content! Two thumbs up!
Hi,
The Cutting board from this video is available. I can also do custom designs. Email me at anamericanartisan@gmail.com for more information.
Thanks for watching and commenting.
-Andrew
Great content. Love the sled and it’s accuracy. The sacrificial boards not so much. I’m considering using four shims to set between the cutting board and the box that are cut about 1/2 “ shorter which should keep everything tight and allow for router to complete the pass without hitting the sacrificial boards. Suspect not as straight forward and would require acrylic top to see where one is at.
What type of blades are you using on your planner.
Are you using a spiral head in the planer?
what kind of router bit did you use on the router
Very informational video thank you! One thing I’m running into is that my edges aren’t square because of the gluing. Should I square the edges even though my faces aren’t flat?
Prob better to flatten first, however method you do that with. Then when u square it up, that’ll take care of any potential tearout. I’m guessing you finish that project by now, and if that’s correct, what route did you go? How did it turn out? Aloha
drum sander works well to level but you'll have to hand-sand with an orbital to remove sanding marks.
Hi James,
Yes, you are right. Thanks for watching and commenting.
-Andrew
I'm already seeing ways to improve this
Andrew...what bit did you use in your router for flat?
There are those flat-bottom router bits out there, shaped jist like forstner bits but without the spurs. Actually, just a wider straight bit is what it is, with the cutting edges flush with the bottom. I got a couple, about an inch or more wide.
Oh man no planar! All you need is a router, a table saw, and a $200 piece of plexiglass.
What size router and bit do you use
Hi Thomas,
I used this bit because it helps draw the dust into the dust collection and away from the camera:
www.whitesiderouterbits.com/products/udp9112
But I think this bit would do a better job:
www.amazon.com/Cleaning-Diameter-Spoilboard-Surfacing-Proburs/dp/B07BF5ZHD1/ref=sr_1_30_sspa?hvadid=78065377312166&hvbmt=be&hvdev=c&hvqmt=e&keywords=amana+router+bits&qid=1553438495&s=gateway&sr=8-30-spons&psc=1
The first bit is from Whiteside. I really like their bits and can vouch for the quality. The second bit is from JESTUOUS. I have never used their bits but this looks like the right one for the job and its a lot less money.
Thanks for watching and commenting.
-Andrew
Can someone please help me I have a router and I'm looking for a surfacing router bit springboard CNC router bits is there just bits for my router available for is a CNC fine
So if you use that sled for the planer then only the bottom would be re-usable?
One could make another cutting board less thick than the first one, if going the lazy route, or only having minimal materials to work with
To anyone having trouble keeping up, 0.75 speed
I was thinking this seems sped up, thanks!
What router bit did you use
I've been trying to get an answer to this same question. Hopefully you get an answer. Whenever I use a router sled it leaves circles on my board that takes lots of sanding to remove.
I love the fast talking lol
I don't know if you audio was on faster speed but i couldn't understand a word you said.
I always heard to never run an end grain cutting board through the planner.
Hi Alex,
Good to hear from you. If you don't use the sled I show you can run into a few problems. First of all, if the board doesn't span the distance from the in feed roller to the out feed roller, it could get stuck. When it gets stuck, the cutter head of the planer usually chews it up pretty badly. The sides of the sled guarantee even pressure from the rollers as the board is fed through the planer.
Second, the board usually has a lot of tear out on the back edge as it completes the cut. The Sacrificial backer of the sled takes the damage instead of your board.
Third, the sled keeps the board flat which means it takes a consistent amount of wood each time. With out the sled, the board can rck in the planer and sometimes get jammed. No fun.
Thanks so much for your continued viewership. It is really appreciated.
-Andrew
Ive heard a planer won’t flatten the top if the bottom isn’t flat, it will just make it parallel. On this board you flattened one side with the router so you had a flat reference for the planer. I know some guys use shims on a planer sled to flatten them and actually glue sacrificial pieces to the end grain sides during glue up and screw into those for the sides. Then put that on the mdf sled with hot glue. Do you have a better way to plane both sides flat or is that the best way?
I neither have a router or planer, damn. lol. I have electric handheld planer
What a concept!! World Record speed narration mixed into a mundane hobby. I like it. Can you speed up?
I use the router sled methods to flatten one side...I avoid all blow out by first going around the outside clockwise... This supports the fiber (as I'm sure you already know). But I just send the whole board through my thickness planer after that...I avoid blowout by gluing a sacrificial piece on the end that gets cut off after it's been flattened...that way I can flip the board after one side is done and clean up the router marks on the other 👍... But with woodworking there's always a million ways to do one thing
Why does a cutting board need to be perfectly flat? You gonna use it on a milling machine?
So it does not rock around on you when using it 👍
@@anthonydtobias it's made of wood no matter how flat you make it, it won't stay that way unless you keep it in a temperature and humidity controlled environment so put legs on it or lay it on a towel
@@jamesburriss1086 i have a cutting board from like 40 years ago that is still flat...
Wow, you speak so rapidly, but clearly you should be an auctioneer!
THIS GUY TALKS FAST!
Blimey do you talk fast . . . . Too fast in my opinion. Having said that tho’ that’s not a bad idea at all. Thank you
lol right?
I played it at .75 speed. Other than the distortion it sounds more like normal speech.
I almost think it's sped up but I haven't seen any other of his videos.
Put it through your planer. Take no material in the first pass, take about a 64th each pass after, keep flipping it. If the glue up was half way decent it will take a bit less than 10 min…
Too fucking complicated
If you think that's complicated, you shouldn't be woodworking.
To much damn talkin! Just get to it.