2 Powerful Ways to Match Skin Tones in Photoshop
US
Войти
Complete Guide to Removing Blemishes in Photoshop
22:48
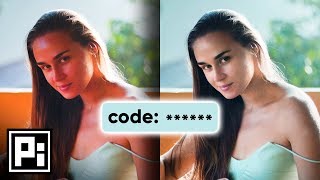
The Secret Code to PERFECT SKIN TONES in Photoshop
24:22
NginguZulu woqobo
2:49
We Made Sushi, It's Scary! (Roblox Scary Sushi)
48:56
The Greatest Comeback Of All Time?
30:07
Yelling at my GF in front of FaZe Rug and Brawadis..
22:49
2 Powerful Ways to Match Skin Tones in Photoshop
PiXimperfect
Подписаться
5 млн
Скачать
Готовим ссылку...
Просмотров 395 тыс.
0
0
Добавить в
Мой плейлист
Посмотреть позже
Поделиться
Поделиться
HTML-код
Размер видео:
1280 X 720
853 X 480
640 X 360
Показать панель управления
Автовоспроизведение
Автоповтор
Опубликовано: 27 дек 2024
Комментарии • 149
Следующие
Автовоспроизведение
22:48
Complete Guide to Removing Blemishes in Photoshop
PiXimperfect
Просмотров 127 тыс.
24:22
The Secret Code to PERFECT SKIN TONES in Photoshop
PiXimperfect
Просмотров 1 млн
2:49
NginguZulu woqobo
SIPHAMANDLA IGAGU SOTOBE - Topic
Просмотров 293
48:56
We Made Sushi, It's Scary! (Roblox Scary Sushi)
FGTeeV
Просмотров 831 тыс.
30:07
The Greatest Comeback Of All Time?
JJ Olatunji
Просмотров 1,6 млн
22:49
Yelling at my GF in front of FaZe Rug and Brawadis..
Sherman
Просмотров 657 тыс.
34:19
These Are The Worst Job Interviews Ever
SMii7Yplays
Просмотров 430 тыс.
8:09
Easy Trick To Match SKIN TONES in Photoshop Fast!
Photoshop Training Channel
Просмотров 241 тыс.
19:03
Equalize Skin Tones in Photoshop
PiXimperfect
Просмотров 434 тыс.
15:09
8 Photoshop Hacks For STUNNING Portraits!
Justin Laurens
Просмотров 775 тыс.
31:06
High-End Skin Retouch with Dodge & Burn in Photoshop
PiXimperfect
Просмотров 895 тыс.
29:50
High-End Skin Retouching & Sculpting in Photoshop
PiXimperfect
Просмотров 2,9 млн
8:44
How to Colour Correct Skin Tones in Photoshop [Skin Colour Correction Tutorial]
Kayleigh June
Просмотров 19 тыс.
15:12
Easy Color Grading for Perfect Skin Tones in Photoshop
Eustace Photography
Просмотров 42 тыс.
10:17
Point Color: The Best Way to Get PERFECT Skin Tones! - Photoshop Trick
PiXimperfect
Просмотров 32 тыс.
13:06
"Hue Mask" for Better Color Grading in Photoshop!
PiXimperfect
Просмотров 263 тыс.
1:10:09
Последствия перегона BMW. Извиняюсь за Русский Топ Гир. Везу ПРАДИК бате менять на Ниву
Настя Туман
Просмотров 163 тыс.
00:19
Как избавиться от старого телевизора
Новостной Гусь
Просмотров 1 млн
17:19
МИКРО-ЗЕМЛЯНКА ПОЛНОСТЬЮ УШЛА ПОД СНЕГ! - Выживание
TheVovkaCom
Просмотров 412 тыс.
00:19
Roblox Sigma Mascot PM For Bookings 🤪 #shorts
Junell Dominic
Просмотров 6 млн
00:31
САЛЛИ УКРАЛА КРЕСТ! в отеле ДОРС роблокс | DOORS FLOOR 2 roblox | Секреты и приколы #Shorts
Red Cat
Просмотров 294 тыс.
00:33
Monsters decorate the Christmas tree! Part 2
Monsters in my house
Просмотров 12 млн
15:18
❤️Майнкрафт но Я СТАЛА ЗЛОЙ МАМОЙ и ЗАТРОЛЛИЛА СКРЕТЧА
Фласка
Просмотров 71 тыс.
32:38
Кто виновен в крушении самолета в Актау? Что рассказали выжившие? | Баку, Грозный, AZAL, Embraer
AIRAN
Просмотров 483 тыс.