18:17 Pro tip... when welding D ring hangers to a bumper make sure you place then directly in line with the frame of the vehicle. If possible, weld them to the same runer that atatches the whole thing to the frame. Now, Ideally you would seld them directly to the frame tips (with frame extension or using any method) and have them independent of the bumper. But what you did is actually quite good
Love the bumper. One thing we use to do with our 3" round bumpers was to drill a hole on the backside and add a tire valve stem. Next, we would drill another hole, tap it and add an air hose quick connect fitting. Fill it full of air and check for leaks. Now you have an air tank at your disposal while in the woods.
@@OverlandUnderBudget it’s variable with power. Just adjust it till your sizzle is consistent like frying bacon! ...awesome video btw! Just might jump into a plate steel bumper build for my FJ!
Awesome video as usual. Quick tip, when cutting the slots for the clevis mounts you can drill a hole at each end of the slot and then connect the outer edges of the holes with the cut-off wheel. Might make it a bit easier. Sweet video and thanks for all the budget how-to info you've been putting out!
The reinforced collar around the receiver is meant to face backwards. It keeps the hitch from wallowing out or ripping the tubing from side loads from a trailer.
Awesome resourcefulness using what you have. Love the angles and explanation all the way through. Very useful for people trying to replicate the same setup. Keep the great content coming!
I'm a welder and fabricater and I can tell u are a natural awesome job I'm building one for a 2000 dakota and been looking for ideas....Very nice work I promise your clevis can hold the empire state building there not moving
Nice build gives me ideas on what I want to do also like that you are using basic tools that don't cost a lot makes me more confident on being able to tackle my own build great channel
Great video, I've just finished building my double swingout rear bumper for my 1994 triple-locked FJZ80 and it is pretty similar build, the only difference is that my bumper attached to the shackles brackets that run all the way inside the chassis, and go through the actual bumper. prices are right around what you mentioned, try selling your old OEM bumper, I sold my OEM tow hitch and bumper for 280$.. and I covered the price of most of the steel. swingouts spindles are also welded through the bumper and welded from the bottom and from the inside of the rail(bumper) and after welding everything up, I welded the ends. super strong with minimum movement if any (with a 35-inch wheel and tire, and a 3 jerrycan on the other side. Great videos.
I just built a bumper like this last weekend you should cut and recess your receiver tube into your bumper it'll be way stronger and you'll have improved ground clearance anytime you can weld on all four sides it's going to be stronger than just holding onto side like you did and it looks cleaner also that thick flange on the front of the receiver tube is designed so you don't rip the front of the tube when you exert a sideload on the tube. On that bent up flat stock you use as a gusset for your hitch would be cool if you cut some holes in it to be for your Breakaway chain hook if you ever tow a trailer
I don't have a Tacoma, I have a Dakota 4x4, but I am still following your channel for ideas. My brackets will have to be of a different design, but the gist is there for making a similar bumper for my own truck. I am also going to incorporate this style for a minimalist front bumper, just beefy enough for a hitch and some brush guards. Thanks for the simple instructions and ideas.
heck yes this is exactly why i enjoy making these videos. Sometimes you just need a example of a way to do something. Then you can tailor the idea to your specific needs!
just subscribed!! i think you may be pissing off all the big players selling bumpers for 800+ bucks hahaha. I'm definitely going to model your bumper to build one for my 3rd gen 4runner
Nice looking bumper! I need to build something like that for my Suzuki sidekick, the stock bumper is missing the plastic cover skin so it looks pretty bad. I build a mini version of a bumper like this for my articulating dump truck, it’s nice and solid 👍 Great project and great fab skills, thanks for posting!
@@OverlandUnderBudget Right on! I think you will really enjoy having a plasma torch 👍 Hey if you get time check out my brothers channel it’s called Olympic Overland. He is building a Dodge Cummins camper, part of the main camper box is going to be an aluminum military maintenance/ service box. Ps if you ever take a road trip up to Washington let me know, we got property to camp on and would be happy to show you some of the cool places on the Olympic peninsula 🙂
Heck yes! I just found his Instagram and RUclips. Such quality content, totally going to grow. I’d love to visit sometime, we used to live Vancouver Washington and I love the PNW.
i follow a badass son of a bitch on youtube that built the awesomest frigging articulating dump truck you've ever seen in your life, really nice guy too, just search for 'articulating dump truck' you'll find him.
Thats a man after my heart. I have many Pelican coolers, and three Forney welders, and a plasma cutter. If a Yeti owner ever uses a Pelican they will burn their Yetis.
Just some helpful information when building stuff like this go to home depot or Lowes and buy a roll or ram board I think its $18 for 50' it makes the best templates and you can fold it and it will holds bends like metal there are some good videos on RUclips about using it for making templates.
Great project-thanks for sharing. With a couple of air fittings that tube bumper can be a nice air compressor storage tank to reduce fill times-assuming your welds are air tight. Moisture drain valve may be needed. I noticed the air line under the truck-maybe you’re already planning on this?
Nice build, but welding those 1in thick clevis mounts with a 110v welder is pretty sketchy. I would have at the very least pre-heated the clevis mounts with a torch (even a little $15 propane torch would do) up as hot as I could get it just to help with penetration. The I would have probably done another 2 or 3 passes over that first bead. Those clevis mounts might be the only thing saving your rig or your life. And you definitely don't want to be around when a winch snaps one off your bumper with 9000 pounds of force. It is worth it to overbuild. I would have also put them directly in-line with, and tied to, the frame mounts. Other than that, it is really not difficult at all to add a 220v outlet to your breaker box, assuming it has room for the breaker. It's what I did. And luckily for me, my breaker box was on the outside of my garage wall so all I had to do was punch a small hole through the back of the breaker box and into the garage. Ran less than a foot of 4 gauge wire to a 220 outlet, then mounted it to the wall right over the hole. You can't even tell it didn't come with the house and only cost like $50 total. You really don't want your hitch receiver backwards. That little support rim around the front is there for a reason. It prevents the mouth of the receiver from being pried open by heavy lateral and vertical forces on the hitch, or from being crushed closed by hard rock impacts.
49:08.... Im sitting here thinking "please dont bump the tailgate with that template as you are telling us how happy you are".. Super awesome job and your rig looks amazing!
New sub, just wanted to say the content I've seen so far has been awesome! Makes me really want to learn how to weld and work on something for my second gen!
Just watched your video. Nice job for a immature fabricator. Only problem I see is you welded the receiver tube in backwards, but you know that! Great job!😂 ⭐⭐⭐⭐⭐
Good job Sir. I enjoy your I can do that attitude. Just a suggestion though maybe next gen use boxed gussets instead of the strap for the tow hitch. It would be less metal and give you more welds between the tube and the hitch 12 welds vs 8 for your strap plus more support laterally than the strap . Please this is just a suggestion from an old structural fabricator..
It's not coming off! Outstanding video, design and fab work. Turn up the welder, clean the area and make sure you've got a good ground. Throw the heat to it! Good work. Edit...are those Redback boots? If so, you're a pro and not telling us...ahahahaha
My watching so many of these Tacoma videos getting me too anxious to buy new upgrades and all that. I gotta stay steady before I break the bank again lol
Just found the bumper I am going to build for my 4runner. Cant wait to see the swing out. I build one one time and didnt use heavy enough walled tube. Yours should be good. Waitingggggggg
a lot easier when you do not have blind spot detection sensors to deal with, so this does not help for my third gen, but I found the tire carrier useful. still... I have been watching your videos half the afternoon... nicely done.
Nice bumper build. One tip is it sounds like you aren't welding with enough wire feed speed, I'd try turning that up a bit, but great job for a home project.
Yes thank you! I just realized my wire speed is like 1/2 of what it was supposed to be! I guess it’s limited to 220 speed while connected to 120v. I ordered a 220v extension so I should be able to run the proper wire speed soon!
That came out looking fantastic. Love the thought process as you went through the build. Thinking through your different options on how to make it different or better. Very nice work
Overland Under Budget, Nice well built bumper. Definitely over the specs. For sure you'll bend the frame first before you bend that bumper. I like to spark metal also and I found an easier solution for removing rust before welding. I used to use flap disc like you do but I tried power sanding silicone carbide paint stripper that fits my angle grinder from Lowe's. Once you use this, there's no going back. At the middle of your video, I noticed that you welded the receiver flush to the bumper but I found out at end that you wanted to mount the license plate there. Won't it looks better if you turn it around and move it back even to the same length of the shackles or enough so that you can insert ball mount pin then weld the strap a little back with 1-1 1/2 hole on each side of the hitch for the trailer safety chain hook up. Then mount your license plate on your spare tire mount someplace. BTW Class III receiver tube at Harbor Freight is only $12.99. Just a little humor. Your hold down clamp is a little better than the Asian fabricators. At least you are using a leather boot instead of FLIP-FLOP. :-) Thanks for the Vlog
haha thanks man. Yep I didn't check my hitch and the location of the pin hole was making it impossible to mount in the correct orientation. Next build will have many improvements!
@@OverlandUnderBudget Hey dude, I dig the bumper. Just asking cause I'd love a set, would you ever consider making the mounting brackets for the 1st gen 4runners? The demand should be high because everything's either overpriced or custom built. I've even seen some people have welded straight to the frame of their 4runner. Those mounting brackets would be a life saver, to more then just me. Thanks for reading, please let me know if your interested.
Hey man, amazing video. I love that you're doing this with low-cost tools. I have a similar setup. I read through a lot of comments but didn't see it mentioned but, what about the license plate light? I don't know about CA but I'm pretty sure you need a light on the plate. It's a pretty easy add-on but I didn't see it in the video.
Hi I like your videos and gives me sone ideas. I did notice something here. The towing hitch receiver you weld it looks backwards. The reinforced part it should be facing outward. Also the distance from the edge to the pin hole it’s measured from the reinforced side. Im not sure if that hitch receiver has the same distance on both sides. Another thing I would do differently it’s to extend that anchored to another point further in. Otherwise all the force to lift any trailer it’s made it by the bumper, without any help of another point. Anyway I like it and I want to make one for my 2018 4Runner. Will see if I’ll do it
Have you confirmed if the brackets will work on a 3rd Gen Runner? Definitely gonna go in this direction. After doing a Coastal Offroad kit on my old truck I'm ready to try a home-made bumper!
Im doing a 3rd gen 4runner bumper rn and the frames are a bit different. 3rd gen frame is just straight because no leaf springs. And you have two bolts on the bottom of the frame.
I thought about it, but for my truck i have lights on the rack that shine down so i didn't think it was needed for my truck. However some flush mount pods would be awesome reverse lights.
Awesome video/channel. Subscribed. Thank you for your generosity with your time. I am curious if there’s any reason you couldn’t utilize this bumper as an auxiliary compressed air tank?
Great Video. Not sure if it has been asked, but why didn't you recess the hitch in like you did the d ring mounts? It looks like you could have put the pin in from the back of the bumper. I have an FJ, so not much help with me, but the ideas and fab tricks are great. Keep it up.

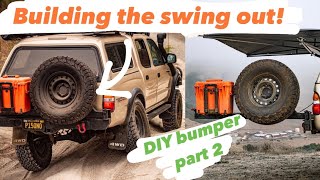


Super excited for stage 2 adding the swing out tire carrier!
We are still waiting :D
@@sehpatr4724 comes out tomorrow morning at 8am! (12/2/2020)
18:17 Pro tip... when welding D ring hangers to a bumper make sure you place then directly in line with the frame of the vehicle. If possible, weld them to the same runer that atatches the whole thing to the frame.
Now, Ideally you would seld them directly to the frame tips (with frame extension or using any method) and have them independent of the bumper.
But what you did is actually quite good
Love the bumper. One thing we use to do with our 3" round bumpers was to drill a hole on the backside and add a tire valve stem. Next, we would drill another hole, tap it and add an air hose quick connect fitting. Fill it full of air and check for leaks. Now you have an air tank at your disposal while in the woods.
Hey mate, just tune your wire speed a bit more, till it welds smooth
Ok great! So faster speed. What’s typical? Or is it based more on feel. Would say 18v and 200 ipm be right?
Inside the door should be a chart, it's a good place to start.
@@OverlandUnderBudget it’s variable with power. Just adjust it till your sizzle is consistent like frying bacon!
...awesome video btw! Just might jump into a plate steel bumper build for my FJ!
it’s all about the sound of the welding!right?
I agree on the wire feed speed being low.
Awesome video as usual. Quick tip, when cutting the slots for the clevis mounts you can drill a hole at each end of the slot and then connect the outer edges of the holes with the cut-off wheel. Might make it a bit easier. Sweet video and thanks for all the budget how-to info you've been putting out!
Genius
The reinforced collar around the receiver is meant to face backwards. It keeps the hitch from wallowing out or ripping the tubing from side loads from a trailer.
It's amazing you're only the second person to mention this in the comments. RUclipsrs doing fabrication but not sure exactly what everything is.
Came to the comments to see if anyone else noticed this. Had to go look at my truck to be sure.
The big question… did he fix it?
Awesome resourcefulness using what you have. Love the angles and explanation all the way through. Very useful for people trying to replicate the same setup. Keep the great content coming!
I made a living welding. And you did a fine job young man.
I'm a welder and fabricater and I can tell u are a natural awesome job I'm building one for a 2000 dakota and been looking for ideas....Very nice work I promise your clevis can hold the empire state building there not moving
Awesome! I collected ideas from your video. I'm decided to install it into my 2011 Tacoma. watching from Chino Hills, ca
Nice build gives me ideas on what I want to do also like that you are using basic tools that don't cost a lot makes me more confident on being able to tackle my own build great channel
Your prices are extremely reasonable, love the content
Thanks Simon
Great video, I've just finished building my double swingout rear bumper for my 1994 triple-locked FJZ80 and it is pretty similar build, the only difference is that my bumper attached to the shackles brackets that run all the way inside the chassis, and go through the actual bumper.
prices are right around what you mentioned, try selling your old OEM bumper, I sold my OEM tow hitch and bumper for 280$.. and I covered the price of most of the steel.
swingouts spindles are also welded through the bumper and welded from the bottom and from the inside of the rail(bumper) and after welding everything up, I welded the ends.
super strong with minimum movement if any (with a 35-inch wheel and tire, and a 3 jerrycan on the other side.
Great videos.
Hell ya sounds like a great build and awesome rig! Working on brackets that from straight through the bumper to the shackles right now!
i love that you leave everything in to explain step by step
I just built a bumper like this last weekend you should cut and recess your receiver tube into your bumper it'll be way stronger and you'll have improved ground clearance anytime you can weld on all four sides it's going to be stronger than just holding onto side like you did and it looks cleaner also that thick flange on the front of the receiver tube is designed so you don't rip the front of the tube when you exert a sideload on the tube. On that bent up flat stock you use as a gusset for your hitch would be cool if you cut some holes in it to be for your Breakaway chain hook if you ever tow a trailer
The wrong way reciever tube is what you should of started with.
Subbed because humble straight up guy helping the 4x4 community
I don't have a Tacoma, I have a Dakota 4x4, but I am still following your channel for ideas. My brackets will have to be of a different design, but the gist is there for making a similar bumper for my own truck. I am also going to incorporate this style for a minimalist front bumper, just beefy enough for a hitch and some brush guards. Thanks for the simple instructions and ideas.
heck yes this is exactly why i enjoy making these videos. Sometimes you just need a example of a way to do something. Then you can tailor the idea to your specific needs!
Love all your fab work on the tacoma, have convinced me to invest in my first welder / fab tools!
This is exactly why I share my projects! You are going to love being able to weld
just subscribed!! i think you may be pissing off all the big players selling bumpers for 800+ bucks hahaha. I'm definitely going to model your bumper to build one for my 3rd gen 4runner
I can’t wait to get my first Tacoma and start doing this, one day!
Heck ya!
Very well done. I have a 97 Tacoma, already have the bed removed so I can do the frame repair thing, so this might be next. Be safe. Guy Speight
very satisfying getting that look at it mocked up to the frame. good work!
What a great video. Really appreciated the explanation throughout the whole video. The best video out there for us diyers.
Nice looking bumper! I need to build something like that for my Suzuki sidekick, the stock bumper is missing the plastic cover skin so it looks pretty bad.
I build a mini version of a bumper like this for my articulating dump truck, it’s nice and solid 👍
Great project and great fab skills, thanks for posting!
Thanks Mike! I really appreciate it, and I love that dump truck! Plasma cutter in the mail because of you!
@@OverlandUnderBudget Right on! I think you will really enjoy having a plasma torch 👍
Hey if you get time check out my brothers channel it’s called Olympic Overland.
He is building a Dodge Cummins camper, part of the main camper box is going to be an aluminum military maintenance/ service box.
Ps if you ever take a road trip up to Washington let me know, we got property to camp on and would be happy to show you some of the cool places on the Olympic peninsula 🙂
Heck yes! I just found his Instagram and RUclips. Such quality content, totally going to grow. I’d love to visit sometime, we used to live Vancouver Washington and I love the PNW.
i follow a badass son of a bitch on youtube that built the awesomest frigging articulating dump truck you've ever seen in your life, really nice guy too, just search for 'articulating dump truck' you'll find him.
You need some safety chain slots on your hitch strap. Looks great.
yes!
awesome !!! I just destroyed mine! perfect timing that you're channel cross my path!!!!! very grateful!! thanks
Thats a man after my heart. I have many Pelican coolers, and three Forney welders, and a plasma cutter. If a Yeti owner ever uses a Pelican they will burn their Yetis.
Just some helpful information when building stuff like this go to home depot or Lowes and buy a roll or ram board I think its $18 for 50' it makes the best templates and you can fold it and it will holds bends like metal there are some good videos on RUclips about using it for making templates.
This looks so sick!!!! Nice job dude!!
Great information you are sharing! For the mounting templates, do you know if they need modification to be used for a Gen 3 4Runner?
sOOOOOOOO cool you are selling those brackets !!! Thanks for doing that !
As my favorite tuber once said, “A grinder and paint makes the welder I ain’t!” -@AvE
Great project-thanks for sharing.
With a couple of air fittings that tube bumper can be a nice air compressor storage tank to reduce fill times-assuming your welds are air tight.
Moisture drain valve may be needed.
I noticed the air line under the truck-maybe you’re already planning on this?
dude! you are so talented! holy crap!
Looks Pristine Brotha looks real clean and fresh :)
The white marker is called Soap Stone, great stuff.
Nice build, but welding those 1in thick clevis mounts with a 110v welder is pretty sketchy.
I would have at the very least pre-heated the clevis mounts with a torch (even a little $15 propane torch would do) up as hot as I could get it just to help with penetration. The I would have probably done another 2 or 3 passes over that first bead. Those clevis mounts might be the only thing saving your rig or your life. And you definitely don't want to be around when a winch snaps one off your bumper with 9000 pounds of force. It is worth it to overbuild. I would have also put them directly in-line with, and tied to, the frame mounts.
Other than that, it is really not difficult at all to add a 220v outlet to your breaker box, assuming it has room for the breaker. It's what I did. And luckily for me, my breaker box was on the outside of my garage wall so all I had to do was punch a small hole through the back of the breaker box and into the garage. Ran less than a foot of 4 gauge wire to a 220 outlet, then mounted it to the wall right over the hole. You can't even tell it didn't come with the house and only cost like $50 total.
You really don't want your hitch receiver backwards. That little support rim around the front is there for a reason. It prevents the mouth of the receiver from being pried open by heavy lateral and vertical forces on the hitch, or from being crushed closed by hard rock impacts.
New sub here man. Great vid, I just learned how to weld for my job and fabricating a bumper for my budget overland build is a goal I now have.
This is wild. Great work! I wish I had the patience and ability to do this for my FJ!
Excellent choice in truck, saw, and watch. Great video. Keep up the great work.
Thank you Bryan!
49:08.... Im sitting here thinking "please dont bump the tailgate with that template as you are telling us how happy you are".. Super awesome job and your rig looks amazing!
Nice to see video after watching progress on Instagram 👏🏼
thanks man!
Great video reminds me of myself whenIwasyounger. Wish I had a friend like you when I younger to do stuff like this.
New sub, just wanted to say the content I've seen so far has been awesome! Makes me really want to learn how to weld and work on something for my second gen!
That came out badass 👍
Thank you!
Just watched your video. Nice job for a immature fabricator. Only problem I see is you welded the receiver tube in backwards, but you know that! Great job!😂
⭐⭐⭐⭐⭐
Exactly what I was looking for my 1996 Tacoma
Good job Sir. I enjoy your I can do that attitude. Just a suggestion though maybe next gen use boxed gussets instead of the strap for the tow hitch. It would be less metal and give you more welds between the tube and the hitch 12 welds vs 8 for your strap plus more support laterally than the strap . Please this is just a suggestion from an old structural fabricator..
at 21:20 it sounded like your inductance wasnt set properly. it kept shorting out.
hitch is in backwards... intentional?
yes! haha i had to do that for this one because of the strange position of the pin hole haha oh well
Fantastic Work! Form and Function. Cheers!
Soap stone, I think. Great video, thinking about building one for my truck.
This makes me want to buy a welder and probably a pipe bender after that. Great vid keep them coming.
Thanks Jason, do it!
It's not coming off! Outstanding video, design and fab work. Turn up the welder, clean the area and make sure you've got a good ground. Throw the heat to it! Good work.
Edit...are those Redback boots? If so, you're a pro and not telling us...ahahahaha
baha those are some old UGG boots! the opposite of a pro : ) ahha Ill try turning up the welder, thanks!
@@OverlandUnderBudget Rebacks are the best slip on boot you can buy. Made in Australia.
@@davidzimmer2694 i will look them up!
That bumper looks awesome man! Great job!
Thanks! 👍
steel prices are crazy high. get it while you can. Only gonna go up in price.
Thus cut file is going to be super helpful. I appreciate you!
Thanks man!
My watching so many of these Tacoma videos getting me too anxious to buy new upgrades and all that. I gotta stay steady before I break the bank again lol
Dude I am so excited to watch this video and build this barber out. Thank you
Heck ya Joseph!
Just found the bumper I am going to build for my 4runner. Cant wait to see the swing out. I build one one time and didnt use heavy enough walled tube. Yours should be good. Waitingggggggg
Sweet, yes the swingout is a really fun project, hoping to get started on it this week!
Oh. Snap you got it .. Good thing you caught that before.finishing it. 😆
a lot easier when you do not have blind spot detection sensors to deal with, so this does not help for my third gen, but I found the tire carrier useful. still... I have been watching your videos half the afternoon... nicely done.
Turn up your wire speed mate. I like you’d rear bar , great ideas
Nice bumper build. One tip is it sounds like you aren't welding with enough wire feed speed, I'd try turning that up a bit, but great job for a home project.
Yes thank you! I just realized my wire speed is like 1/2 of what it was supposed to be! I guess it’s limited to 220 speed while connected to 120v. I ordered a 220v extension so I should be able to run the proper wire speed soon!
Outstanding work!
That came out looking fantastic. Love the thought process as you went through the build. Thinking through your different options on how to make it different or better. Very nice work
sounds lke your wire speed might be slightly high, adjusting that will make your welds look even better
Nice work, man. Instead of the strap over the hitch receiver, what about one or two sets of vertical trusses?
Yes that another great option! I tried that but liked the visual of the strap
Overland Under Budget, Nice well built bumper. Definitely over the specs. For sure you'll bend the frame first before you bend that bumper. I like to spark metal also and I found an easier solution for removing rust before welding. I used to use flap disc like you do but I tried power sanding silicone carbide paint stripper that fits my angle grinder from Lowe's. Once you use this, there's no going back. At the middle of your video, I noticed that you welded the receiver flush to the bumper but I found out at end that you wanted to mount the license plate there. Won't it looks better if you turn it around and move it back even to the same length of the shackles or enough so that you can insert ball mount pin then weld the strap a little back with 1-1 1/2 hole on each side of the hitch for the trailer safety chain hook up. Then mount your license plate on your spare tire mount someplace. BTW Class III receiver tube at Harbor Freight is only $12.99. Just a little humor. Your hold down clamp is a little better than the Asian fabricators. At least you are using a leather boot instead of FLIP-FLOP. :-) Thanks for the Vlog
haha thanks man. Yep I didn't check my hitch and the location of the pin hole was making it impossible to mount in the correct orientation. Next build will have many improvements!
I built that exact bumper minus the diamond plate and the receiver for my VW diesel Rabbit truck!
heck yes! thats rad
this looks sweet! going to try building a similar one for my 1998 4runner!
Heck ya! Thanks man. My sister has a 3rd gen runner, I’m going to see if I can make some brackets for that too
@@OverlandUnderBudget Hey dude, I dig the bumper. Just asking cause I'd love a set, would you ever consider making the mounting brackets for the 1st gen 4runners? The demand should be high because everything's either overpriced or custom built. I've even seen some people have welded straight to the frame of their 4runner. Those mounting brackets would be a life saver, to more then just me. Thanks for reading, please let me know if your interested.
Leave the end of the bumper ends open so the Hi-Lift jack will fit in for jacking up the truck when bogged down in the mud
Nice job man,it looks awesome.....lol “rice rocket😂😂😂
Hey man, amazing video. I love that you're doing this with low-cost tools. I have a similar setup. I read through a lot of comments but didn't see it mentioned but, what about the license plate light? I don't know about CA but I'm pretty sure you need a light on the plate. It's a pretty easy add-on but I didn't see it in the video.
Great catch, i have a solution for that, ill add it in a future video. Reusing the OME one
Great job looks amazing
Hi I like your videos and gives me sone ideas. I did notice something here. The towing hitch receiver you weld it looks backwards. The reinforced part it should be facing outward. Also the distance from the edge to the pin hole it’s measured from the reinforced side. Im not sure if that hitch receiver has the same distance on both sides. Another thing I would do differently it’s to extend that anchored to another point further in. Otherwise all the force to lift any trailer it’s made it by the bumper, without any help of another point. Anyway I like it and I want to make one for my 2018 4Runner. Will see if I’ll do it
Fantastic video! This is giving me motivation to weld my own bumper next summer, thanks!!!!
thanks John! part two comes out wednesday!
You should put some out for the 2nd gen!!!
I’d love to, I just have a 1st gen so it’s hard to design for different trucks that are not sitting in my driveway
Nice work!
Definitely going to use your cut files when I get around to building my bumper. Thanks for making those and making them accessible.
Glad you like them, thanks man!
Have you confirmed if the brackets will work on a 3rd Gen Runner? Definitely gonna go in this direction. After doing a Coastal Offroad kit on my old truck I'm ready to try a home-made bumper!
Im doing a 3rd gen 4runner bumper rn and the frames are a bit different. 3rd gen frame is just straight because no leaf springs. And you have two bolts on the bottom of the frame.
Was surprised you didn't add lights
I thought about it, but for my truck i have lights on the rack that shine down so i didn't think it was needed for my truck. However some flush mount pods would be awesome reverse lights.
@@OverlandUnderBudget what I was thinking
Excellent video! Keep them coming. I love your channel.
Cool project! Almost sounded like your ground wasn’t hooked up..
haha thanks man
curious if that hitch attachment will hold up to full tow weight?
On the reciver, isnt the flange supposed to go on the outside ? and safety chain holes?
Where can I find the pdf
I got so busy with my current camper build I haven’t made the pdf yet! But it will be on my website 👍🏼
Cool functional build and step by step instructions.
Thank you David!
Awesome video/channel. Subscribed. Thank you for your generosity with your time. I am curious if there’s any reason you couldn’t utilize this bumper as an auxiliary compressed air tank?
Nice vids man very easy to follow. Def going to take this idea and make one for my fj80
Thanks Logan, much appreciated! I love those 80 series
Great how to video. im gonna build on for my 05.
The hole in the hitch is trapped bud!. 😂😂😂
Would love to see something on the delica l400 can not find anything to help on rear bumper or bulbar
Ya that’s a pretty unique vehicle. I’d say crawl under there and see what you can dream up for brackets
Try crankin the amperage up a little bit. The welds look okay but from the sound of your machine i am guessin it isnt getting full penetration
for defense can you use 14 gauge 2"x4"?
You should plumb your airline into the bumper, use it as an air tank.
Thats such a neat idea!
Great Video. Not sure if it has been asked, but why didn't you recess the hitch in like you did the d ring mounts? It looks like you could have put the pin in from the back of the bumper. I have an FJ, so not much help with me, but the ideas and fab tricks are great. Keep it up.
Amazing video. Can’t wait to start mine!
Dude love your energy and your videos! Thanks a ton for sharing .
Thanks Dan i really appreciate that! part two comes out tomorrow!
Hi bud, have you ever tried the raptor liner products, you should check it out I am sure this may be helpful for you 👍
Awesome channel man! New sub here! I love your approach to practical and budget friendly overlanding.
Thank you so much! I’m really enjoying sharing my learning, projects and mistakes