Fellow San Antonio resident! Love gardening and jewelry making (bead weaving), sewing, and just got a 3d printer to make some clay cutters. Thanks for this video
Hey 👋 sounds like we have a lot of similar interests :) hope your clay cutters turn out well! We love our 3d printer and use it for so many things! It’s a great investment 🥳
Also I just got a 10x14 inch glazed ceramic tile from Home Depot today for ~$2.50, and a 4x4 for .39. I saw everyone say it’s easy to work on and bake.
Awesome! They seem really intimidating at first, but after a couple prints, we found that its super easy and intuitive! And they come in handy more than you'd expect! We have some chairs that were scratching our floors, and we couldn't find any furniture pads that would stick, so we just 3d printed something that fit like a glove, and no more scratches! Thanks for watching! 🙂
Haha thanks! It's all a learning curve, but once you do it a few times, it gets a whole lot easier! If you want to skip the designing process, you can always find a file from thingiverse that you like and print it instead! That's an easy way to get accustomed to a 3d printer without having to go through the whole design process 🙂
Once used on polymer clay. It's not uncommon to retire kitchen tools into the polymer kit but yes the clay has inedible or even toxic to eat ingredients depending on the company recipe.
Try sprinkling your rolling surface with corn starch, the clay won't stick to the surface or tools when you lift the clay right up. It won't hurt your clay or change color or texture. It just wipes off with a paper towel after it is baked.
Great video 😊 Good attempt with the clay, too ❤️ Like the other person said about using a clay blade is so essential because it’s so thin and flexible (I realize you’ve probably already purchased the needed items but in case you haven’t 😉). Also, about the toaster oven. It’s better to use than your home oven because of the toxic fumes certain clays will put out while baking. I put my toaster oven outside when I bake my polymer clay otherwise I would have to thoroughly clean the inside of my oven before I could use it for food again unless I were to use a baking bag (like for turkeys). Which I don’t, lol. Also, baking on a clay tile that will fit into the toaster oven can help the evenness of the baking. Think of it like baking a pizza on a pizza tile in the oven. I just use a white glazed tile. You definitely can place your clay on the tile and cut out your pieces right on it. I have made jewelry pieces on it and clay covered boxes, too. Also make sure your clay isn’t rolled too thin or uneven, that also can help with the burning issue. That and being sure to follow all the baking instructions on the clay packaging. Hopefully that wasn’t too redundant or too late. Enjoy experimenting 😊
Thanks for the tips!!! I've got a ceramic tile in my garage and I'll definitely use it next time! I havent gotten back around to working with this clay yet but I plan too soon! I'm thinking I'll make myself little ghost earrings for halloween 👻
I would love to test your cutters and send you the finished pieces in trade!! Lol I have CMT amongst other issues, and i have yet to find a single cutter that doesn't hurt my fingers\hands. I have worked with clay and wire for years and I totally have screwups on the DAILY!! Keep up the good work and videos
Hey that sounds great, shoot us an email with your mailing address and we'd love to send you a couple! Our email is in the about section on our channel! good to hear we aren't the only ones who mess up! haha we are all works in progress :D
You need to watch a couple of polymer clay jewelry tutorials on RUclips they’re really easy to do and if you have the proper tools it’ll make your life a whole lot easier
I realize this is old, and you may have been told already, but you should not use your actual kitchen tools (rolling pin, pasta machine, etc.) for multiple reasons. Yes, the clay is nontoxic, but there are chemicals and stuff in it, and you shouldn't expose yourself to that. also, for toaster ovens, the temperature should be done with a thermometer to make sure it's accurate. I saw someone suggest putting it outside, and that is good, or at least in a room with very good ventilation as the fumes (especially when curing multiple pieces) can get strong. The clay is also cooked based on thickness and temperature. Lower temperature longer is better if you are worried, but your pieces were pretty thin (the time and temp are based on 1/4 inch for most brands, but each one might be different.
Absolutely! There's lots of programs out there to use. We prefer Sketchup online for most of our stuff because that's what we're comfortable with (also its free!), but we definitely want to branch out into other programs at some point. Our other video about polymer clay cutters goes into more depth of how to use the software. Link in description. My best advice would just to start playing around with it to see what you can come up with, that's how I learn best is just to dive right in! There's also a ton of other RUclipsrs who give awesome Sketchup tutorials for beginners! 🙂
Watching other polymer clay videos will teach you the tips, tricks and tools needed to work successfully with polymer clay. I recommend Jessema Tutorials here on RUclips.
Thanks! Sketchup has a free online version that I used in this video to design the cutters. I just put the link in the description! It's very intuitive and easy to pick up. It does have some quirks, but overall, a good program. You'll also need a slicer program if you don't have one already for 3d printing. We used a program that is specific to our 3d printer, but there's a very good free version called Cura that is more open-source and available for a variety of printers. Keep an eye out for our next video, we're doing a little bit of a deeper dive into Sketchup and 3d modeling! :)
Thanks for your interest! We're actually in the process of putting our polymer clay .stl files up on Etsy for really cheap. If you have access to a 3D printer, you'll be able to download them from our shop and print them on your own 3d printer. If you don't have a 3d printer, we are toying with the idea of selling the cutters on our store as well, so be on the lookout! I'll try to remember to reply here when we get everything up on our store! Thanks for watching!
Ya we always wanted to tinker with one, and we absolutely love having one around. It comes in handy so often. We waited for Amazon Prime Day and snagged this Monoprice Voxel printer for dirt cheap. I think it was around or below $300 if I remember right. Love this printer, hasn't jammed, minimal print fails, quiet, and easy to use. Link below in description if you're interested :)
I thought your cutters were great. I wouldn't use a pasta machine for clay and also for food. I use ceramic tiles both under and on top of the clay when baking. I also use parchment paper on top and bottom. This keeps things nice and smooth and also helps to avoid scorching. We'll done for making the video.
@@BrevaCreative I always bake for an hour at the recommended temperature. I use a small counter top oven and checked the temperature with an oven thermometer the first few times I used it. I've never had scorching. Hope this helps.
@@BrevaCreative If you are having problems with scorching at the recommended temperatures, try putting parchment over and drop your oven temp by around 10 degrees. I've found that there is some variability with certain brands honestly.
Hello Breva, thank you very much for sharing this video, could you please make another video explaining more slowly the steps to make the cutter in this way, I did not know that we could create it with SketchUp, the result is wonderful! Well, here I am following you just in case one day you dare to make another video with this topic. Thanks a lot. I am glad that you join us creating with polymer clay, it is a fascinating and wide world, there is a lot of information online that will be useful to you and your mind will fly with new ideas to create without stopping. I would also recommend better quality Clay like Cernit or Premo. To make canes of clay I recommend FIMO as the clay can be manipulated but the designs will remain with less distortion. good luck
Thank you! We definitely want to make a follow-up to this video so stay tuned 😉We just got ourselves a new resin 3d printer, and we're curious to see if we can get even sharper edges with it! We'll also try it again with better clay, because I do think that was a lot of our problem. Thanks for the advice and the clay brand names, saves us some research! Thanks for following!
Within the brands of polymer clay, only certain formulations are good for making jewelry. So for Sculpey, use Sculpy Premo and/or Sculpy Souffle. For Fimo, only Fimo Professional. KatoClay and Cernit are also good for jewelry.
Yeah it's not for everyone, but we got a really good deal on ours. It was about 40% off and we only spent about $250 on ours. But it's definitely an investment, and we've definitely used it enough for other projects that have easily saved us that much money in the long run. Thanks for watching!
@@BrevaCreative for my business I use Sculpey premo Sculpey soufflé or cernit. Those are sturdier clays for jewelry making and they leave less bubbles and fingerprints. Also get an oven thermometer. You should only bake at 275° for btw 40-60 minutes depending on your thickness.


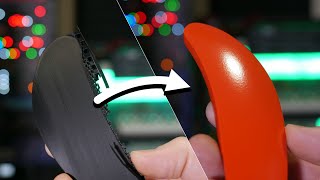


![How to Make Your Own Halloween Cookie Cutters - 3D Printable - Fusion 360 Beginner Tutorial [2022]](/img/1.gif)
Fellow San Antonio resident! Love gardening and jewelry making (bead weaving), sewing, and just got a 3d printer to make some clay cutters. Thanks for this video
Hey 👋 sounds like we have a lot of similar interests :) hope your clay cutters turn out well! We love our 3d printer and use it for so many things! It’s a great investment 🥳
Also I just got a 10x14 inch glazed ceramic tile from Home Depot today for ~$2.50, and a 4x4 for .39. I saw everyone say it’s easy to work on and bake.
Yeah I need to go get a ceramic one soon the granite in this video was a little sticky 🥲
I never knew how a 3D Printer worked before this video. Thank you soooo much. I learned something.
Awesome! They seem really intimidating at first, but after a couple prints, we found that its super easy and intuitive! And they come in handy more than you'd expect! We have some chairs that were scratching our floors, and we couldn't find any furniture pads that would stick, so we just 3d printed something that fit like a glove, and no more scratches! Thanks for watching! 🙂
Thank you for instructions for 3D printing.
Thanks for watching! 🙂
That looks quite hard. Your very clever.
Haha thanks! It's all a learning curve, but once you do it a few times, it gets a whole lot easier! If you want to skip the designing process, you can always find a file from thingiverse that you like and print it instead! That's an easy way to get accustomed to a 3d printer without having to go through the whole design process 🙂
Great video Eva!!! I thought of Wilma Flintstone and Betty Rubble when I saw them! 🙂
🤣
Wow, I love how real ya'll are! You are really like all of us and do not do it perfect everytime:) Thanks guys, this was great!
It's all trial and error! (with more error than we'd like to admit 😉)
Hint: Not supposed to use items for food that are used on polymer clay. There is something in the clay that makes it unsafe.
Once used on polymer clay. It's not uncommon to retire kitchen tools into the polymer kit but yes the clay has inedible or even toxic to eat ingredients depending on the company recipe.
So cool
Try sprinkling your rolling surface with corn starch, the clay won't stick to the surface or tools when you lift the clay right up. It won't hurt your clay or change color or texture. It just wipes off with a paper towel after it is baked.
Definitely going to try that next time, we're in the process of making a part 2 video for this one so keep an eye out for it!
Is there a spray I can use for in-between polymer clay so they don't stick while I make impressions?
Great video 😊 Good attempt with the clay, too ❤️ Like the other person said about using a clay blade is so essential because it’s so thin and flexible (I realize you’ve probably already purchased the needed items but in case you haven’t 😉).
Also, about the toaster oven. It’s better to use than your home oven because of the toxic fumes certain clays will put out while baking. I put my toaster oven outside when I bake my polymer clay otherwise I would have to thoroughly clean the inside of my oven before I could use it for food again unless I were to use a baking bag (like for turkeys). Which I don’t, lol.
Also, baking on a clay tile that will fit into the toaster oven can help the evenness of the baking. Think of it like baking a pizza on a pizza tile in the oven. I just use a white glazed tile. You definitely can place your clay on the tile and cut out your pieces right on it. I have made jewelry pieces on it and clay covered boxes, too. Also make sure your clay isn’t rolled too thin or uneven, that also can help with the burning issue. That and being sure to follow all the baking instructions on the clay packaging.
Hopefully that wasn’t too redundant or too late. Enjoy experimenting 😊
Thanks for the tips!!! I've got a ceramic tile in my garage and I'll definitely use it next time! I havent gotten back around to working with this clay yet but I plan too soon! I'm thinking I'll make myself little ghost earrings for halloween 👻
I would love to test your cutters and send you the finished pieces in trade!! Lol
I have CMT amongst other issues, and i have yet to find a single cutter that doesn't hurt my fingers\hands.
I have worked with clay and wire for years and I totally have screwups on the DAILY!!
Keep up the good work and videos
Hey that sounds great, shoot us an email with your mailing address and we'd love to send you a couple! Our email is in the about section on our channel! good to hear we aren't the only ones who mess up! haha we are all works in progress :D
You need to watch a couple of polymer clay jewelry tutorials on RUclips they’re really easy to do and if you have the proper tools it’ll make your life a whole lot easier
👍
Check out the channel “Clay Zoo”. Great tutorials and easy to follow.
I realize this is old, and you may have been told already, but you should not use your actual kitchen tools (rolling pin, pasta machine, etc.) for multiple reasons. Yes, the clay is nontoxic, but there are chemicals and stuff in it, and you shouldn't expose yourself to that.
also, for toaster ovens, the temperature should be done with a thermometer to make sure it's accurate. I saw someone suggest putting it outside, and that is good, or at least in a room with very good ventilation as the fumes (especially when curing multiple pieces) can get strong.
The clay is also cooked based on thickness and temperature. Lower temperature longer is better if you are worried, but your pieces were pretty thin (the time and temp are based on 1/4 inch for most brands, but each one might be different.
im new to designing could you please explain the step to the designing a bit more?
Absolutely! There's lots of programs out there to use. We prefer Sketchup online for most of our stuff because that's what we're comfortable with (also its free!), but we definitely want to branch out into other programs at some point. Our other video about polymer clay cutters goes into more depth of how to use the software. Link in description. My best advice would just to start playing around with it to see what you can come up with, that's how I learn best is just to dive right in! There's also a ton of other RUclipsrs who give awesome Sketchup tutorials for beginners! 🙂
Watching other polymer clay videos will teach you the tips, tricks and tools needed to work successfully with polymer clay. I recommend Jessema Tutorials here on RUclips.
Thanks for the tip! Stay tuned for our next video landing this Thursday where we do a deep dive into making better cutters! 😉
Hi from Spain, TFS can you tell me the name of the Software? So cool
Thanks! Sketchup has a free online version that I used in this video to design the cutters. I just put the link in the description! It's very intuitive and easy to pick up. It does have some quirks, but overall, a good program. You'll also need a slicer program if you don't have one already for 3d printing. We used a program that is specific to our 3d printer, but there's a very good free version called Cura that is more open-source and available for a variety of printers. Keep an eye out for our next video, we're doing a little bit of a deeper dive into Sketchup and 3d modeling! :)
Please provide a link for the pattern printer... it would be much appreciated! Thank you!
Thanks for your interest! We're actually in the process of putting our polymer clay .stl files up on Etsy for really cheap. If you have access to a 3D printer, you'll be able to download them from our shop and print them on your own 3d printer. If you don't have a 3d printer, we are toying with the idea of selling the cutters on our store as well, so be on the lookout! I'll try to remember to reply here when we get everything up on our store! Thanks for watching!
Mmmm polymer
No, bad Stephen. No eat.
@@BrevaCreative they do look like cookies tho
Wish i had a 3d printer.
Ya we always wanted to tinker with one, and we absolutely love having one around. It comes in handy so often. We waited for Amazon Prime Day and snagged this Monoprice Voxel printer for dirt cheap. I think it was around or below $300 if I remember right. Love this printer, hasn't jammed, minimal print fails, quiet, and easy to use. Link below in description if you're interested :)
@@BrevaCreative Thank you!
😍😍😍😍❤
Can you create one for me?
Definitely! If you head over to our Etsy store (link in video description), there's a custom option for our polymer clay cutters! 😊
Try watching Jessama Tutorials channel. Sam is good at explaining ay a beginner level. See her earlier videos for different techniques.
Great, thanks for the tip! We'll definitely look her up! 🙂
I thought your cutters were great. I wouldn't use a pasta machine for clay and also for food. I use ceramic tiles both under and on top of the clay when baking. I also use parchment paper on top and bottom. This keeps things nice and smooth and also helps to avoid scorching. We'll done for making the video.
Oh, I’ll have to try that! Scorching has been an issue almost every time I’ve baked polymer clay. Do you have to bake longer with the tiles in there?
@@BrevaCreative I always bake for an hour at the recommended temperature. I use a small counter top oven and checked the temperature with an oven thermometer the first few times I used it. I've never had scorching. Hope this helps.
@@susankilmister11 Awesome! We'll definitely have to try this again, thanks for the advice 😀
@@BrevaCreative If you are having problems with scorching at the recommended temperatures, try putting parchment over and drop your oven temp by around 10 degrees. I've found that there is some variability with certain brands honestly.
We'll try that, thanks a bunch! 😁
Hello Breva, thank you very much for sharing this video, could you please make another video explaining more slowly the steps to make the cutter in this way, I did not know that we could create it with SketchUp, the result is wonderful! Well, here I am following you just in case one day you dare to make another video with this topic. Thanks a lot. I am glad that you join us creating with polymer clay, it is a fascinating and wide world, there is a lot of information online that will be useful to you and your mind will fly with new ideas to create without stopping. I would also recommend better quality Clay like Cernit or Premo. To make canes of clay I recommend FIMO as the clay can be manipulated but the designs will remain with less distortion. good luck
Thank you! We definitely want to make a follow-up to this video so stay tuned 😉We just got ourselves a new resin 3d printer, and we're curious to see if we can get even sharper edges with it! We'll also try it again with better clay, because I do think that was a lot of our problem. Thanks for the advice and the clay brand names, saves us some research! Thanks for following!
Within the brands of polymer clay, only certain formulations are good for making jewelry. So for Sculpey, use Sculpy Premo and/or Sculpy Souffle. For Fimo, only Fimo Professional. KatoClay and Cernit are also good for jewelry.
" all you need is a 3D printer" which start around 400 dollars where I'm from
Yeah it's not for everyone, but we got a really good deal on ours. It was about 40% off and we only spent about $250 on ours. But it's definitely an investment, and we've definitely used it enough for other projects that have easily saved us that much money in the long run. Thanks for watching!
That clay is garbage. That’s why it’s giving you so many issues
Good to know, what clay do you use? 🙂
@@BrevaCreative for my business I use Sculpey premo Sculpey soufflé or cernit. Those are sturdier clays for jewelry making and they leave less bubbles and fingerprints. Also get an oven thermometer. You should only bake at 275° for btw 40-60 minutes depending on your thickness.
@@BrevaCreative also get a clay blade. They’re pretty cheap on Amazon. This helps you touch the clay less.
Great, thanks for the advice, we'll have to try that out next time 🙂