The stm32 Cortex M7 are a beast, lot of power processing, lot of peripherials, basic 2D drawing on hardware, DMA and Display interface that offloads the CPU, I never worked before with a MCU that blurs the line between a MCU and CPU with an OS until the STM32F767, and the Arduino GIga is even better!.
I like the Arduinos more, the less features they have. The Uno R3 is still my favorite. But yes, the Giga is a beast in terms of being "just" a microcontroller and I will dive deeper into it's capabilities with projects on my to-do list.
The plan is to create a working level sniffer on my second project www.HomoFaciens.de in the hopefully not too far future. The software written for this video was written quick & dirty and is not in a stage that is worth publishing. The display is a SPI TFT with 320x240 pixel type ILI9341.
@@hoitg4647 Oh! Thank you! There are other videos where the Arduino GIGA R1 is demonstrated but at some point one of them said the display librairies do not work properly yet. However your seems to work just fine. I purchased a GIGA and the uses I had in mind mostly involve having a good display. I had hoped to use your source code as a reference to get the display to work.
in the column "contact" you can find my mail address. If you send me an email, I can give you the quick & dirty code with the display: homofaciens.de/contact_en.htm
I am using Linux Mint 21.1 (which is the latest version) on that +10 years old laptop. With this there is absolutely no need for any driver installation and so no trouble for me. It runs perfectly out of the box.
@@hoitg4647 spent three days with registers reading but once I understood it, didn’t have to change that many things. I increased the adc clock by increasing pl2 multiplier, and set the adc 1 and two to run in interleaved mode, and put the adc in continuous mode. I’ll be publishing an arduino library for it soon, but I also want to add opamp first.
Little bit overclocking for ADC. 8 bit fADC 50 MHz you can get 8.3 MSps and I recommend to use DMA for data transfer. That 14 MSps@8 bit need fADC to be around 85MHz. maybe working but results maybe out of specs. Other case maybe to use those 2 ADC as interleaved mode if supported.
@@hoitg4647 At least DMA was easy to config with STM32F3xx when I did signal generator. Basically pregenerate pattern and config DMA, Timer, and DAC. With 1MSps DAC you can get pretty "nice" 100kHz sine wave or pattern. Only preparing is taking CPU time and when running it's basically 0 hit to CPU. Also you can fill that buffer with new data if you need or prepare new dataset and do buffer swap. Not sure how accessible DMA is through arduino libraries. I usually use Arduino when I need quickly test something simple.


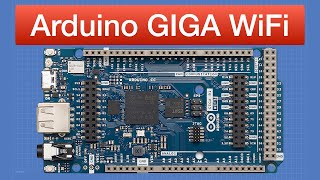


The stm32 Cortex M7 are a beast, lot of power processing, lot of peripherials, basic 2D drawing on hardware, DMA and Display interface that offloads the CPU, I never worked before with a MCU that blurs the line between a MCU and CPU with an OS until the STM32F767, and the Arduino GIga is even better!.
I like the Arduinos more, the less features they have. The Uno R3 is still my favorite. But yes, the Giga is a beast in terms of being "just" a microcontroller and I will dive deeper into it's capabilities with projects on my to-do list.
Thanks for sharing!
Thanks for sending me the GIGA!
I really like all your work, a lot of knowledge
Is there an available source for the levelsniffer_2 ? Also, I would very much like to know exactly what display module you have used.
The plan is to create a working level sniffer on my second project www.HomoFaciens.de in the hopefully not too far future. The software written for this video was written quick & dirty and is not in a stage that is worth publishing.
The display is a SPI TFT with 320x240 pixel type ILI9341.
@@hoitg4647 Oh! Thank you! There are other videos where the Arduino GIGA R1 is demonstrated but at some point one of them said the display librairies do not work properly yet. However your seems to work just fine. I purchased a GIGA and the uses I had in mind mostly involve having a good display. I had hoped to use your source code as a reference to get the display to work.
in the column "contact" you can find my mail address. If you send me an email, I can give you the quick & dirty code with the display:
homofaciens.de/contact_en.htm
I have an issue with the USB driver setup for my GIGA R1. I can't get it to read the port. Did you have to do some extra configurations at 5:02
I am using Linux Mint 21.1 (which is the latest version) on that +10 years old laptop. With this there is absolutely no need for any driver installation and so no trouble for me. It runs perfectly out of the box.
I am having same issue. If you figure it out, please let me know and I'll do the same.
Nice video!! Thanks
What's with all the spinning?
7:29 Whats the Code for that Project?
I want to try it myself
Thanks 🙏
That was quick & dirty code, only for this video. If you mail me I can sent you the files. The rest will be up to you.
@@hoitg4647 ok Danke ich wede Ihnen eine E-Mail schicken
I got the giga r1 wifi to 14 mega samples per second
That sounds great!
Any words on how you achieved this?
@@hoitg4647 spent three days with registers reading but once I understood it, didn’t have to change that many things.
I increased the adc clock by increasing pl2 multiplier, and set the adc 1 and two to run in interleaved mode, and put the adc in continuous mode. I’ll be publishing an arduino library for it soon, but I also want to add opamp first.
Little bit overclocking for ADC. 8 bit fADC 50 MHz you can get 8.3 MSps and I recommend to use DMA for data transfer.
That 14 MSps@8 bit need fADC to be around 85MHz. maybe working but results maybe out of specs.
Other case maybe to use those 2 ADC as interleaved mode if supported.
@1234: the "normal" proceeding. Thanks in advance for sharing your code!
LimbaZero: DMA transfer adds a bit more code. Thanks for that hint!
@@hoitg4647 At least DMA was easy to config with STM32F3xx when I did signal generator. Basically pregenerate pattern and config DMA, Timer, and DAC.
With 1MSps DAC you can get pretty "nice" 100kHz sine wave or pattern. Only preparing is taking CPU time and when running it's basically 0 hit to CPU. Also you can fill that buffer with new data if you need or prepare new dataset and do buffer swap.
Not sure how accessible DMA is through arduino libraries. I usually use Arduino when I need quickly test something simple.