Essential Upgrade Cheap, Fast and Easy

HTML-код
- Опубликовано: 27 сен 2024
- Throw away the metal tables that came with your planer and do this instead. Seriously, it's way better - a true upgrade.
Before I made the original, I had a serious problem during the winter with slipping on the feed rollers. Turned out the smooth, polished metal bed of the planer had too much friction and the feed rollers couldn't grip the stock well enough to push it through. Changing to the melamine table SOLVED that perfectly. In fact, it did such a great job of fixing that problem, I almost forgot about it!
Doesn't have to be fancy or complex - the table can be longer if you need it - but the big thing is that it's quick and easy to install and take off, and doesn't take up a lot of room in the shop.
It doesn't prevent snipe, but no feed table arrangement will for these small planers. To stop snipe, you need to have continuous feed so that stock is under BOTH rollers when the cutter is cutting. I use a sacrificial piece of stock to feed in before I send in the stuff I want to plane, and that sacrificial piece takes the snipe. I made a video showing the method and you can watch that here:
• Eliminate Planer Snipe...
▶️ Project plans for sale: ibuildit.ca/pl...
▶️Support the work I do on Locals:
ibuildit.local...
▶️ Patreon:
www.patreon.co...
▶️ Join my Makers Mob for detailed build tutorials:
go.themakersmo...
My "Scrap bin" channel:
/ ibuilditscrapbin
#ibuildit
#woodworking
Website: ibuildit.ca/
Facebook: / i-build-it-25804801424...
Instagram: / i_build_it.ca


Throw away the metal tables that came with your planer and do this instead. Seriously, it's way better - a true upgrade.
Before I made the original, I had a serious problem during the winter with slipping on the feed rollers. Turned out the smooth, polished metal bed of the planer had too much friction and the feed rollers couldn't grip the stock well enough to push it through. Changing to the melamine table SOLVED that perfectly. In fact, it did such a great job of fixing that problem, I almost forgot about it!
Doesn't have to be fancy or complex - the table can be longer if you need it - but the big thing is that it's quick and easy to install and take off, and doesn't take up a lot of room in the shop.
It doesn't prevent snipe, but no feed table arrangement will for these small planers. To stop snipe, you need to have continuous feed so that stock is under BOTH rollers when the cutter is cutting. I use a sacrificial piece of stock to feed in before I send in the stuff I want to plane, and that sacrificial piece takes the snipe. I made a video showing the method and you can watch that here:
ruclips.net/video/Ssvzv2TKBMg/видео.html
Why not just wax the table?
Finally, a John Heisz project I can make! ! !!!
Daring today, aren't we?
If it were me, I would’ve built it with TWO cleats on the underside of the melamine bed, forgetting that I had to put it into the planer. And then, I’m SURE I would’ve built a removable support.
Down and dirty! Great addition to the lunch box John!
a few years ago i bought a used router table from a carpenter out of his shop. he had something like this but it must've been about 12 feet long and integrated into a work table along one wall of his shop. i wanted to ask him about it but didn't want to waste his time and have often wondered about it. this looks like a great small-shop alternative and very do-able for a weekend warrior like myself. thank you JH!
Long time fan, John, love all your stuff. Overall a great and simple design that best meets the original intent and design of the lunch box planer.
HAPPY HOLDIAYS!
I’ve been meaning to do something like this with my planer for years! Maybe I’ll actually go do it now.
I like the dust collection can. That's a good idea since it blows so hard anyway. I have problems with it blowing off my shop vac hose. Also the angle measuring trick was clever too. I always think too hard and miss the obvious simple stuff...
I made my own infeed and outfeed table for my lunchbox planer 30 years ago. Mine is 3 feet or so long. Double thickness of MDF. 1.5 inches thick. Edge guides in the middle. I have support blocks beneath it on the in and out side to keep the table locked in place. Helps to reduce planer snipe.
You always have excellent improvements to your tools. At least the ones you don't make yourself.
So simple, yet so effective.
Just what I like best about your stuff.
I'm definately gonna build one for myself
Hi John great vid as always! Just got a 7435 for my shop. And the garbage can/ala dust collector is genius. Will be building mine shortly
How can I see some more details on the dust collector? My Rigid can’t keep up with the planer.
Nice build and is definitely now on my to-do list (and as an aside now that my cordless drill has 'expired' (pushing up the daisies, kicked the bucket, is now an ex-drill) I love the use of your impact-driver as a wood drill... chef's kiss... maybe I don't need to rush to grab another DeWalt drill after all)
Very nice planer upgrade John. 👍👍🔨🔨
Brilliant idea! I will have to add that feature to my DW735
So simple, so effective. Genius John!
What an awesome idea, I think I'll do that on my steel city planer and remove the stock wings to help with longer stock!
Great idea. I need to do the same. What I really liked was that custom trash can lid with the filter. I would much prefer to use that over my dust collector as the chips fill it up way too fast.
Brilliant work, John! Really well done! 😃
Stay safe there with your family! 🖖😊
And happy holidays!
Pooh. I just bought and installed the metal extensions for mine a few months ago. I do use a melamine sled for jointing, but now I think I'll add a long bed as well. I especially like the support on the outfeed.
Nice upgrade to an upgrade! Take care & stay safe.
Perfect simple solution ... what else would i expect from you! well done!
Hey John, long time no see! I'm glad to see you are still making content and enjoying your time in the shop.
My thicknesser had 300mm supports on each end, which as you say is useless, I opted for a length 1500 X 380 X 35mm Kitchen bench top. Great for supporting the longer pieces I quite often use.
Nice job John. I think you should make "Jazz Hands" an ending feature of all future videos.
Lol love the waiting motion.
That's cool. One vid suggestion I have is to show the finished product first, at least briefly, and then go over the details.
Hey John. Love your work 👍
FINALLY!!!!
Mark this down peeps! The ONLY man on the internet to correctly state this mod will do nothing for snipe with these planers.
The only way to eliminate snipe on these planers is to move the snipe to a discarded section of material.
Haha John doesn't know what to do with all those extra hands
The outfeed anticipation at the end. :D 👐
Watched, liked and a comment thrown in for good measure (twice, cut once). Hey, I have two thumbs, how come only one of them counts?
Lol the little ending was awesome
Simplicity at its best.
I need to do this. I also need to replace the chipped blades, but.............
Jajaja, that end was funny!! Great video, thanks!
John is proof that the more you use your brain the better your dreams come true.
nice work, good ideas
Pretty cool! I Mean you lose like 3/4 but unless you milling rhino leg thick stock, would be fine.
You know what I like about this video: It's short, cuts right to the chase and has no unnecessary show off scenes in it - as opposed to the vids of other RUclipsrs. I really appreciate it.
Cheers
John I noticed you're using the A/C adapter on the DeWalt 60V miter saw, another channel had a ton of issues with theirs and essentially DeWalt told them to stop using it as it can ruin your motor, just a heads up, might be something to look into further.
Nice KISS method!
Great! Very simple and effective. Nice. Maybe a side hustle as a Price Is Right model? *grin*
Why not make the miter saw interchangeable with the thickness planer and make the "rails" of the miter station melamine and as wide as the planer?
nice simple project! Thanks!
Hey John - Could you please describe how you made the dust collector, looks very interesting
How does the feed belt pull the wood through with that in place
Just found your channel! Like your style, sir.
So obviously this makes the scale inaccurate by the thickness of the melamine, yes? Well worth it for the extra support, and i measure my stock anyway. Right?
Is your planner working right? Seems like the outfeed side is curving your boards by an 1/8th. Check the footage @4:12. The gap gets bigger the longer the piece.
Does having this table inside the planner render the thickness scale obsolete? How do you know what thickness you're planning to?
The minimum thickness that can be planed on the DEWALT is 6mm. Can you go down even thinner after fitting this feed table ?
the SUPPORT "leg" appears to be a little to low, going from the gap that appears under the test piece the farther it gets from the planer blades. Super easy fix, or do you consider is not worth the effort (not trying to sound sarcastic just curious, as I would be in the not worth the effort camp)
Nice idea, Are you running the cutter blades or a helix cutter. I switched to the Shelix cutter head. Its unbelievable
Use a push block! On that table saw!!
John, did you do a video on your dust collector. I need to improve mine....a lot
I did! Here it is: ruclips.net/video/h7oWNcIwr7E/видео.html
Yes he did.
Do you have problems with the feed rollers getting gunked up with sawdust and whatnot and needing cleaning every so often? If so, what is the best way to do that? I''ve been doing it with rubbing alcohol but I'm not certain this is the best way. Anyone have a better solution?
Some people have had success with Simple Green. Put it on a rag and wipe the roller. Be sure the planer is unplugged. Do what you can reach on the roller, then plug the planer in and turn it on to get to a fresh area. Turn it off and unplug before starting again. It will take multiple tries to get the entire roller. Other suggestions include mineral oil or naptha. Whatever you use, don't put an excessive amount on. Just a small amount on a rag.
Hope this helps
I don't own a planer yet but I'm wondering if something like this will through off the depth setting on your planer? If it does how to you adjust?
By using that melamine do you still get snipe?
What I do not understand is that the much cheaper OZITO 2 blade planer ($350) has no snipe whereas the more expensive DEWALT planer ($1200) does have it. Why is that ?
Nice idea…..! Thanks…
I’m curious… I’ve seen other woodworking RUclipsrs show how you can take rough lumber and make it S4S without a jointer (using a planer and a sled with shims, and a table saw).
Would making a infeed/outfeed table that spans the length of the machine like you’ve done also automatically act like a planer sled, enabling it to make the faces parallel if you just flipped the piece over?
Maybe I’m confusing myself or this doesn’t make sense… I’m very much a beginner.
I've never been a fan of trying to joint with a surface planer. Better to get it close with a hand plane, then run it trough the planer to get it as flat as you can.
If you are new to the channel you just find the ’’ ask Google for woodworking ’’ . Pretty much an answer for every question and solution for every problem you gonna find here or at the website . Don’t forget to read the caption on the top , there is always some info or links to elaborate or give more info .
No, a longer indeed/outfeed won't do anything to flatten a twisted board. (The rollers will simply bend the board as it goes through.) You need a sled to which you can place shims under the board to prevent the flattening effect from the rollers. It works great but if you have a lot to do, gets old pretty quick. It's the reason I now have a jointer. :)
Very well said, Phil
Smart….🙏🏾
Okay... what the heck is going on at 4:08... 😆😆 John, I don't think you're taking this seriously enough. 🙄😉
So, I have to wax my metal tables about once a year or so. Did you ever have to do anything with the Melamine?
Wax free and super slick.
Mine came with stand, extra blades and Set of infeed-outfeed tables. Don't know how I could put extra brace on outfeed?
So did mine. Looks like we can just remove our in and out shelves and the mounting bolts. This melamine sits on the main bed...above our shelves...
Nice
Полностью одобряю👍
I’m not so lucky; my thicknesses has rollers on the lower platform. 😅
Genius
It’s not every day you get a J Heisz dance.
👍👍👍
Commenting to say thanks John for sharing and for the algorithm
I don’t know if I got a milk dud or what, but this is the worst planer I’ve ever owned. Constantly trips the on board circuit breaker. Would not remove than a 16th of an inch of pine at a time, so I bought some more expensive knives that weren’t supposed to dull like the factory knives. 30 board feet and the same problem tripping circuit breaker after about 10 minutes of run time and knives are not cutting .
Dude, I would like your stuff a lot more if it just worked and didn't require so much setup. For example, your chip-separator. Why are you putting clamps on the lid instead of having a lid that is just sealed and it's ready to go?
As a real-world person who has shit to get done, this is a thing that's just impeding me when I'm busy and tryiing to accomplish something. I want to plug in my hose and get to work. I don't want to spend time getting everything in the system set up when it should be sitting there just ready to do its job.
Hmmm.. I was all in until I saw one side of that 2x4 wasn't jointed before going through the planer. smh😉
Weak
So when is the snipe hunt?
John, once again something creative, useful and informative in just over 4 minutes. Many RUclipsrs would still be completing their obnoxious intros and begging for likes and subscribers.
Hi John, after many years of coveting this thicknesser, it FINALLY went on sale at a price I could justify (still over 1100 bucks Australian at bunnings), and now I'll be making a sled like this in the near future, cheers for the motivation 👍
Awesome ideas! I especially liked the dramatic reenactment of planing a board at the end!
As always, my favorite You Tube Woodworker, John Heisz shows again that he thinks on a different plane than mere mortals like me do. Brilliant John. Just love your posts. Always learn something from you. Thanks.
One of my favorite RUclipsrs. Don't ever change.
What I really liked is the hop dance watching the wood pass. I really reminds me of Chris Squire, YES bassist doing his walk during his signature walk playing Fish.
Great, simple addition. I'll have to do this if I ever get around to making a stand for my planer.
Very cool with the pockets and cleats for supports. I do something similar with my router table that attaches to my bench, but at a 90 to the floor not on an angle here, which could have so many uses for so many projects... Yet another invention of yours i will have in my shop buddy!
Support pockets allowing longer outfeed! 👍
When I saw the title, my first thought was "What's John doing with my old girlfriend?"
Kind of a dumb question but what type of glue are you using to attach to melamine?
Either your board was warped or that outflow table was low.
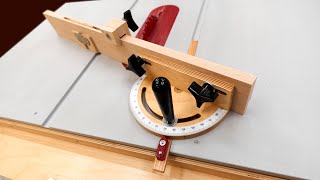
noticed you do not have zero clearance on your chop saw ???
Great solution John , love the simplicity of it. 👌
Thanks :)
LOL that ending! XD
Nice! Great idea I'll be using. Thanks for sharing John.
Rock on John!
Plans????!!!!!
j/k, nice idea, John. A lot easier to build than your screw-advance box joint jig.
Thanks you just solved my problems. Brilliant
Looking at making this for my lunch box planner. The adjustments on the infield and out field don’t work good. Have a piece of white board left over from my table build.
I just got a planer so this is perfect timing! A great low-profile solution.
I'm always curious about videos with "almost done" music towards the end of the video. It tends to take me out of the video because then I'm just anxious for it to end or thinking about what I'm going to watch next. Always wondered what the reasoning is behind it, besides branding.
John, Thanks for the video. NIce upgrades. Does you sled (old and new) eliminate snipe?
Cool! So simple yet effective. Well done sir.
That is now the best 2 x 4 in the provinces.
Great editing and simplicity!