Dry Pour Sidewalk number two - They keep getting Better!

HTML-код
- Опубликовано: 28 июл 2023
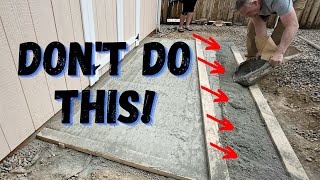
- Hi everyone, welcome back to How That Works, with Hank Baugh. In this video, I’m going to show you how I completed my 5th dry-pour concrete project. This time, I made a beautiful sidewalk that looks amazing and is super durable. Dry pour concrete is a technique where you mix the dry ingredients of concrete and then add water later, after you level and compact the mixture. This way, you can avoid cracking, shrinking, and bleeding of the concrete. It also saves you time and money, since you don’t need to rent a mixer or hire a contractor. If you want to learn more about dry pour concrete, check out my previous videos where I explain the process in detail and show you some of my other projects. I’m so happy with how this sidewalk turned out and I hope you enjoy watching me work on it. Don’t forget to like, comment and subscribe for more dry-pour concrete tips and tricks. Thanks for watching and see you in the next one!
 Хобби
Хобби


The blister is caused by air trying to escape when water soaking in pushes the air out, but the top crust layer is not yet strong enough to resist a bubble breaking up thru it.
The key step is to get your forms level and slope right. That takes time but so important. My daughter and I (no experience with concrete) made a 5x5 slab that turned out great. Good thing is that it eliminates the heavy mixing and using bags of rock underlay. Now I’m working on the paver walkway that is turning out to be a challenge leveling but at least it want be a muddy mess when it rains. Your walk turned out great and I love the dry pour. A couple of strong nephews will have to help unload bags and I’ll take it from there for the next concrete slab.
I like the sander idea. Will pin the cord to the end of the boards to keep it outta the way. Thanks for the advice.
Nice improvement. There is ALWAYS a better way.☺️
Outstanding
What a great idea with the palm sander!
It really is a life saver. Makes the job easy.
How did you attach the sander to the 2x4 to stay in place?
3" Deck screws
Great video, thank you!
I plan on attempting an 18ftx14ft pad in sections. This seems the way to go.
🙋🏼
Again you did an amazing job. I love it!
Nice!
That's a brilliant leveling device!. I would fasten the cord to the top of your 2x4s to avoid the cord fom tangling and getting in your way. Great video!
Yes the cord was in the was a few times. Maybe I will make that improvement before the next one.
I’d call that another success ! Looks great, Hank !
Excellent job
Thank you very much! If you have not subscribed, I would love to have you on the roster.
Looks really good
Thank you
Great video, sir!
Thank you.. Tell you friends!
Thanks!
Best voice over yet.
Wear a mask so you could keep doing all these great videos.
Great video! But yeah, google “concrete dust lungs”… it’s not pretty!
Hi, I watched your other vid where you made mistakes with this process (including not using quikrete), but this project turned out a beauty! That palm sander contraption as a screeding tool, wow really smart idea! I've watched a bunch of these dry pour vids, with the Cajun couple being the inspiration for all the rest of the videos being watched lol! I'm thinking to use this method for a shed slab.
It has been a learning curve for sure. Thanks for sticking with me!
I'll be watching you for tips, I'm sure you'll make more vids on this too. You're a rock star with this dry pour stuff, I watched some of your other vids after this one. I was thinking on this, do you think it's a good idea to presoak the area with water before pouring out the concrete in the forms? Not sloppy wet, just damp. And also, after pouring the bag out, mixing it a little by hand or with a hoe, to ensure the aggregate and cement are evenly distributed? The second part is because of a youtube guy I watched, who was totally against dry pours. One of his points was that the aggregate would settle in the bag, but I don't know do you think yes or no?
@pondacres on this walk, the dirt was wet because it had rained the night before. This made it messy, and some of the bags got wet on the bottom side and fell apart when I was opening them. For these reasons, I do not recommend pre-wetting the ground. The concrete will absorb moisture from the ground as well as from the humidity from the air.
I do recommend continuing to water for a couple of days, especially if there is no rain.
I see no need to mix or water as you go. The aggregate has always been evenly distributed in the bags I have used.
Thank you for watching my videos. I hope you are enjoying them.
Hank
Thanks Hank, good info! I don't know jack, but that's what youtube/internet is for lol, for real I learned a lot of stuff from channels like yours. Keep on rockin!
Sometimes the sand used in the bag mixes are sourced from different locations. Hence the difference in color.
The blister is more of a sign of air pocket, right? So it's just the one area that didn't get vibrated enough to fill the pocket. Easy fill with a pint of patch. Another success by Hank.
The blisters are a mystery. Sometimes I get one, other times I don't. I had a theory that the top crust was set up too much, and too thin. (Thin and brittle) That did not seem to pan out as on another pour I did the second misting sooner and still got a small blister.
I like @Doozler theory in comments below, but have to prove it out. The conflict is, you can't make the initial misting layer thicker, or you risk washing away your top powder.
Next time I will probably take it easy the second and third misting to get a thicker crust.
great job, how does it do with the colder weather(freeze) I'm looking to do the exact project in my yard, thanks
Mine did very good surviving the first winter.
See short - ruclips.net/user/shortsaj8quRiosAU?feature=share
⭐️⭐️⭐️⭐️⭐️⭐️
No expansion joint where the walk meets the previous slab? You look like you're down south from the soil, so maybe not needed. You'd need it here.
about how long after you've watered, can you take the forms off, and when would you put the 6-8ft cuts to prevent breakage?
I wait 2 days before removing forms. At least 30 days before making cuts.
Was thinking of mixing color with my initial misting water, the type designed for wet concrete that can be had a big box store? What do you think after all your experience with dry pour?
I would love to see how that turns out. I would try a small sample pour before doing anything important.
Why didn't you put break seams before? Is that not a good idea?
It would be. I thought I would saw cut them later.
If I were to use the 5000 psi stuff w rebar - would that support vehicles in your opinion?
According to my 1st test results here ruclips.net/video/UiundCjcgYA/видео.html
No. But I learned some important things and am running new tests ruclips.net/user/shortsZkAfue87dBc?feature=shared
If this comes out like I think it will, the answer would be yes.
Results for 2nd test are being delayed due to the lab being backed up.
@@HankBaugh how did you do the dry pour test piece? Fill with dry, 2 mists then??? Then submerge? TIA for info!
The 80 lb bag is a challenge. I’ll be looking to buy 60 lb bags and dump them from suv trunk to job location.
They are heavy. I had the whole skid loaded by fork truck the backed the truck up to the point of use.
@@HankBaugh I tried to lift 80 lb bags into a cement mixer & couldn’t do it. So I did 2 bags at a time in a wheelbarrow until I had about 30 bags done.
Would have place the materials directly on the brick. Brick is a great foundation material.
Does anyone know if this works for a colder climate? Toronto, Canada.
As long as Temps are above freezing the concrete should set up the same.
I want to do this but I see so many videos showing how crumbly a dry pour is.
Technique is critical. You might do a few practice squares.
How many bags did you use ?
39
Cost you $600. What would it cost to use a concretor
So I take it the slab is 3.5” ?
That is right.
I’ve seen some wet the ground before the bags of concrete, to help absorb from the bottom, as well.