etrailer | B and W Custom Base Rails Kit Installation - 2022 Ram 2500

HTML-код
- Опубликовано: 11 окт 2024
- Click for more info and reviews of this B and W 5th Wheel Hitch Rails:
www.etrailer.c...
www.etrailer.com
Don’t forget to subscribe!
/ etrailertv
Full transcript: www.etrailer.c...
Hello neighbors, it's Brad here at etrailer. And today, we're taking a look and installing the B&W rail kit for your fifth wheel hitch on a 2022 Ram 2500. Now this is gonna be rated at a good weight capacity for your fifth wheel trailer or your fifth wheel camper and it's gonna come in at a weight capacity of 18,000 pounds. So you're gonna wanna make sure you pick up a fifth wheel that can handle that. And also check to make sure that the truck can handle that before hooking up. But those are some pretty serious numbers to move some pretty serious weight.
And this is also gonna be ISR rated, so meaning this is gonna be the standard size of rails. That way you can drop in a number of different hitches and there's plenty of options here available at etrailer. They're gonna perfectly fit your needs. Now something I am going to point out is with the fifth wheel and the RamBox style of truck. It is pretty narrow in here and you don't wanna make any damage to the side of your truck when making turns, so I do recommend having a rotating head.
The Reese Sidewinder's a great option and that's really gonna just pivot up higher. That way it's not gonna make contact with your bed while towing. Now as far as installation goes this is a pretty easy kit to do. Your chassis is already kind of set up to get these custom fit brackets and the kit is designed to work directly with your truck so there's no drilling required as far as mounting those brackets to the frame. And my drilling required is to obviously make holes for your carriage bolts to pass down to those brackets.
And overall this is pretty easy. Can be done I would say in about three hours or so. You can do it in your garage or in your driveway. There's gonna be a few spots that may get a little bit tight, but overall it's pretty easy install and it's a B&W which really speaks volumes about their quality as far as their hardware, their powder coating. Everything about the kit is just very high quality and this is no different than the rest of their components.
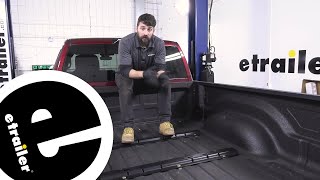
So as far as that installation, I wanna make sure you get ears installed. So let's take a look at that. Now to begin our installation, we're gonna wanna go ahead and lower down our spare tire. It's just gonna make a lot more space for us underneath and that's honestly the hardest part is while you're under the truck is making sure you have space to go to all your brackets and hardware in place. So getting this out of the way is just gonna open that up for us. We're also gonna go ahead and remove our heat shield, again, just to kind of give us a lot more space to work. Now it's gonna be just a series of 10-millimeter bolts that we have. So you can see that there's four of 'em right here. There's also gonna be two that kind of go on this cross beam, so make sure you get those as well. (tool whirring) So at this point we're gonna take our rail that we have just one of 'em, they're both the same and we're gonna set the front part. This is gonna be kind of our baseline as to get the rest of it in place. So you're gonna wanna measure from the end of the bed, not the tailgate. And also this one has a spray in liner, so you're gonna want to take that into account. A lot of times it'll be about an eighth of an inch, give or take, but kind of just get the best measurement you can to the edge of the rail here. Now we are gonna be making sure that it's centered up. So what I've done is I've used a chalk marker that way, you know, paint marker, it's gonna leave marks. This can actually come off with just some water. So I've gone ahead and measured it out to that. But what I'm gonna do, we need to get our lateral side to side. So what I'll do is just put a line here, a line here, and then also on the backside. So that way if it does shift a little bit, we know that we at least have a reference point to get it back squared up. So now I'm gonna measure from side to side make sure that we have this centered and then we're gonna be marking our holes. Now on this one in particular, we're gonna be using this center hole back here. We want this towards the cab. So we'll go ahead, and you can use a punch or you know, whatever you want to mark with this. But we're gonna be doing some pilot holes to drill through. So something visually that you can see it. Sometimes a punch especially on, you know, your textured spray-in bedliners, you're not gonna be able to see it. So I recommend using permanent marker, a paint marker. And we're gonna be using this third hole from the inside. So we're gonna go ahead and mark right here. We