Make A Mini Da Vinci Catapult!

HTML-код
- Опубликовано: 20 окт 2024
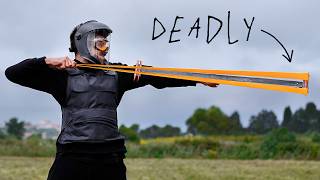
- Let's make a mini Da Vinci catapult! … maybe we can use it to conquer Wales :P
Instagram- / andy_elliott_
Twitter- / mist8kofficial
Facebook- / mist8kspage
G+ www.gplus.to/An...
My channel is all about cool D.I.Y projects and science experiments. Subscribe for more!
Music-
Backing songs from- freesfx.co.uk, epidemicsound.com, incompetech.com/


Very cool! Leonardo and MacGyver would be proud!
You're back!
+Alexandro Lozano Yessss
+Mist8k how to make an easy phone case?
+Slothy Ways Duck Tape and bubble rap.
ELijah Lupinski bruh
Hey :)
About how far does it launch the projectile?
That's what I was wondering
Dayum! This works well, and looks cool too.
"i then enlarged the hole, so it could fit the shaft" 😂😂😂
sex?
@@burritodog3634 honestly bro I don't even remember commenting on this video 😂
You need to add a "stop" on the frame for the catapult arm , that way when the arm stops half way it will give more thrust
if you placed a piece of wood to halt the launching arm in one position you could likely launch the missile farther.
Try to make a trebuchet with this catapult design. I think it'll be a cool hybrid :D
i love the new medieval weaponry trend you'r going into!
keep on with it!
Amazing
that was pretty cool!
What is the range ? How far does it launch?
hey guys it's Andy here
in this video im going to show you how to make this miniature ( ) catapilter
NICE
so I started with base I decided to make base from this wooden foldout ruller.
mainly because I have no over particular use for it.
also being ruller it makes easier to chop it into a equal length.
I began by chopping the ruller into two length, four inches
and two length two and half inches
I'll be using ( ) this five centimeter M60 bolt to piece everything together
I then went on to drill three holes equal length apart on the four length of ruller
make sure the holes big enough to fit the screws
I then use the bolts to piece together the frame as shown
with the help a few nuts
everything should stay in place.
there we go.
I then cut out two right angle triangles from sheet of ( )
once I've smoothed them out
these will help secure the main frame.
using hot glue I attached first triangle to the edged frame like so.
I then used holes that were already there to carefully guide drill through.
Once that was done I did exact same thing for the opposite side.
there we go.
I then screwed in another bolt through those holes
next It was time to make pivoting shaft.
for this I decided to use an empty ink refill from a pen
as it's easy to drill into.
I cut in down in length and then drill two tiny holes into the center.
I also came across this plastic mechanical ( ) from inside of electronic toy.
this will do fine for the trigger mechanism.
I increased hole in the center so it was wide enough to squeeze over the shaft.
two tiny pieces of the ( ) secure I then added to the two holes that I made in shaft
I then made another small hole ninety degrees from the secure holes
this hole will fit in the launching arm.
I decided to use this metal road for the launching arm.
I found this small sqare piece of wood and then crafted into a scoop using a rotory tool.
this wood then be attached to the shaft which was then attached to the frame.
Next it was time to make springy arms which powered catapiltor.
to make this I cut out two length from a plastic container.
you need to make sure the plastic is flexible enough to give enough toque to power
the catapilltor
I smoothed each one of them out and then drilled hole at the end.
there we go.
these were then sloted under the outer screws and then glued onto the center screw.
simple.
I then tighted string to the secures under shaft which was then tightened
( ) flexible arms.
You can see how I've attached the strings to the shaft in such a way that when I pulled launching arm. the flexible arm's tighten up and creat toque.
for trigger device it's just simple chopped off rollystick with a hole at the end
and a small hole in the center to attach rope.
this trigger device catchs with ( ) until it's pulled and release in the catapilltor
I also glued on this little ledge to stop the launching arm from unevenly hitting the fram.
add some for trigger device. and we're ready to go.
NICE
You're back!!!!!!!!!!
good to have 'you' back
I love your vids andy
Nice
Can u make some tutorials that the supplies are more available?? Thank you
Super cool
i love these videos, i'll have to make some of these one day, when i'm bored enough, lol
Wow, that's awesome
u R BACK BUDDY
This is so cool! Thanks.
Nice build and also no need to measure where to cut the ruler ;)
Awesome!
how do you have all of these things and ideas
yeah his back andy
It's very beautiful
If u put a stop where the arm goes straight up wen u shoot it will go further
Can you do more videos for gadgets review geek that was an amazing channel pleeeaasse
I agree
there we go
me:(watching normally
guy:with the help of this nuts
what i heard:(with the help of deez nutz)
i freaking died!!!😂😂😂
Mist8k you should start upload your videos on instructables I bet you can get more people to notice your channel
just one 'mits8k' (get it?) it elastic potential energy not torque...... tension would be closer, other than that its a great little build!! :)
You should consider making things like this heavier.
Dope leave over 9000
very good
You should make a mini trebuchea next
Me when he brings out the big ruler - I thought you said mini
Cool
Nice!
more video in the week pleas
trebuchet next?
NICE
Nice vid
cool
Do more gummy deaths!
Now you are making videos more often, right?
looks tough to make
Yo amazing
Crh- Boom.
m8k- Nice.
this is so gooododododdoddddddddd
neat
Niiiiice
Who just watches the videos but never makes the the things
ayyyyy lmao heck yea boi
Ya!!! You're back!!! Also mwahahahahahahahah
waiting for your new cool hacks
4:06 dude illuminati all day.
Johnny Appleseed same
niiiiice
Damn... This holes ain't loyal
DaVinci used plastic?
You mean they didn't have it back then?!?!?!?
not torque it tension lol but good video
+Carson Herteis Torque is the force on the shaft, tension is the force on the strings.
Thats a Gliedermaßstab.
OH. MY. GOD...... TWO METAL...TRIANGLES!!!!!!! ILLUMINATI CONFIRMED!!!!!
I WAS SEARCHING FOR HOURS FOR THIS!
nope i was lying i never searched it no hate.
hello
to any one who screws up on cutting the ruler right you are beyond help just just leave
under 18 can do it or not
yore soooooooooooo cool
This is called the Davinci catapult
When making something is more interesting than using it.
Awww my brain
you can make a that's what she said joke after almost every sentence 😏
make a electric skateboard for $50!
3000th exact
how do you know where to cut to get even lengths? lol jk
"Lollistick"
Lolololololololololololie stick
nice =))
Mae hen wlad fy nhadau yn annwyl i mi,
Gwlad beirdd a chantorion, enwogion o fri;
Ei gwrol ryfelwyr, gwladgarwyr* tra mad,
Tros ryddid collasant eu gwaed.
Cytgan:
Gwlad, gwlad, pleidiol wyf i'm gwlad,
Tra môr yn fur
I'r bur hoff bau,
O bydded i'r hen iaith barhau.
2. Hen Gymru fynyddig, paradwys y bardd,
Pob dyffryn, pob clogwyn, i'm golwg sydd hardd;
Trwy deimlad gwladgarol, mor swynol yw si
Ei nentydd, afonydd, i mi.
Cytgan:
3. Os treisiodd y gelyn fy ngwlad dan ei droed,
Mae hen iaith y Gymry mor fyw ag erioed,
Ni luddiwyd yr awen gan erchyll law brad,
Na thelyn berseiniol fy ngwlad.
Cytgan:
Uh
Alko Alomerovic read the description
+Chris Drew I just did I still don't get it
+MoPro Uploads welsh national anthem - land of the fathers
+Chris Drew officially the first time ive ever seen the welsh language used online...
The way you say shaft makes me uncomfortable ahha
Inches -_-
rydw i'n hoffi coffi. :P
Are you a uh..
are you a mason?
Nearly first
not first :'(
2nd
7th
first
First comment
First
Cool
nice
first
nice
first
first