Это видео недоступно.
Сожалеем об этом.
Raspberry Pi GPIO Tutorial: The Basics Explained

HTML-код
- Опубликовано: 8 сен 2015
- This Raspberry Pi GIO tutorial takes you through a lot of the basics of the GPIO pins and what you can do with them
Full Guide: pimylifeup.com...
As you may know the general purpose input and output pins (GPIO) are used to communicate with other circuity. This includes thing such as extension boars, circuits, and much more. You can do some pretty cool stuff with them.
You should beware that playing around with the Raspberry Pi GPIO pins wrongly can result in destroying the Pi. The best way to avoid this is to double check that whatever you’re plugging in will be supported by the Pi.
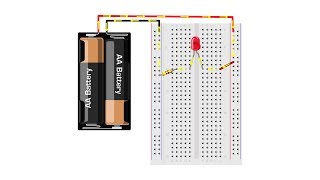
In the little small circuit, I use in the Raspberry Pi GPIO tutorial I use the following equipment.
• 1 100-ohm resistor
• 1x Red LED
• GPIO Breakout Kit Assembled
• Breadboard
• Breadboard Wire/Jumper Cables
There is quite a bit of terminology around these pins but be sure to not let this turn you off from using them. We go into the terminology a little in the video but if you need more information be sure to look up some of the terms I used.
In the video we display a Raspberry Pi GPIO pinout diagram. If you would like this to use for future reference, then be sure head over the guide. You can find the link above.
We will be looking at doing many projects using the GPIO pins in the future. This includes stuff such as home automation! This is something I know a lot of people have been asking about.
I hope you have enjoyed this video on the Raspberry Pi GPIO pins. If you have any questions, feedback or anything else feel free to drop us a comment below. Also be sure to subscribe so you can stay up to date with all our latest Raspberry Pi projects, guides and much more.