In this tutorial I demonstrate the new HUE adjustment that is in the local adjustment tools of Lightroom Classic ver 9.3+ I was wrong in the video when I stated that this feature was introduced in Lightroom Classic 9.4 -- it was actually introduced in version 9.3. Anthony Morganti’s MUST HAVE applications: At least one Non-Destructive RAW Editor Lightroom - bit.ly/2zwQ0nW Capture One - captureone.38d4qb.net/y1Djy Luminar - bit.ly/2JUJxKw (Save with the Promo Code AM16) On1 Photo RAW - bit.ly/2zJmA9I (Save 20% with Promo Code: AM17) Exposure X5 - bit.ly/2U8UxrK (Save 10% with Promo Code: AnthonyMorganti) At least one FULL Editing App: Photoshop - bit.ly/2zwQ0nW Affinity Photo - affinity.serif.com/en-us/photo/ My MUST HAVE Plugins: Topaz Denoise AI - bit.ly/3cDqa5J Topaz Gigapixel AI - bit.ly/3cDqa5J Topaz Sharpen AI - bit.ly/3cDqa5J *Save 15% on all Topaz Labs apps - use the Promo Code: AMDISC15 My MUST HAVE Mac Utility: CleanMyMac X - Info: bit.ly/3jtVpU3 To save 10% on your purchase of CleanMyMac X: 1. Visit the CleanMyMac X store: bit.ly/3bEMuMx 2. Scroll down to the very bottom of the page and click on "Enter it now" under "Already have a coupon code?" 3. Paste the promo code TONY10 and hit "Verify" 4. The prices will be reduced and you’ll be able to select the license and proceed with the payment ** Note that all of the promo codes listed above may not work on sale product. *** I am an affiliate for all of the companies listed EXCEPT Affinity Photo. Please read my Code of Ethics Statement: onlinephotographytraining.com/code-of-ethics/ Please follow me on Instagram: instagram.com/anthonymorganti/ I use this software to record my screen and make parts of my screen enlarge and zoom out so you can see it: Screenflow: telestream.pxf.io/DMrW2 Unsure of how to price your photography? Check the 2019 Guide to Pricing Your Photography: amzn.to/2S1CiU7 I am an affiliate for all of the companies listed EXCEPT Affinity Photo. Please read my Code of Ethics Statement here: onlinephotographytraining.com/code-of-ethics/ Thank you!
Thank you Anthony. Very helpful information ,it’s not always the BIG changes that are important. I appreciate your videos daily. Stay safe and well. Neville.
A good basic explanation of how to use the hue adjustment. I wish you went into more detail on how to actually use the slider and other adjustments to obtain the actual color you are looking for. The slider’s logic, even on fine mode, seems confusing to me.
Hi Anthony, Thank you for all your work and for helping so many in the field of photography. I first found you when I got Lightroom 5 with a camera and have been following you ever since. I am still using that same version of Lightroom (5.4 now) and for the most part it suits my needs pretty well. I am currently building a new computer (17) and am thinking it might be worthwhile moving on to the Adobe subscription service . I think some of the new tools, since LR 5.4, might be either time saving or just do a better job for certain things that I have to do . Currently I do a lot of D&B but it is very time consuming , but in the end I can get a pretty good result. One of the things I find laborious is removing 'stretch marks' . and even tattoos that some might want to remove . . Watching your videos on using the Range Mask I figured that it might be a time saving process to use it for this type of work. Would it be possible for you to investigate stretch marks and tattoo issue in LR . I know it can be done using Photoshop but I think the learning curve will be steep there , where I am already fairly competent in LR. I don't necessarily need to move to the Adobe subscription service so you might be able to recommend one of the other products you use that have similar user interfaces to LR. Could you do a video ? I shoot 99% humans with some animals thrown in , just for fun.
Anthony, at some point I remember someone on RUclips saying that is you want to use the original HSL tool to change the color of a selected object you should first set saturation to 0 before selecting and adding the new color. Is this still true? Thanks!


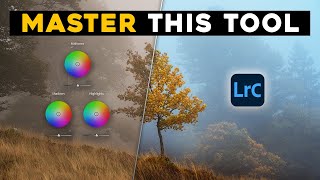


In this tutorial I demonstrate the new HUE adjustment that is in the local adjustment tools of Lightroom Classic ver 9.3+
I was wrong in the video when I stated that this feature was introduced in Lightroom Classic 9.4 -- it was actually introduced in version 9.3.
Anthony Morganti’s MUST HAVE applications:
At least one Non-Destructive RAW Editor
Lightroom - bit.ly/2zwQ0nW
Capture One - captureone.38d4qb.net/y1Djy
Luminar - bit.ly/2JUJxKw (Save with the Promo Code AM16)
On1 Photo RAW - bit.ly/2zJmA9I (Save 20% with Promo Code: AM17)
Exposure X5 - bit.ly/2U8UxrK (Save 10% with Promo Code: AnthonyMorganti)
At least one FULL Editing App:
Photoshop - bit.ly/2zwQ0nW
Affinity Photo - affinity.serif.com/en-us/photo/
My MUST HAVE Plugins:
Topaz Denoise AI - bit.ly/3cDqa5J
Topaz Gigapixel AI - bit.ly/3cDqa5J
Topaz Sharpen AI - bit.ly/3cDqa5J
*Save 15% on all Topaz Labs apps - use the Promo Code: AMDISC15
My MUST HAVE Mac Utility:
CleanMyMac X - Info: bit.ly/3jtVpU3
To save 10% on your purchase of CleanMyMac X:
1. Visit the CleanMyMac X store: bit.ly/3bEMuMx
2. Scroll down to the very bottom of the page and click on "Enter it now" under "Already have a coupon code?"
3. Paste the promo code TONY10 and hit "Verify"
4. The prices will be reduced and you’ll be able to select the license and proceed with the payment
** Note that all of the promo codes listed above may not work on sale product.
*** I am an affiliate for all of the companies listed EXCEPT Affinity Photo. Please read my Code of Ethics Statement:
onlinephotographytraining.com/code-of-ethics/
Please follow me on Instagram: instagram.com/anthonymorganti/
I use this software to record my screen and make parts of my screen enlarge and zoom out so you can see it:
Screenflow: telestream.pxf.io/DMrW2
Unsure of how to price your photography? Check the 2019 Guide to Pricing Your Photography:
amzn.to/2S1CiU7
I am an affiliate for all of the companies listed EXCEPT Affinity Photo. Please read my Code of Ethics Statement here:
onlinephotographytraining.com/code-of-ethics/
Thank you!
Thank you Anthony. Very helpful information ,it’s not always the BIG changes that are important. I appreciate your videos daily. Stay safe and well. Neville.
Another great video, Thanks Anthony for clearing up the Hue slider as I was having some problems with it.
Thanks Anthony, for me you are the Bob Ross of Photoshop/Lightroom! Always a pleasure to watch your explanations
Thanks for sharing your knowledge....! I watch every one 👍
A good basic explanation of how to use the hue adjustment. I wish you went into more detail on how to actually use the slider and other adjustments to obtain the actual color you are looking for. The slider’s logic, even on fine mode, seems confusing to me.
I’ll have to go back and try this again. Have just the picture that needs it.
Anthony, as usual, a great informative video. One question, how do you use the fine adjustment in HUE?
Hi Anthony, Thank you for all your work and for helping so many in the field of photography. I first found you when I got Lightroom 5 with a camera and have been following you ever since.
I am still using that same version of Lightroom (5.4 now) and for the most part it suits my needs pretty well. I am currently building a new computer (17) and am thinking it might be worthwhile moving on to the Adobe subscription service . I think some of the new tools, since LR 5.4, might be either time saving or just do a better job for certain things that I have to do . Currently I do a lot of D&B but it is very time consuming , but in the end I can get a pretty good result.
One of the things I find laborious is removing 'stretch marks' . and even tattoos that some might want to remove . . Watching your videos on using the Range Mask I figured that it might be a time saving process to use it for this type of work. Would it be possible for you to investigate stretch marks and tattoo issue in LR . I know it can be done using Photoshop but I think the learning curve will be steep there , where I am already fairly competent in LR. I don't necessarily need to move to the Adobe subscription service so you might be able to recommend one of the other products you use that have similar user interfaces to LR. Could you do a video ?
I shoot 99% humans with some animals thrown in , just for fun.
brilliant, as always
Anthony, at some point I remember someone on RUclips saying that is you want to use the original HSL tool to change the color of a selected object you should first set saturation to 0 before selecting and adding the new color. Is this still true? Thanks!
Works neither for a white object as explained and shown in this video, nor a black one.
Enjoy your tutorials, however I would like to see more using Lightroom on the Ipad Pro.
Thank you.
Thanks!
Very useful