Aspire and VCarve Pro Tutorial: House Sign

HTML-код
- Опубликовано: 16 сен 2024
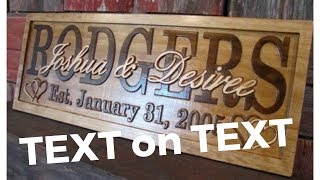
- Vectric Aspire and VCarve Pro tutorial. I create a sign using a few of the new features of the 8.0 software. First I make an outside border and contort the lines using new techniques. I also use a new Texturing feature to create a background then I trick Aspire into doing a VCarve in a different way to create a unique sign.
Want the tool shown at 14:00? Here is the link: dl.orangedox.c...  Наука
Наука


This is better than the Aspire video tutorials. I wish I could see a woodgrain texture instead but I think some playing around with the texture tool will work. I saw a clipart grain to use but haven't figured how to merge clipart pieces together. I cannot tell you how much this has helped me. Thanks.
Thanks Mike. Excellent tutorial. As a beginner I found this excellent because of your detailed explanation of everything you do.
Rick Hubka You're welcome Rick.
One thing I've found, sort of by accident, is when you're using your .001 end mill to trick Aspire into doing a tight pass with the v-bit, if you select "Raster" in the toolpath settings instead of the default "Offset", it'll calculate the toolpath much quicker, and cleaner to boot.
+ginmark Thanks. Good info.
Nice video, but I have my doubts about any .001 end mill. If this is true you would have a .0005 cut depth per pass. Please correct me as the smallest end mill I can find is 1/64 or a .0156 diameter cutting depth one half of diameter.
Also, when you create a vector, and you want to mirror a copy, try control +shift+ H for horizontal mirroring, and control + shift + V for vertical mirroring. I use these multiple times a day. And just so you know, I didn't know I could grab a guide line like that! Thanks!
Love this tutorial man!!! Extremely helpful with that clever way you trick the vcarve process!!!!! 👌🏻👌🏻👌🏻
Very nice overview and sign! I enjoyed it! Thank you!
Thank you for this video. It is very helpful!
You're welcome Darren. I hope it helps.
Great video Mike as usual you explain it very clearly and it's easy to follow along. What is the estimated machining time? Keep up the great work, thanks for posting.
Mick Martin Thanks Mick. Good question about the time... With all toolpaths selected, it says 26 minutes and 42 seconds with a rapid speed of 200.
With your ATC and a rapid speed of about 800, you're probably looking at about 20 minutes.
Of course, I have my feed rates set pretty low so you might be able to do it a little faster.
I really like the house sign but I think I'm missing something even though I've watched the video several times. When you toolpath the texture, why do you use a start depth od .2"? Was material removed previously that I'm not seeing?
Very good video... Thanks for the help!!
muy buen tutorial. gracias por darnos su tiempo.
Mike, great video; one question, when you added the .001 End Mill, did you change to an end mill or leave the V-bit in the CNC?
Hi Wesley. No, I never really use the 0.001 tool. It really never existed except in the mind of the Aspire software. It forces the v-bit to ignore everything except for the sharp outlines of the letters. Hope this helps.
Great video, thanks for sharing.
Marc Eaton Thanks Marc. You're welcome.
What kind of wood would you recommend for this sign project.?
Thanks for sharing. I noticed your tool calculates a second offset. What is that for? Or did I miss the explanation in the video. Thanks.
Andy Blackman Hi Andy. Good question.
I wanted to use the Vectric textured pattern generator, but if I'd not created the offset, my textured background would have ran over into the letters and frame of my sign and ruined it. The tool allows me to calculate the distance necessary to make sure my "keep" areas remained safe. I only used that offset for a safe boundary for my texture.
If you haven't watched: ruclips.net/video/OdK2VONXZPc/видео.html, I advise you to. It's long but it shows what I really created the tool for. If you're wondering how that works, watch: ruclips.net/video/XZa3y8NSmS0/видео.html. It goes more into detail of how and why it works.
I don't understand the part about using a .001 bit for the flat area clearance. Could you elaborate?
The 0.001 tool is only used as a dummy tool. It's never really used.
If I'd used a normal size tool, even for a dummy tool, it would have allowed the v-bit to clear a lot of areas out, thus destroying my texture between the letters and such. When I tell Aspire that my cutout tool is a very very small tool, it allows that tool to do almost all of the cut, not the v-bit.
This tool I will turn off after it's given the v-bit its path.
All that's left to do then for the v-bit is to go around the letters and do a sharp cutout on them.
I hope this helps.
Hello . Oblique pyramid with vectric aspire
?
Great video but you lost me a bit on the angle offset calculation....where is that?
Please explain why every time I do this my name flips upside down. Also unlike the others here I think you should try not skipping click here steps like mirror the image without saying click on the correct side button you need to remember that the buttons are not named just pictures I had to stop and watch you cursor to see what the hell you were doing. But still 5 times later it’s still putting name upside down
I had the same problem. I found that after selecting the name it has to do with which arc you chose first. Top arc first and bottom arc second will keep the name right side up. Bottom arc first and top arc second it will turn the name upside down. Hope this helps. I could have it backward, but that's the problem.
How much time the texturing took?? and how much time it took to complete the job?
Where does one obtain the Angle Offset calculator you wrote? Is it available for download? Thanks for the video!
monitoringpost dl.orangedox.com/HiBp3i0Ot3ACzEYZve/AngleOffset.exe. If you want to see what I really did the app for, watch this video: ruclips.net/video/OdK2VONXZPc/видео.html
cncMike304 Will do. Thanks!
this is a great video!!!! Thank you!!!
very good
For future reference most people do not know the key shortcuts...please show via program interface instead
End mill 0.001 inch? Waw..
The 0.001 tool will never be used in reality (never really existed). It's only there to fool Aspire or VCarve Pro into using the v-bit to get the sharp corners without destroying my textured background.